How to Make Pixel Art in Adobe Illustrator
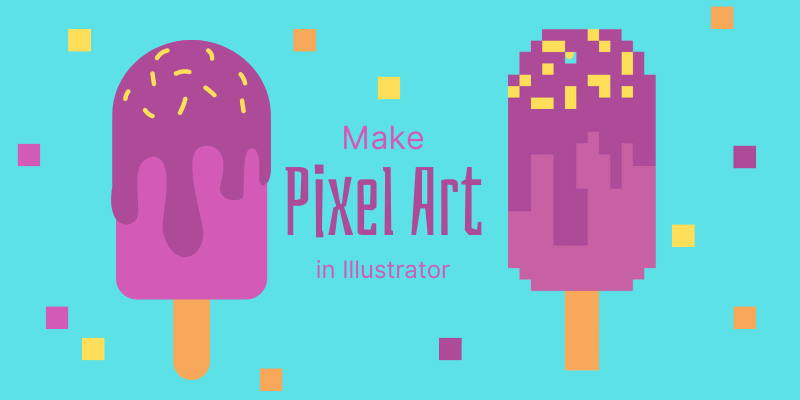
Creating pixel art in Adobe Illustrator? That sounds rare because Illustrator works best with vectors, but you’d be surprised how great it is for making pixel art too. Actually, it’s a good choice to make pixel art in Illustrator because you can scale the vector without losing its quality.
Some of you might’ve already tried to duplicate squares to make pixel art, okay, you could use the grids and squares to make it, and actually, that was how I started.
But as I create more, I’ve found a much easier solution and I’ll be sharing the method with you in this tutorial.
The two essential tools you’ll be using are Rectangular Grid Tool and Live Paint Bucket. These tools can sound new to you but don’t worry, I’ll guide you through using a simple example.
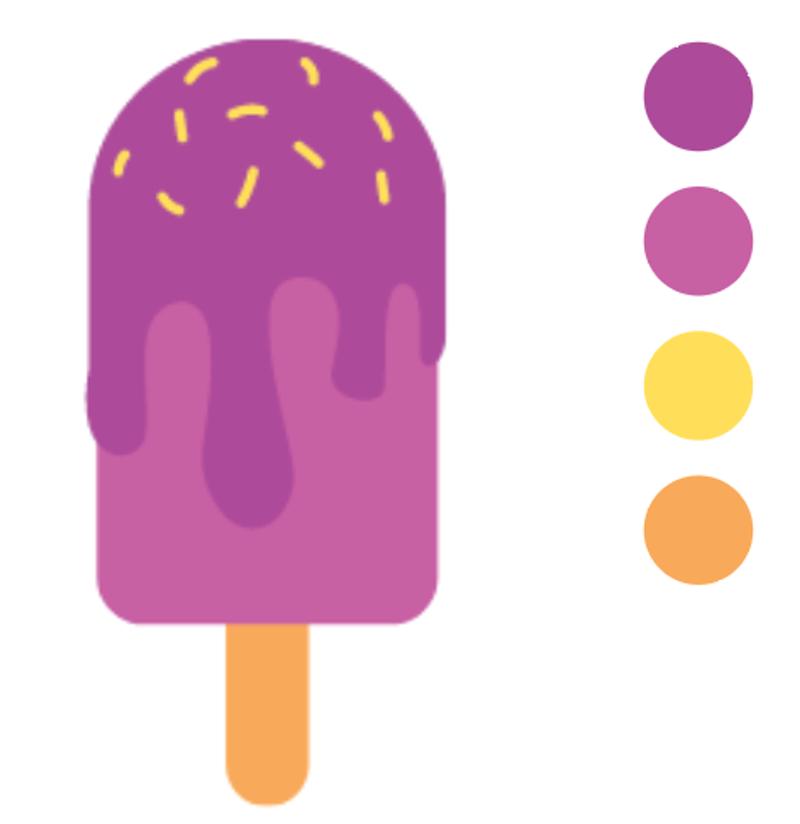
Let’s make a pixel art version of this ice cream vector following the steps below.

Note: the screenshots from this tutorial are taken from Adobe Illustrator CC Mac version. Windows or other versions can look different.
Step 1: Create a new document and set the Width and Height to 500 x 500 pixels.
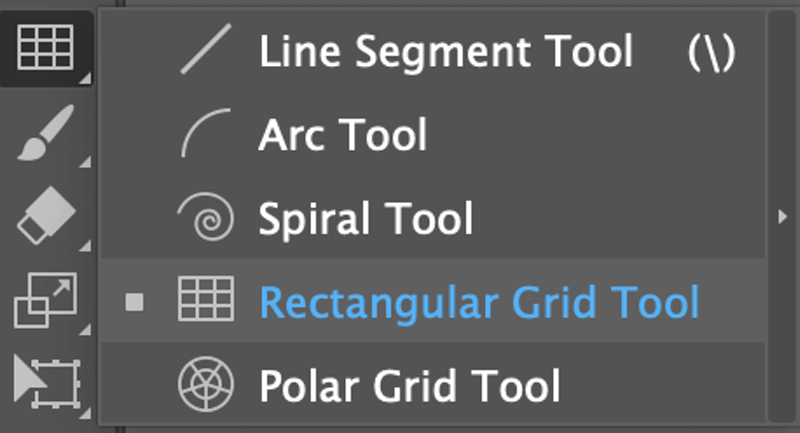
Step 2: Choose the Rectangular Grid Tool from your toolbar, which should be in the same menu as the Line Segment Tool. If you’re using the basic toolbar, you can find the Rectangular Grid Tool from the Edit Toolbar menu.
Select the Rectangular Grid Tool and click on the artboard. Set the Width & Height to the same size as your artboard, and increase the number of horizontal & vertical dividers. The number determines the number of grids in a vertical or horizontal row.
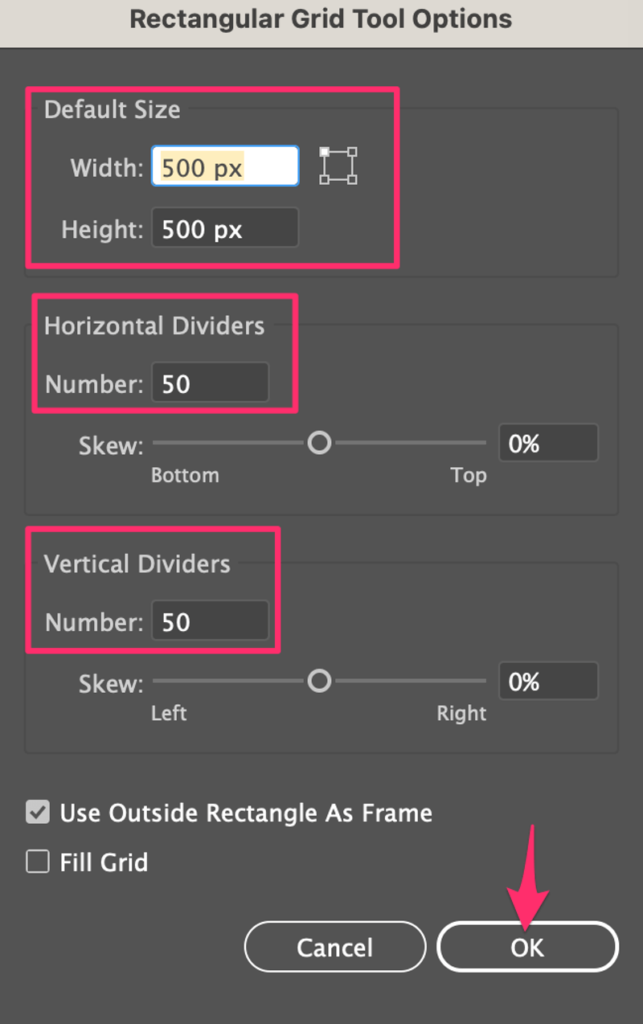
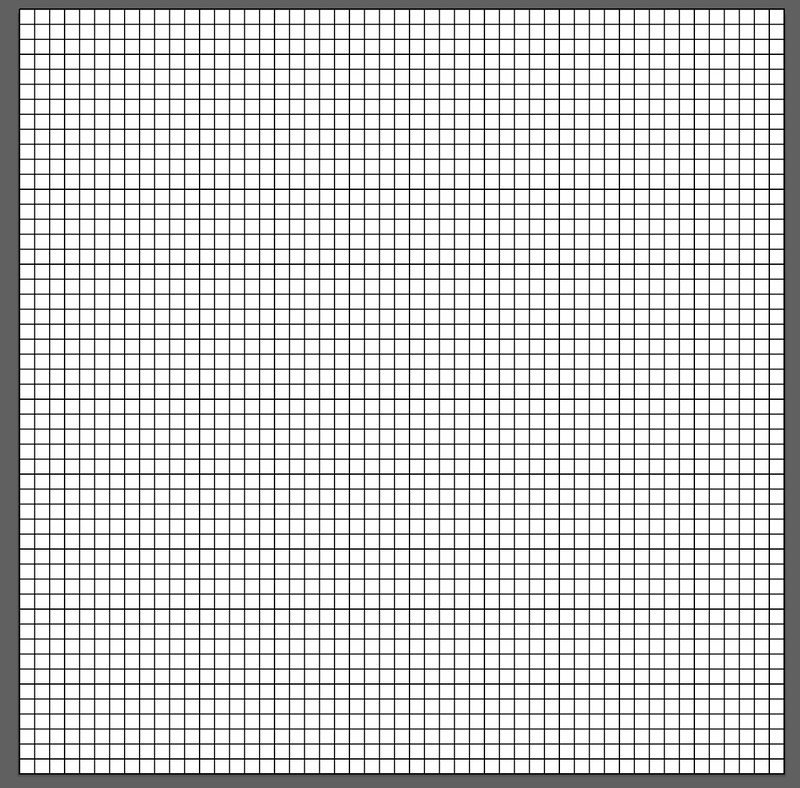
The higher the number, the more grids it’ll create and more grids mean each grid is smaller than if you’d have fewer grids. For example, if you put 50 for Horizontal Dividers and 50 for Vertical Dividers, this is what it would look like:
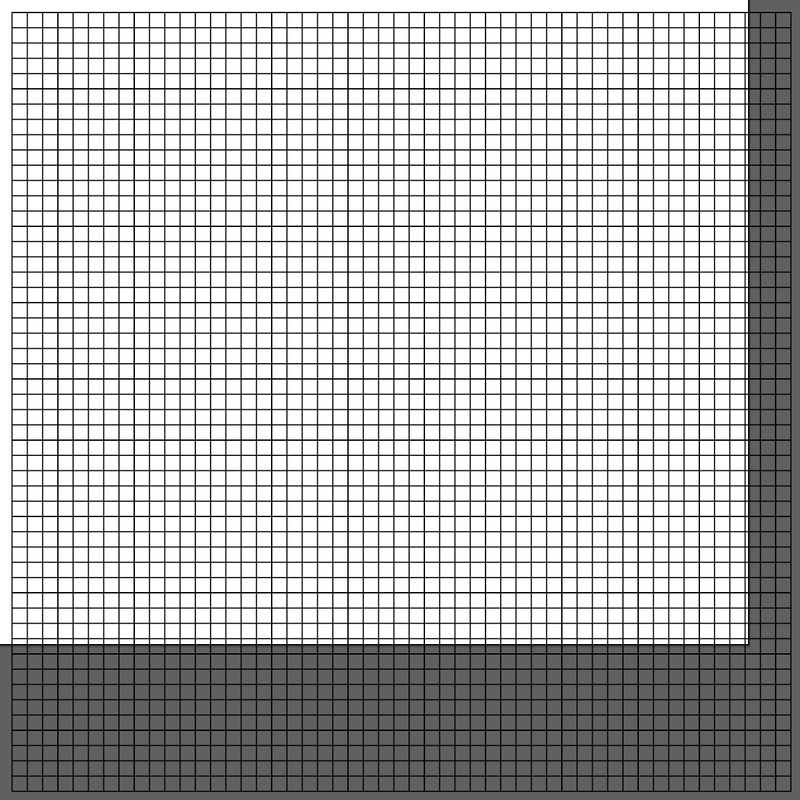
Step 3: Align the grid to the center of the artboard. Select the grid, and click on Horizontal Align Center and Vertical Align Center from Properties > Align.
Step 4: Make a palette of the colors you’re going to use for the pixel art.
For example, let’s use the colors from the ice cream vector. So use the Eyedropper tool to sample colors from the image, and add them to the Swatches panel.
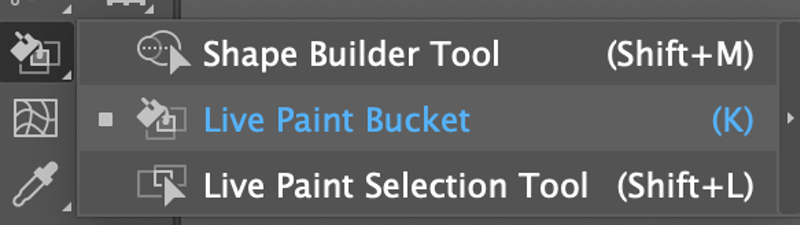
Step 5: Use the Selection tool (keyboard shortcut V ) to click on the grid, and activate the Live Paint Bucket tool using the K key or find it on the toolbar.
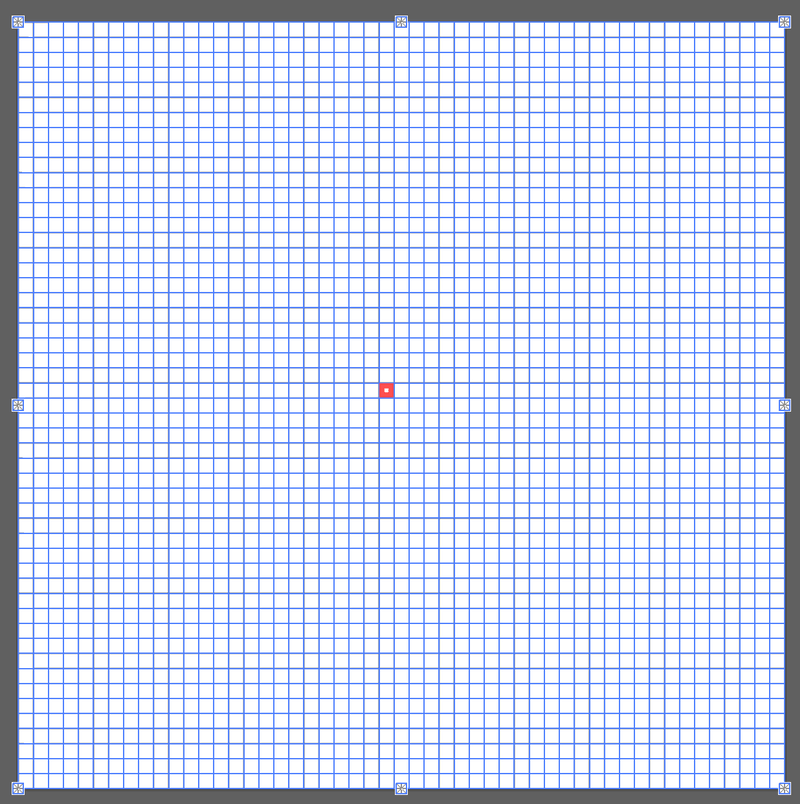
You should see a small square on the grid that you hover over, which means you can start drawing or simply click on the grids to fill up the grids.
Step 6: Choose a color and start drawing. If you want to change colors from the same palette, simply hit the left and right arrow keys on your keyboard.
If you’re not confident to draw it freehand, you can place the image to the back of the grid, lower the opacity and use Live Paint Bucket to trace the outline.
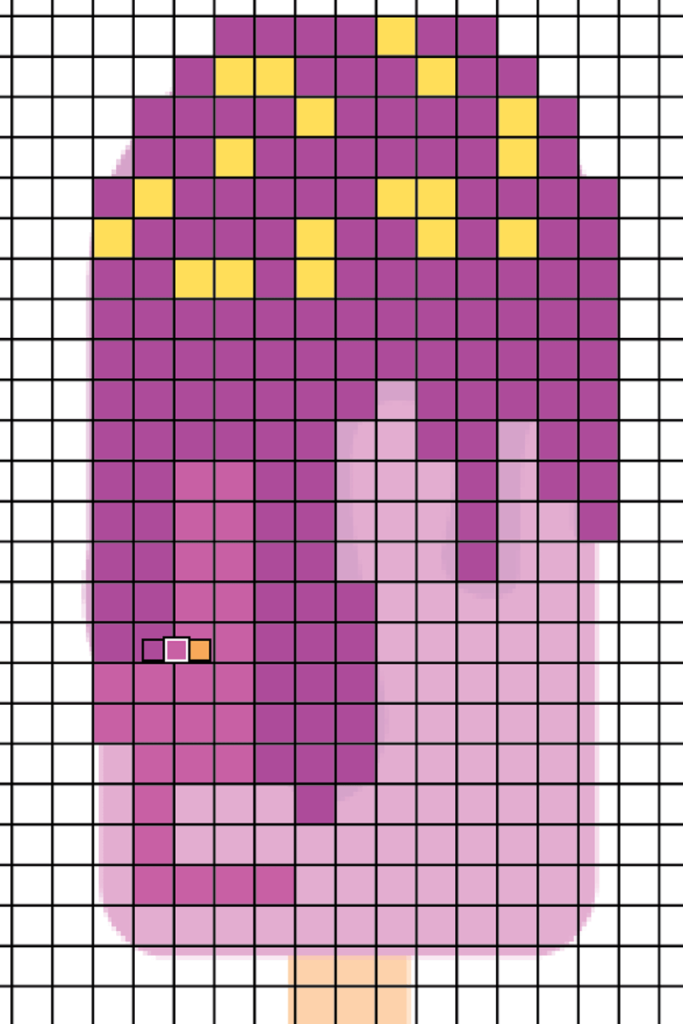
Once you finish adding colors, delete the image on the back.
Step 7: Right-click on the grid and choose Ungroup.
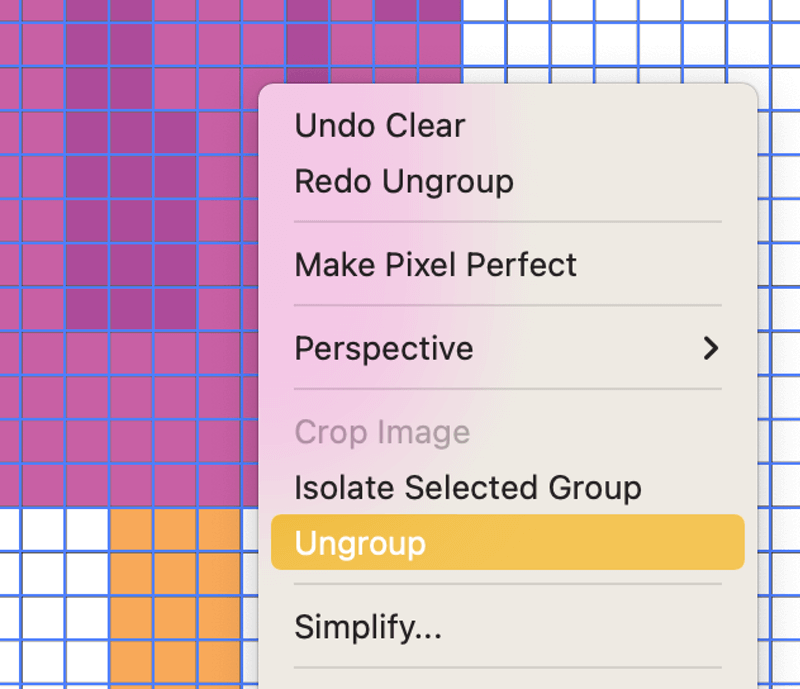
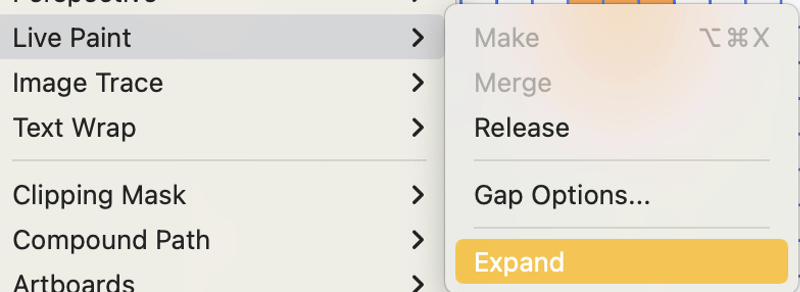
Step 8: Go to the overhead menu Object > Live Paint > Expand.
Step 9: Choose the Magic Wand Tool (keyboard shortcut Y ) on the toolbar.
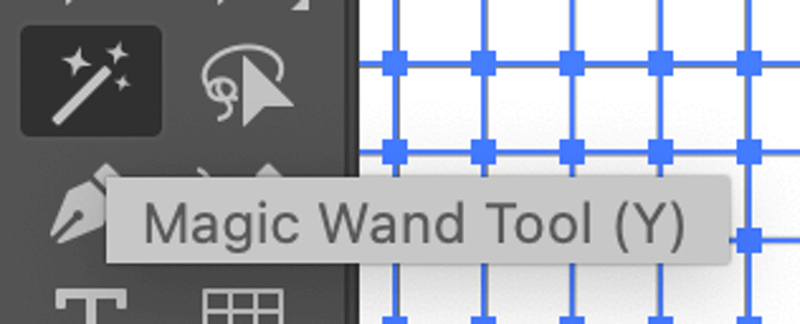
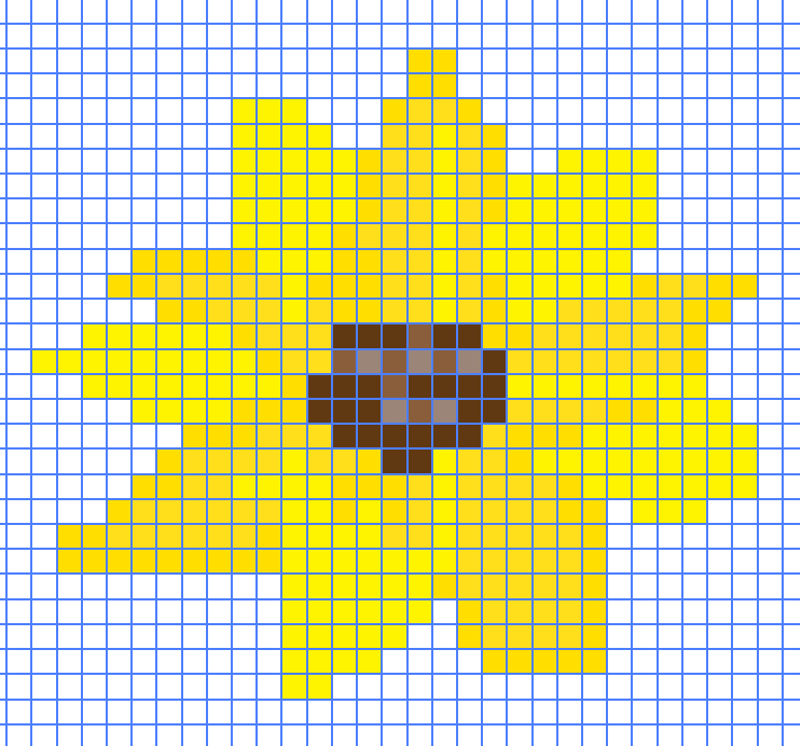
Click on the grid and hit the Delete button. That’s how you can convert a vector to pixel art in Adobe Illustrator.

You can use the same method to create pixel art from scratch. Instead of tracing the image, simply draw freely on the grids.
That’s It
So yes! You can definitely make pixel art in Adobe Illustrator and the best tools to use are Live Paint Bucket and Rectangular Grid Tool. Make sure to ungroup the artwork and the grid once you finish, and expand the Live Paint to get final the result.
The best part of making pixel art in Illustrator is that you can always go back to recolor artwork or scale it for different uses.
Leave a Reply Cancel Reply
Thank you so much for this! I’ve been having a blast at work today making pixel art.
Hey Jessica, glad it helped!
Search
Hey Creatives!
 My name is June, I’m a graphic designer and a problem solver. I’m here to help you solve your Illustrator problems. Read more about me and why I created this website here.
Related Posts
 How to Use the Touch Type Tool in Adobe Illustrator
 What is the Direct Selection Tool in Adobe Illustrator and How to Use It
 How to Become a Medical Illustrator
 How to Find Pantone Colors in Adobe Illustrator
 How to Add a Texture in Adobe Illustrator
 How to Change/Distort Perspective in Adobe Illustrator
Want More?
Sign up for my newsletter to get exclusive Adobe Illustrator tips to your inbox.
Disclaimer
Illustrator is a design program made by Adobe Inc. This site is not associated with Adobe. As an Amazon Associate I earn from qualifying purchases.
How to Create Pixel Art Icons in Adobe Illustrator

Mary Winkler Last updated Jan 20, 2015

 What You’ll Be Creating
In this beginner tutorial, you’ll learn techniques for creating forever scalable pixel art in Adobe Illustrator. With the use of the Rectangular Grid Tool and the Live Paint Bucket Tool, we’ll create simple, cute little pixel art icons, and then I’ll show you how to bust them out of the grid, creating lossless icons, pixel art patterns, and more.
1. Setting Up Your Document
Step 1
Open up Adobe Illustrator CC 2014 (this tutorial is quite usable with other versions of Adobe Illustrator, but this is what all of my screenshots come from), and create a New Document. I like working in a square, 800 px by 800 px document. You can use a smaller or larger file if your needs call for that.


Step 2
From the Toolbar, grab the Rectangular Grid Tool (found under the Line Segment Tool (/). Double-Click the tool to bring up its options. Enter in your document’s size for the Width and Height. Enter 30 for both the Horizontal and Vertical Dividers.


Step 3
Make sure your rectangular grid lines up with your Artboard. Select your grid and set the Stroke color to black, or whatever color you like best so that you can easily see the grid.


2. Drawing the Notebook’s Outline
Step 1
Select your grid and grab the Live Paint Bucket Tool (K) (in the Toolbar under the Shape Builder Tool (Shift-M)).
- Click on the grid to make a Live Paintgroup.
- Deselect and start filling in a couple of the grid spaces, using brown ( #801800 ) as your fill color.
Step 2
You can either click one grid space at a time, or click and drag along your grid to fill in multiple spaces in one go. Regardless of your method, fill in a rectangle outline of 15 pixels across and 18 pixels down.


Step 3
Using the Live Paint Selection Tool (Shift-M), select the brown box in the lower left corner of the brown rectangle and Delete it. Then, using the Live Paint Bucket Tool, fill in three diagonal boxes in the lower right corner.


Step 4
For the notebook’s spirals, start two grid spaces to the left and fill in two boxes up, one box diagonally up, and two boxes down. Skip one column and repeat twice.
Then, use the Live Paint Selection Tool to delete the space from the brown rectangle outline so your notebook spirals have four white spaces from the top to the bottom (see below).
Fill in three spaces below the notebook outline that connect diagonally to finish the spiral outlines.


3. Filling in and Extracting the Notebook
Step 1
Change your fill color to blue ( #4dc6e1 ) and fill in the notebook, starting with the right edge and bottom edge. Fill in spaces beneath each spiral shape and then, five rows from the top of the notebook, fill in a horizontal line (see below).


Step 2
Fill in two more horizontal lines, each with two rows between them. Then, using light blue ( #b6f9ff ) as your fill color, fill in large spaces at once, rather than just a column or row).


Step 3
Fill in the rest of the notebook page (except for a single white column on the left side). With gray ( #b1b1b1 ), fill in the four spaces in each spiral.


Step 4
Once finished with your pixel art design, Select the grid, Right-Click, and hit Ungroup. Then, go to Object > Live Paint > Expand to turn your Live Paint Group into objects. Hit Divide in the Pathfinder panel so your filled-in spaces will be separate from the grid. Finally, use the Magic Wand Tool to select the stroked grid and Delete it. We’ll go over this process again for the other icons on this tutorial.


4. Creating a Simple Pencil
Step 1
Use the Rectangular Line Grid Tool to create another grid for your vector pixel art. Once again, use the Live Paint Bucket Tool to start filling in spaces with brown.
Fill in four diagonal spaces going to the upper right and then three diagonal spaces going to the lower right to create the pencil’s point. The rest of the pencil’s top is four spaces down on either side of the point and nine spaces across.


Step 2
The sides of the pencil are 19 spaces down and the bottom is seven spaces across. Don’t forget to fill in the top three rows for the pencil’s lead and two rows of seven spaces near the bottom for the metal bit of the eraser.


Step 3
We need two colors for each section of the pencil: the wood, the yellow body, the metal bit, and the eraser. The darker color fills in two full columns on either side of the lighter color, which fills in three columns. The colors are as follows:
- Wood: Tan ( #eeb55c ) and Light Tan ( #f8dd92 )
- Yellow Body: Yellow ( #fbc423 ) and Light Yellow ( #ffef42 )
- Metal Bit: Gray ( #b1b1b1 ) and Light Gray ( #d8d8d8 )
- Eraser: Pink ( #f8a8a0 ) and Light Pink ( #f8d8d0 )
Step 4
Finally, let’s repeat the process of extracting your vector pixel design from the rectangular grid. Select the grid, Right-Click, and hit Ungroup. Then, go to Object > Live Paint > Expand to turn your Live Paint Group into objects. Hit Divide in the Pathfinder panel so your filled-in spaces will be separate from the grid. Finally, use the Magic Wand Tool to select the stroked grid and Delete it.


5. Creating a Small Set of Markers
Step 1
This design is similar to the pencil, so I’ll go over the outline rather quickly. Set up your line grid in the same fashion as the notebook and pencil.
- The tip is chiseled and starts with filling in two spaces to the right and one down diagonally.
- The tip is four spaces high, four spaces across, and has three on the diagonal.
- Fill in two spaces on either side of the marker tip. Then fill in eight spaces across for the top of the marker body.
- Complete the top half of the marker with sides that are seven spaces down on either side. The bottom and the stripe near the top are eight spaces across each.
- Finally, the body of the marker is 21 spaces down on either side and eight spaces across on the bottom. There are three rows of brown across in the body of the marker (see below).
Step 2
Like the pencil, the colors of the marker are separated into columns.
- Start with bright green ( #b7e835 ) in the center two columns. I decided that green should be filled into four of the seven sections.
- Fill in the two columns on the right side of each of the four green sections with medium green ( #9dc107 ).
- The left side of the green sections are filled in with dark green ( #768d12 ).
- The other three sections are filled in with three shades of gray: dark ( #b1b1b1 ), light ( #ffffff ), and medium ( #d8d8d8 ).
Step 3
For the third and final time in this tutorial, let’s review the steps of extracting vector-based pixel art from a rectangular grid:
- Select the grid, Right-Click, and hit Ungroup.
- Go to Object > Live Paint > Expand.
- Hit Divide in the Pathfinder panel. Finally, use the Magic Wand Tool to delete the grid.
6. Changing Colors for Alternate Designs
Step 1
One way of easily changing colors is to Copy (Control-C) and Paste (Control-V) the grid design before you extract your vector-based pixel art icon from the rectangular grid. Then you can easily refill Live Paint spaces.


Step 2
Alternatively, Select your design, go to Edit > Edit Colors > Recolor Artwork, and change the hues of your selected object. I find this to be the quickest way of changing an object’s colors.

 Please note the artwork has been superimposed onto the Recolor Artwork panel in order to demonstrate its use.
Step 3
Create as many variations of your little pixel art icons as you see fit. Make sure each design’s squares are Grouped (Control-G) together. Below, you can see the Preview (Control-Y) mode versus the Outline mode, showing all of your scalable vector squares that make up each design.


Great Job, You’re Done!
Now that you’ve got the technique down, you can create icon sets, printable seamless patterns with the Pattern Options panel, mobile game assets, and more. While pure pixel art this is not, the principle of working on a small scale is the same, with the advantage of resizing the artwork in a lossless format. Share your vector-based pixel art creations with us in the comment section below!
Create pixel-perfect designs
Discover how to create crisp lines and artwork in your UI/UX projects as well as your web, screen, and other digital designs.

Never wrestle with anti-aliased icons and fuzzy art again — create paths that automatically align to the pixel grid as you draw them, or align art to the pixel grid in just one click. Here’s how.
Set up pixel-snapping
First, choose View > Pixel Preview. Now when you zoom to 600% or higher, you’ll see the pixel grid.
Note: Pixel Preview lets you preview what your artwork will look like when rasterized. It’s especially helpful when you want to control the placement, size, and edge appearance of objects in a rasterized graphic.
With nothing selected on your artboard, click the Snap to Pixel button in the Snap Options section of the Properties panel.
Simple How To Make Pixel Art In Adobe Illustrator With Step By Step

Imagine the time you’ll save when you draw clean, sharp lines from the start. Adobe illustrator began as a bezier drawing program with support for live text.
Simple How To Make Pixel Art In Adobe Illustrator With Step By Step, Most artboard presets that illustrator provides have square pixels, that is, the video ruler pixel aspect ratio (vpar) is 1.0. Then press ctrl + d to repeat that action.

How to Create Pixel Art Icons in Adobe Illustrator From design.tutsplus.com
This pixel art tutorial will help you learn the basics / fundamentals of what pixel art is and how you can get better at pixel art fast! Once you�re finished with the creative process, take a little bit of time and make sure that all the anchors are correctly snapped to the pixel grid. Learn pixel art in u. Most artboard presets that illustrator provides have square pixels, that is, the video ruler pixel aspect ratio (vpar) is 1.0.
How to Create Pixel Art Icons in Adobe Illustrator Drawing the notebook�s outline step 1
Dengan menggunakan rectangular grid tool dan live paint bucket tool, kita akan buat yang sederhana, ikon pixel yang lucu, kemudian saya akan menunjukkan cara untuk keluar dari grid, menciptakan ikon lossless, pola pixel art dan banyak lagi. Most artboard presets that illustrator provides have square pixels, that is, the video ruler pixel aspect ratio (vpar) is 1.0. Once you�re finished with the creative process, take a little bit of time and make sure that all the anchors are correctly snapped to the pixel grid. The cool part of making pixel art inside illustrator is that you have an immense amount of control over each and every pixel, and you can also scale the artwork infinitely large due to it being in.

Source: design.tutsplus.com
Draw and export each pose as an image and combine them in adobe photoshop or bring your ai file into adobe after effects and follow the steps outlined in my how to create animated gifs for your website. Dengan menggunakan rectangular grid tool dan live paint bucket tool, kita akan buat yang sederhana, ikon pixel yang lucu, kemudian saya akan menunjukkan cara untuk keluar dari grid, menciptakan ikon lossless, pola pixel art dan banyak lagi. 3 steps to create pixel art characters in adobe illustrator. How to Create Pixel Art Icons in Adobe Illustrator.

Source: helpx.adobe.com
Enter 30 for both the horizontal and vertical dividers. Go to view and turn on smart guides. 3 steps to create pixel art characters in adobe illustrator. Create pixelperfect art in Illustrator Adobe.

Source: pinterest.com
Anything that lets you place squares on a grid is a potential pixel editor. Once you�re finished with the creative process, take a little bit of time and make sure that all the anchors are correctly snapped to the pixel grid. Imagine the time you’ll save when you draw clean, sharp lines from the start. How to Create Pixel Art Icons in Adobe Illustrator.
Once you create pixel bit characters in adobe illustrator, have some fun with it. Imagine the time you’ll save when you draw clean, sharp lines from the start. The cool part of making pixel art inside illustrator is that you have an immense amount of control over each and every pixel, and you can also scale the artwork infinitely large due to it being in. 3 Pixel Art Yapımı [Sıfırdan Adobe Illustrator CC 2020.

Source: youtube.com
Some of you people are crazy. Tools to help you to create pixel art. This pixel art tutorial will help you learn the basics / fundamentals of what pixel art is and how you can get better at pixel art fast! How to create pixel art in illustrator �� pixel art from.

Source: design.tutsplus.com
Imagine the time you’ll save when you draw clean, sharp lines from the start. But, like, in a good way. Create vector version sprites to be exported to animation. How to Create Pixel Art Icons in Adobe Illustrator.

Source: youtube.com
Tools to help you to create pixel art. With nothing selected on your artboard, click the snap to pixel button in the snap options section of the properties panel. How to pixelate in illustrator. Create 3D Pixel Art Adobe Illustrator 8bit YouTube.

Source: helpx.adobe.com
Drag the square to create a new square. Then press ctrl + d to repeat that action. The cool part of making pixel art inside illustrator is that you have an immense amount of control over each and every pixel, and you can also scale the artwork infinitely large due to it being in a vector format. Create pixelperfect art in Illustrator Adobe.

Source: adobe-illustrator.wonderhowto.com
Dan grady explains how to create 8bit style artwork in adobe illustrator. Drawing the notebook�s outline step 1 Drag the square to create a new square. How to Create 8bit style pixel art using Adobe.

Source: vectips.com
Step 3 make sure your rectangular grid lines up with your artboard. Click create when you�re done. Dengan menggunakan rectangular grid tool dan live paint bucket tool, kita akan buat yang sederhana, ikon pixel yang lucu, kemudian saya akan menunjukkan cara untuk keluar dari grid, menciptakan ikon lossless, pola pixel art dan banyak lagi. Create 3D Pixel Art in Illustrator Vectips.

Source: youtube.com
Tools to help you create pixel art. Dalam tutorial pemula ini, anda mempelajari teknik untuk membuat seni pixel di adobe illustrator. While the tool wasn�t designed for working in the concept of pixels, i go over how to make a pixel grid using squares! Creating 2D Pixel Art Adobe Illustrator Tutorial YouTube.

Source: youtube.com
Some of you people are crazy. This canvas will be what we use to draw our pixel art. Inside the menu on the right called preset details type the name pixelfrog and enter 500px for the width and 500px for the height. Pixel Art in Illustrator Part 2 of 2 YouTube.

Source: megavoxels.com
Imagine the time you’ll save when you draw clean, sharp lines from the start. Imagine the time you’ll save when you draw clean, sharp lines from the start. Anything that lets you place squares on a grid is a potential pixel editor. Best Pixel Art Software for 2021.
Source: youtube.com
Imagine the time you’ll save when you draw clean, sharp lines from the start. With nothing selected on your artboard, click the snap to pixel button in the snap options section of the properties panel. Imagine the time you’ll save when you draw clean, sharp lines from the start. Create Pixel art in Adobe Illustrator 8 bit 16 bit.
Source: design.tutsplus.com
Enter 30 for both the horizontal and vertical dividers. Tools to help you to create pixel art. Go to view and turn on smart guides. How to Create Pixel Art Icons in Adobe Illustrator.
When You Do Find Anchors That Have Jumped Off, Simply Grab The Direct Selection Tool (A), Select The Appropriate Anchor Point, And Then Position It Back To Its Nearest Gridline Intersection.
Dan grady explains how to create 8bit style artwork in adobe illustrator. Building your sprites in adobe illustrator. I just made a 10 x 10 pixel square and moved the square 12 pixels downwards. Once you create pixel bit characters in adobe illustrator, have some fun with it by creating run, punch, or idle cycle gifs like i did above.
Enter In Your Document�s Size For The Width And Height.
Adobe illustrator began as a bezier drawing program with support for live text. Drawing the notebook�s outline step 1 Tools to help you create pixel art. Drag the square to create a new square.
Dalam Tutorial Pemula Ini, Anda Mempelajari Teknik Untuk Membuat Seni Pixel Di Adobe Illustrator.
Build out a pixel grid by choosing the rectangle tool from the toolbar. Tools to help you to create pixel art. Click on the square so the smart guide says path. Draw and export each pose as an image and combine them in adobe photoshop or bring your ai file into adobe after effects and follow the steps outlined in my how to create animated gifs for your website.
Most Artboard Presets That Illustrator Provides Have Square Pixels, That Is, The Video Ruler Pixel Aspect Ratio (Vpar) Is 1.0.
The cool part of making pixel art inside illustrator is that you have an immense amount of control over each and every pixel, and you can also scale the artwork infinitely large due to it being in a vector format. Imagine the time you’ll save when you draw clean, sharp lines from the start. But, like, in a good way. Some of you people are crazy.