Изменение параметров угла
Команда «Параметры угла» позволяет быстро задать параметры угла любого контура. Доступен целый ряд параметров угла от простых скругленных углов и до сложных орнаментов.

A. Параметры угла без обводки B. Тот же эффект с обводкой в 1 пункт C. Тот же эффект с обводкой в 4 пункта
Применение формы угла при помощи диалогового окна «Параметры углов»
С помощью инструмента выделения выберите контур.
Выберите меню «Объект» > «Параметры угла».
Чтобы применить угловой эффект ко всем углам прямоугольника, выберите значок «Сделать все значения одинаковыми» . Если параметр не выбран, то по обеим сторонам значка появляются точки (в виде разорванного звена цепи).
Выберите параметр угла и укажите размер для одного или нескольких углов.
Значение размера определяет радиус, на который параметры угла будут распространяться от каждой угловой точки.
Выберите «Просмотр», чтобы просматривать результаты эффекта до его применения. Затем нажмите кнопку «ОК».
Использование интерактивных углов
Функция интерактивных углов позволяет применять параметры углов к прямоугольным фреймам, щелкнув поле желтого цвета, которое появляется на фрейме, и перетащив его. Кроме того, к каждому углу могут быть применены индивидуальные параметры и значение радиуса.
Выделите прямоугольный фрейм и щелкните поле желтого цвета.
На выделенном фрейме появляются четыре желтых ромба, которые означают активацию режима интерактивных углов. Если желтое поле не появляется на выделенном фрейме, выберите «Просмотр»> «Вспомогательные элементы» > «Показать интерактивные углы».
Чтобы добавить параметры угла, выполните одно из следующих действий.
Чтобы скорректировать радиус всех четырех углов одновременно, перетащите один из ромбов по направлению к центру фрейма.
Чтобы скорректировать один угол, удерживайте клавишу «Shift» при перетаскивании ромба.
Чтобы циклически переключаться между различными параметрами, щелкайте на желтом ромбе при нажатой клавише «Alt» (Windows) или «Option» (Mac OS).
По завершении изменения углов щелкните за пределами выделенного фрейма.
Чтобы удалить параметры угла, выберите «Объект» > «Параметры угла», затем щелкните «Нет».
Если появление желтого поля нежелательно при выделении фрейма, выберите «Просмотр» > «Вспомогательные элементы» > «Скрыть интерактивные углы».
Указания по применению форм углов
Обратите внимание на следующие моменты.
Если вы приобрели внешние программы, увеличившие число эффектов, команда «Параметры угла» в палитре «Обводка» может содержать дополнительные фигуры.
Параметры угла проявляются во всех угловых точках контура. К гладким точкам они не применяются. При перемещении угловых точек контура стили углов меняются автоматически.
Если параметры угла существенно изменяют контур, создавая, например, выпуклость или вогнутость, это может повлиять на процесс взаимодействия фрейма с содержимым или с другими частями макета. Увеличение значения параметров угла может привести к тому, что существующий участок обтекания текстом или втяжки фрейма будет далеко выступать за пределы фрейма.
Параметры угла нельзя редактировать, но можно изменить его внешний вид, скорректировав радиус угла или обводку.
Если после применения параметров угла они не видны, убедитесь в том, что в контуре используются угловые точки, и к ним был применен цвет обводки или градиент. Затем увеличьте значение параметра «Размер» в диалоговом окне «Параметры угла» или толщину обводки в палитре «Обводка».
How to Round Corners in Adobe InDesign
Most of the objects in InDesign start out as basic squares. Squares have a useful role in page layout, but they barely scratch the surface of what InDesign can do.
One of the simplest ways to break up an overly rectilinear layout is by adding rounded corners, although you have to know where to find the corner settings in InDesign.
I’ve collected three separate methods for adding round corners in InDesign, as well as an advanced script for adding round corners on more complex shapes. Let’s take a look!
Table of Contents
Method 1: Round Corners using the Control Panel
If you want to add equally round corners to a square object, this is your fastest option.
Follow the steps below to round the corners of an image in InDesign.
Step 1: Switch to the Selection tool using the Tools panel or the keyboard shortcut V, and select the object you want to have round corners.
When the object/image is selected, you’ll see the Corner Options section (highlighted in the screenshot below) on the Control panel at the top of the main document window.
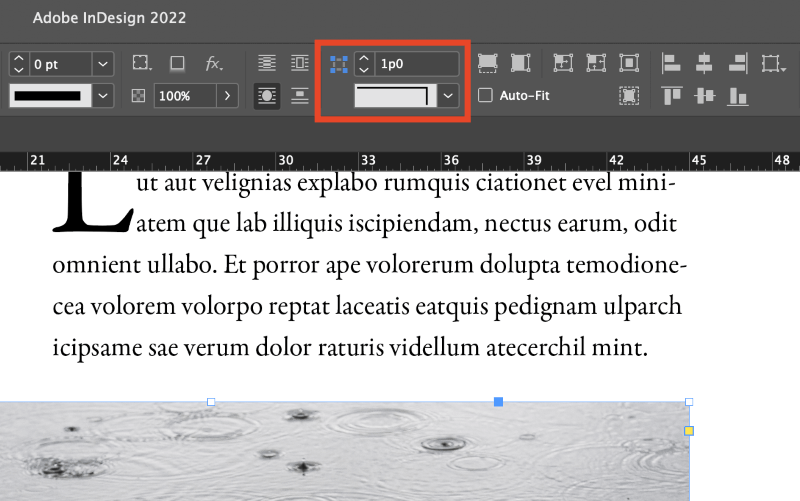
Step 2: Set the rounding amount using any unit format you want, and InDesign will automatically convert it into the document’s default units.
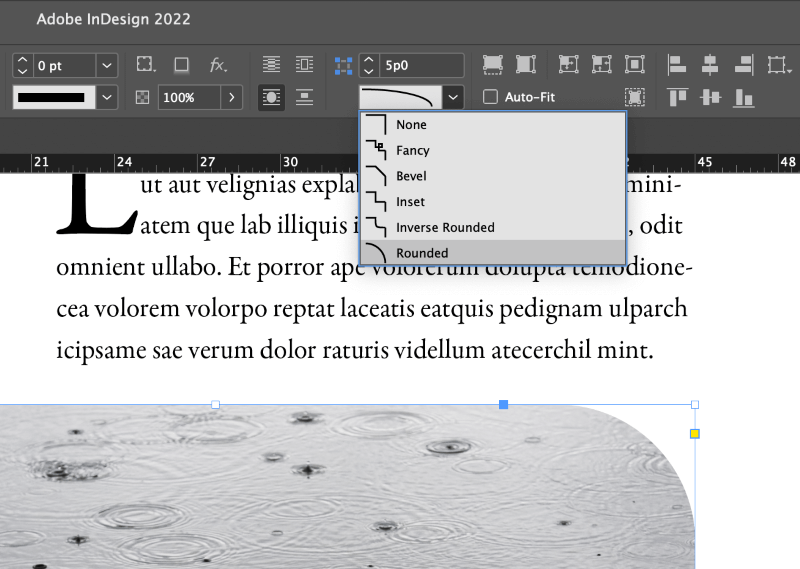
Step 3: Select the Rounded type in the corner shape dropdown menu, and InDesign will add rounded corners to each corner of your selected object.
Method 2: The Corner Options Dialog
If you want to have different rounding amounts on each corner of your square object, you can open the Corner Options dialog to control each corner individually.
To get started, make sure that the object you want to have rounded corners is currently selected.
Next, open the Corner Options dialog box by holding down the Option key (use Alt if you’re on a PC) and clicking the Corner Options icon in the Control panel at the top of the main document window.
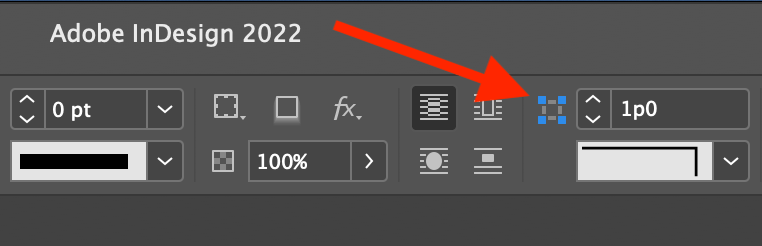
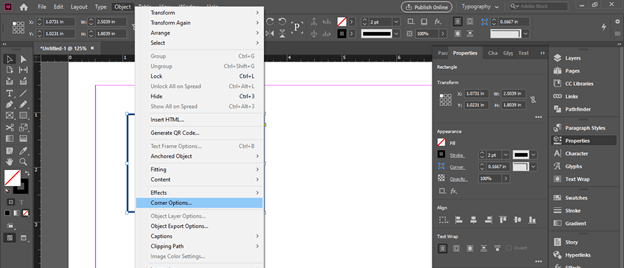
You can also launch the same dialog window by opening the Object menu and clicking Corner Options.
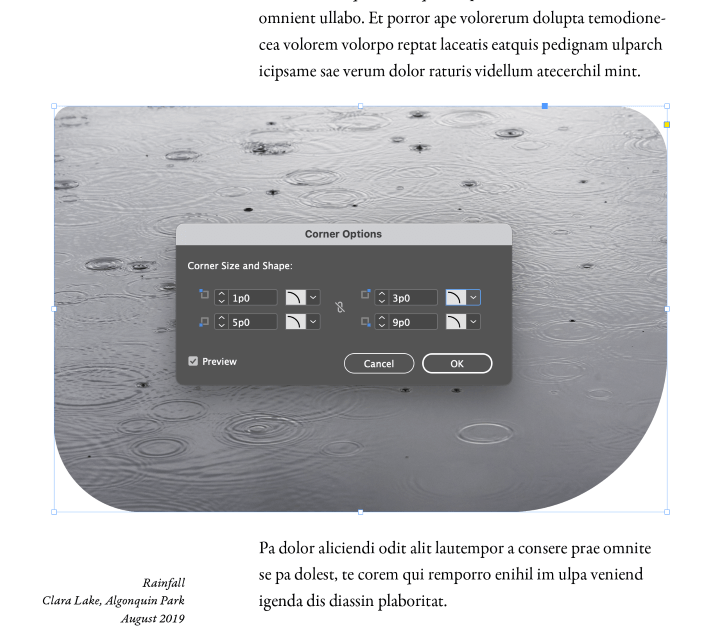
Select the Rounded option from the corner dropdown menu, and specify the rounding amount you want to use.
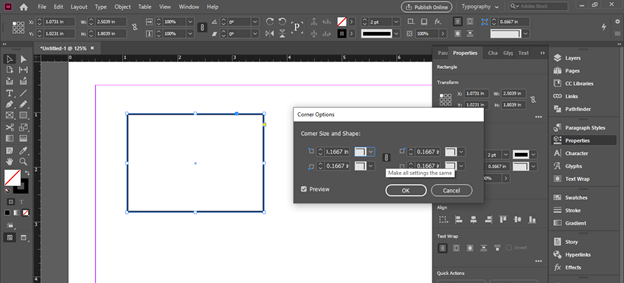
By default, the four corner options are linked to use the same rounding amount, but you can unlink the values by clicking the small chain link icon in the center of the dialog window.
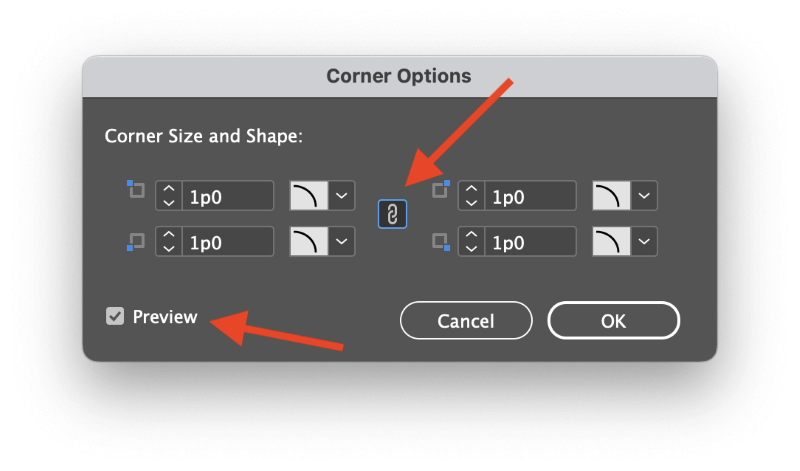
You may also want to check the Preview box so that you can see a real-time preview of the results of your corner settings.
Note that the preview won’t update until you move the focus away from the text input boxes that control the rounding amount, so don’t get frustrated if you can’t see the results right away.
Method 3: Live Corners Mode
If you’re not happy with either of those methods, you can also use Live Corners mode to add rounded corners in InDesign.
Live Corners is a more intuitive method of adding rounded corners since it works visually instead of forcing you to think about the exact measurement you want to use.
Here’s how it works.
Step 1: Select your object using the Selection tool. Along the edges of the blue bounding box that surrounds your object, you’ll see a small yellow square.
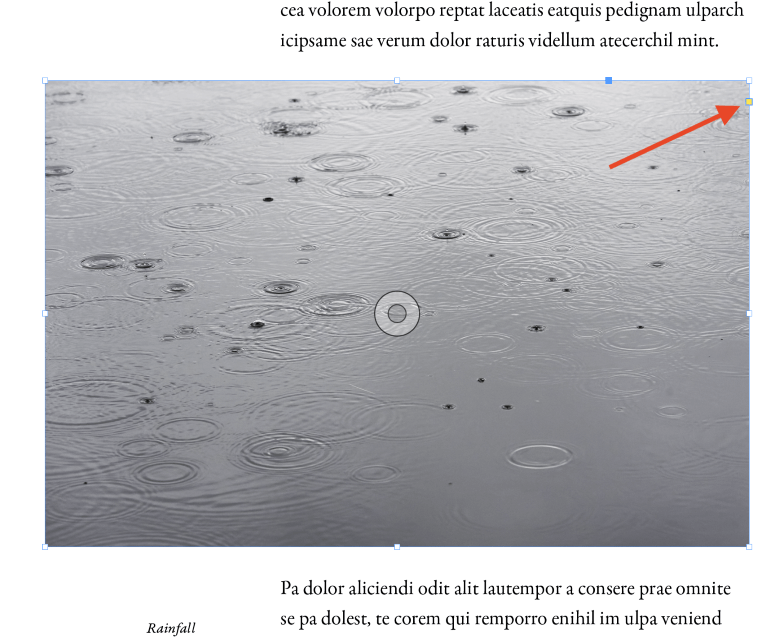
Step 2: Click the yellow square to enter Live Corners mode. The four corner handles of the bounding box will turn into yellow diamond shapes, and you can click and drag any one of these yellow handles to instantly round each corner equally.
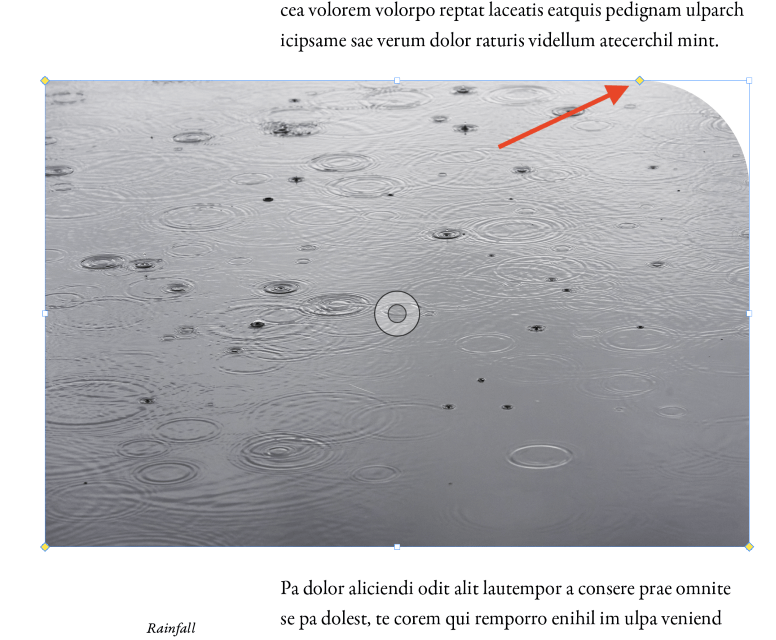
If you want to set different rounding values for each corner, hold down the Shift key while dragging one of the yellow handles and it will move independently of the others.
Live Corners mode should use the Rounded corner option by default, but it can also apply other corner effects.
Step 3: Hold down the Option key (use Alt if you’re using InDesign on a PC) and click the yellow diamond handle to cycle through the different corner options.
Advanced Corner Rounding with Scripts
Note: credit for this tip goes to Bob Wertz of Sketchbook B, who pointed it out in a blog post about a previous InDesign CC version – but it still works!
InDesign allows you to create some very complex frames in a variety of polygons and freeform shapes, but at soon as you convert your frame into one of these, you’ll lose the ability to add rounded corners using any of the methods described above.
While many users are content with the standard InDesign tools, it’s possible to expand InDesign’s capabilities using scripts. I’m no expert in this area of InDesign, but you don’t have to be an expert to run the script, which comes bundled as a free example script.
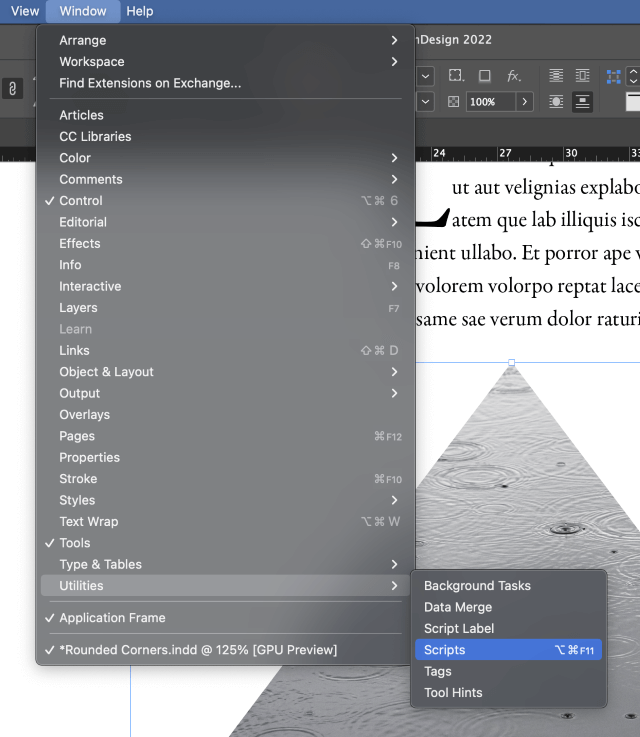
Open the Window menu, select the Utilities submenu, and click Scripts. You can also use the keyboard shortcut Command + Option + F11 (use Ctrl + Alt + F11 if you’re using InDesign on a PC).
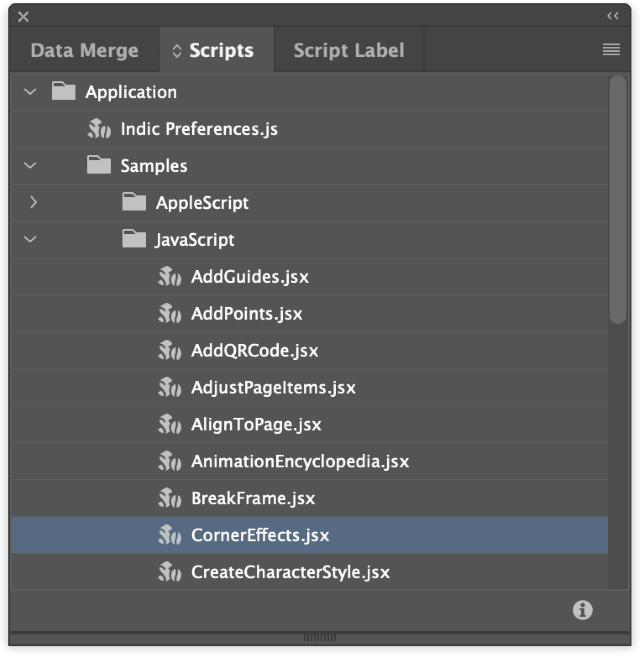
InDesign will open the Scripts panel. The script we want is located in the following folder: Application > Samples > Javascript > CornerEffects.jsx
Double-click the entry named CornerEffects.jsx to run the script, which will open a new dialog window so you can configure the options. Select your Corner Type, set the Offset to control the rounding amount, and then choose which points should be affected.
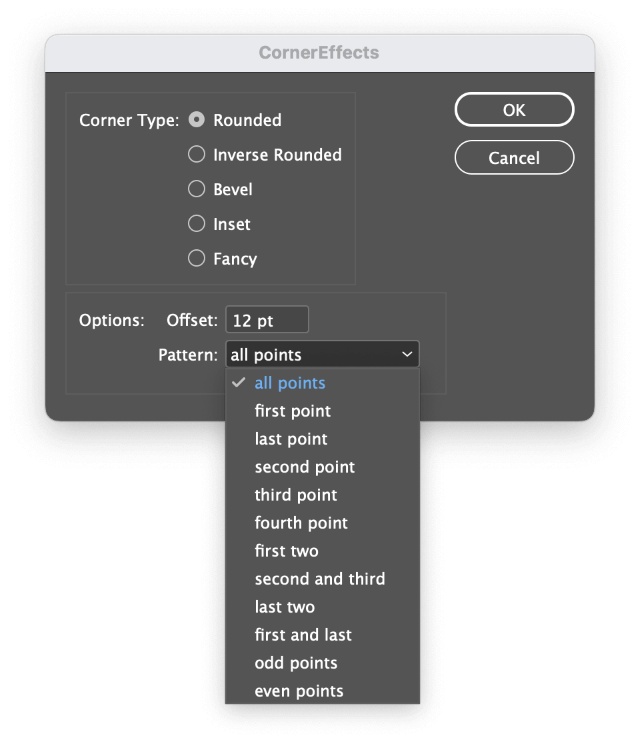
As you can see in the screenshot above, this script offers you far more flexibility when it comes to adding rounded corners in InDesign.
Just keep in mind that these scripts may sometimes produce unexpected results. For example, you may have to run the Undo command a few times to revert to your unrounded shape if you make a mistake or change your mind!
A Final Word
That’s just about everything there is to know about how to add rounded corners in InDesign. Everyone has to decide on their own favorite workflow, but now you have three different methods to choose from as well as an advanced trick for adding rounded corners to complex shape frames in InDesign.
Индизайн и скруглённые углы
В Индизайне можно скруглять разные углы разным радиусом. Это клёво. Но вот как выглядит окно, где это настраивается:
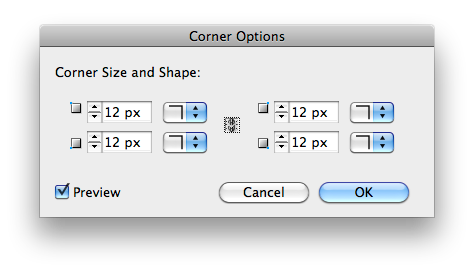
Казалось бы, очевидно, что должно быть вот так:
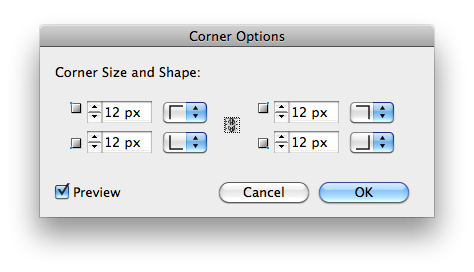
Не говоря уж о том, что ввод радиуса для нескруглённых углов — это бред.
В Индизайне хватает бреда.
Да я бы плюс к твоему убрал бы вообще пиктограммы, обозначающие угол. По этим четырем пикселям все равно толком ничего не видно — приходится вглядываться.
Скругленные углы в индизайне это здорово. Почему у Адобе не дружат друг с другом продукты и не появляются похожие по реализации скругленные углы в Иллюстраторе и Фотошопе не очень понятно. У меня была надежда что в новых версиях они будут идти навстречу друг другу. Но пока что по результатам Creative Future где презентовали пятую версию их движение друг на встречу другу заключается лишь в конвертации, экспорте и переносе файлов из одного продукта в другой. И никак не касается логики интерфейса, которая порой просто поражает. Когда два соседних окна в одном и том же продукте с одинаковыми счетчиками реагируют на прокрутку колесом внутри счетчика совершенно по-разному. До сих пор меня убивает отсутствие в Flash масштабирования окна по Ctrl + =
и Ctrl + −. И множество других моментов. Индизайн на мой взгляд в интерфейсном плане самый выигрышный сейчас из всех остальных продуктов. Но и как видно на вашем примере в нем хватает «удивительных» решений.
Corner size and shape. Сие профжаргон или опять же тупизм?
Corner coupling. Corner rounding. (Первое что нашёл.)
А немецкая манера писать с больших букв нарицательные понятия — уже как «Отче Наш» всех интерфейсов!
InDesign rounded corners
InDesign Rounded Corners is a feature of shape or image through which we can make their corner round that means we can provide arc at the corner of the shape. There is a feature in InDesign through which we can make corner round for different purpose. Not only for shape but we can also do this with placed image and with some other things. There are two ways through which we can make round corners. First one is by using Corner option and second use directly by the anchor points of the shape or image. So let me tell you how you can do this?
How to create and use Round Corners in InDesign?
Creating round corners for shape or image that have corner is very easy task in this software. We just have to understand some parameters of corner option of this software and i will tell you one more way that is by handling anchor points of shape or image for doing this.
3D animation, modelling, simulation, game development & others
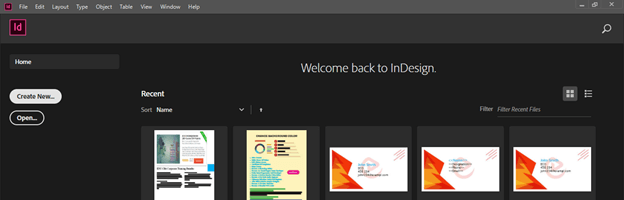
First i will create a new document and for this purpose i will click on Create New button of welcome screen of this software.
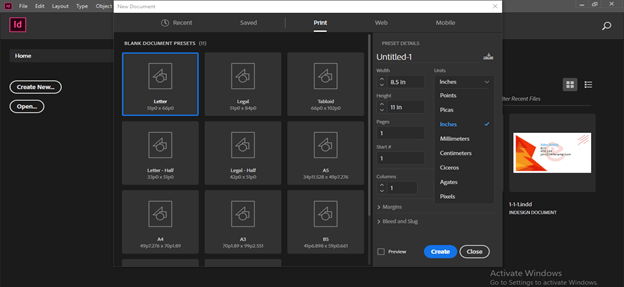
And i will go with the default settings of New Document dialog box.
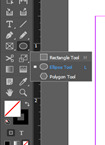
Now let us create a Rectangle shape of which corner we will convert into round shape. For this purpose i will take a Rectangle tool from tool panel or you can press M as its shortcut key.
I will create a rectangle like this.
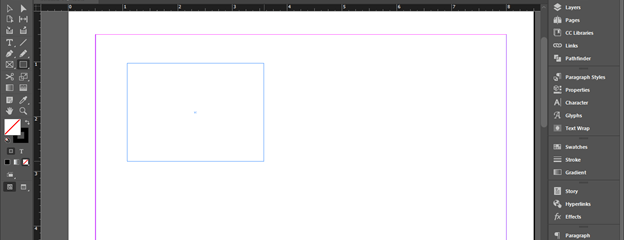
There is no fill color in this rectangle, it has only stroke.
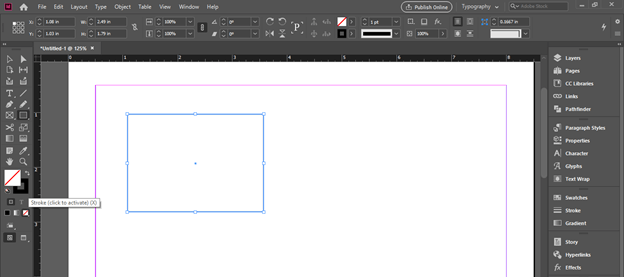
I will increase stroke width as 2 point so that we can see it clearly.
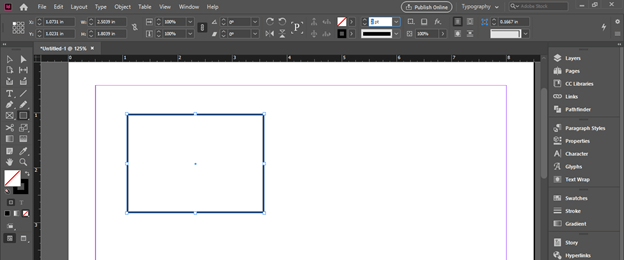
I will open Properties panel for Corner Options which is at the right side of working screen in the panels section.
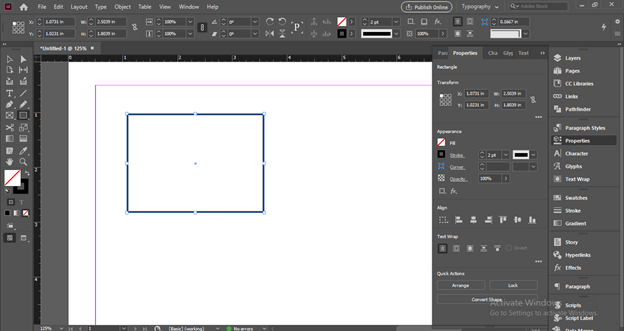
If there is no Properties panel in your working screen then you can find it in Window menu. So go Window menu and click on it. Here in the scroll down list of this menu you can find Properties panel.
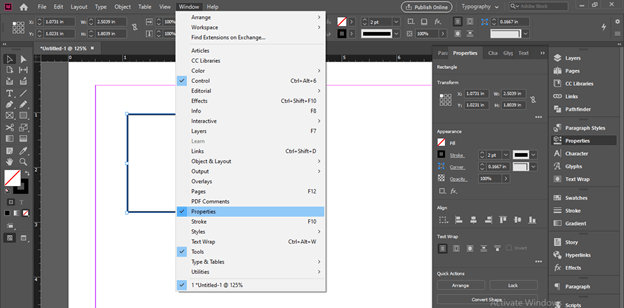
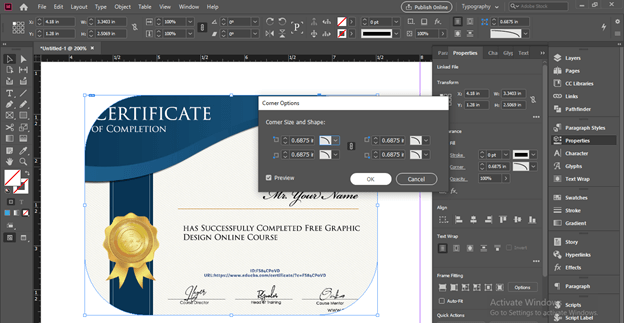
Here in the Properties panel we have Corner option so click on it. Once you click on it a dialog box of Corner Options will open.
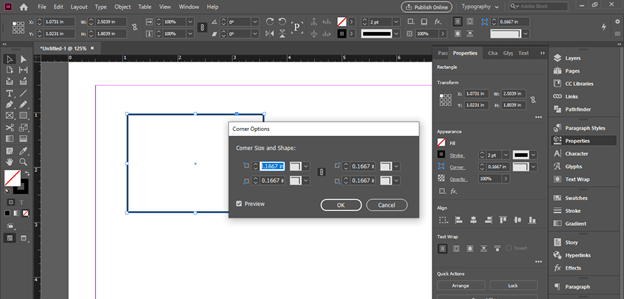
You can also open this dialog box from the Object menu of menu bar. So go to Object menu and click on it. In the scroll down list of it we have Corner Options. Click on it for enabling it.
In this dialog box we have four options for all four corners of this rectangle shape so let us discuss them. At the center there is chain linked icon that shows value of all four corner change proportionally if we change value of any one corner. We can unlink it also as per our requirement i will tell you this later section of this article.
I will click on down arrow button of first corner box option and here in the popup list we have some styles for corners such as Fancy, Bevel, and so on. ‘Rounded’ is at the last of this list so i will click on it for selecting it.
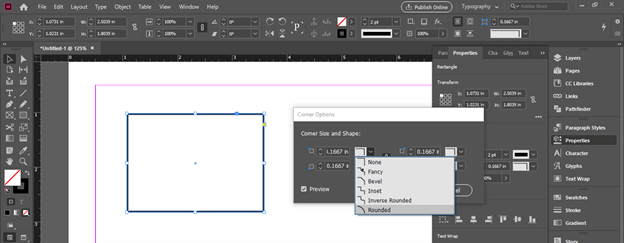
You can see the corners of this rectangle shape turn into round shape. All corners are linked so if we change one corner then rest will change with it also.
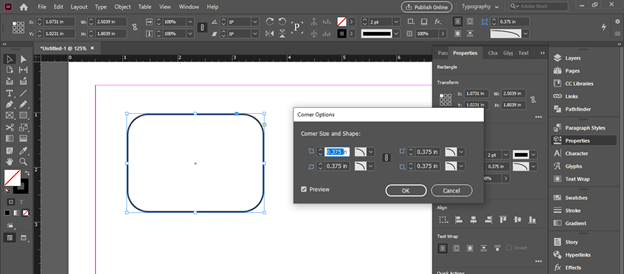
You can enter your desired value in the value box also for creating your desired arc at corner.
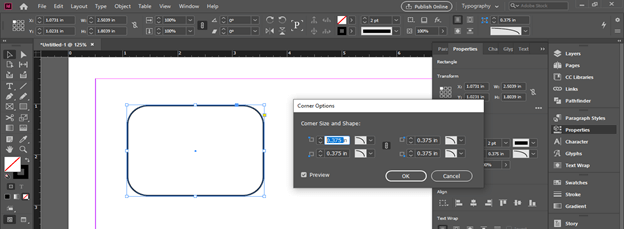
There is one more option for round corner but it will round corners in reverse direction. I will select it this time from the list of corner style.
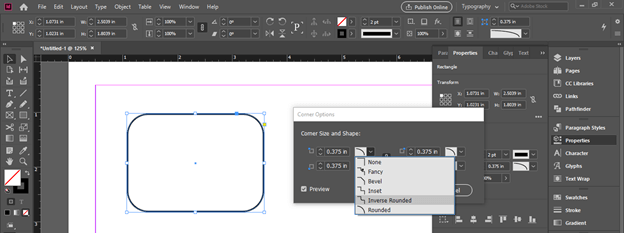
And you can see it will round the corners in reverse direction. You can change arc value here also.
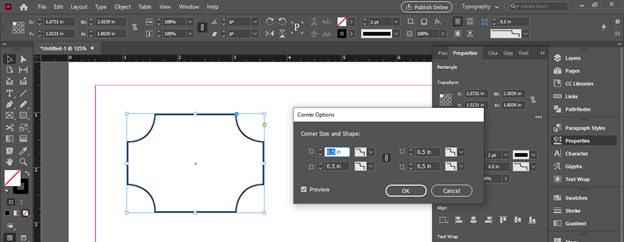
Now let us see what will happen if we unlink this chain icon. For unlink click on this icon.
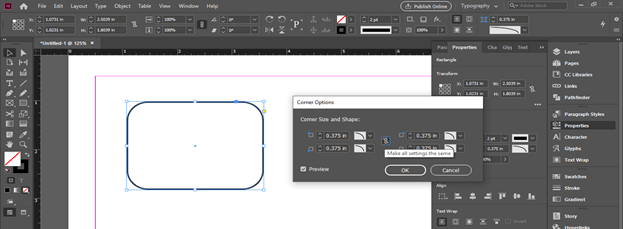
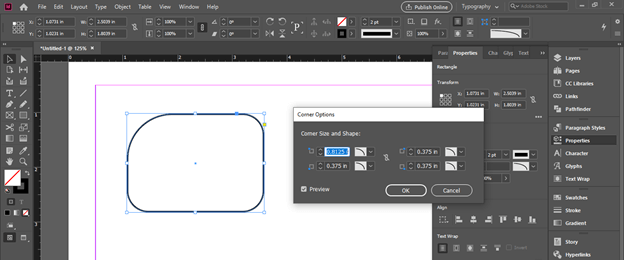
Now i will change the round value of first corner only and you can see this time change only applies on the chosen corner because chain icon is unlinked.
Now i will make a copy of this rectangle and fill some color to it for explaining other way for making round corners. You can apply this method on strokes also.
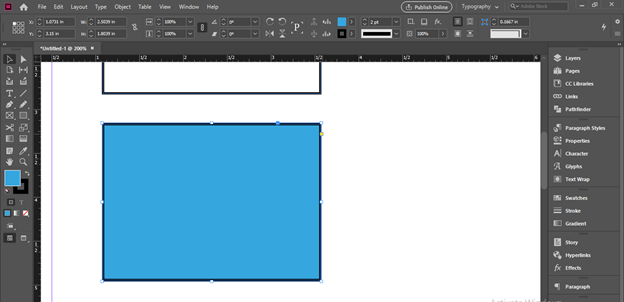
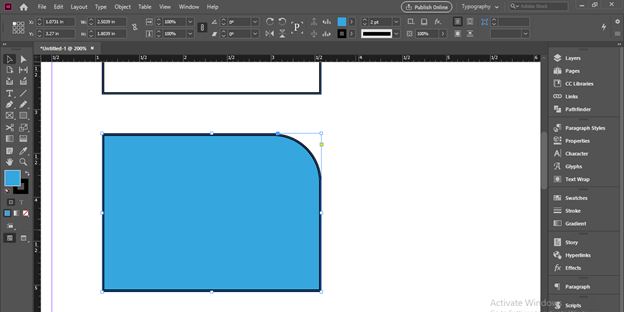
There is a yellow square anchor point at the edge of this rectangle.
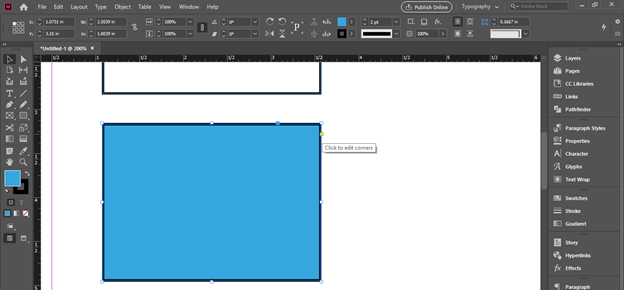
Click on that anchor point and it will turn into four anchor point that will be on all corners.
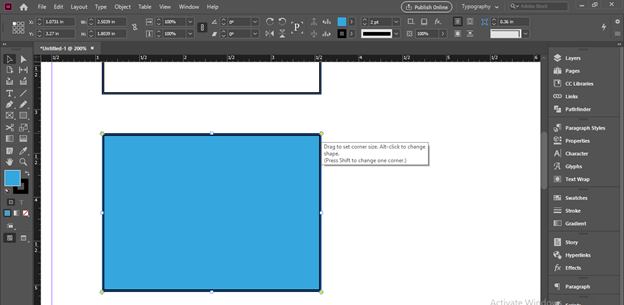
Hold this yellow anchor point with selection tool and drag into inward direction.
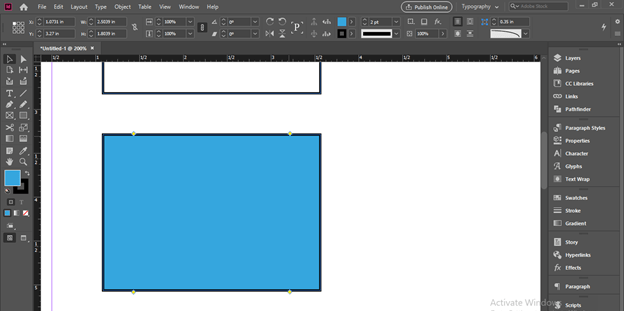
And it will around corners as much as you drag the anchor point in inward direction.
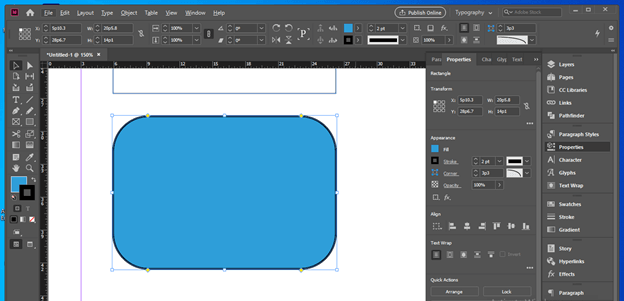
If you want to round only one corner then hold shift button of keyboard and drag this yellow anchor point in inward direction.
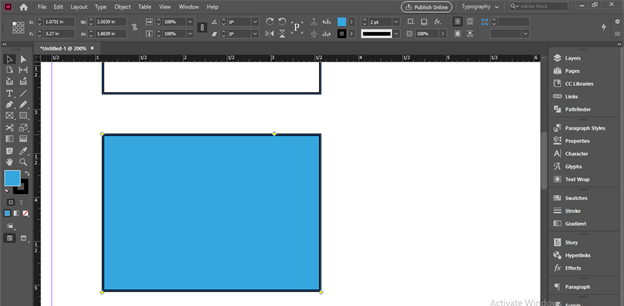
And it will turn that chosen corner into round corner.
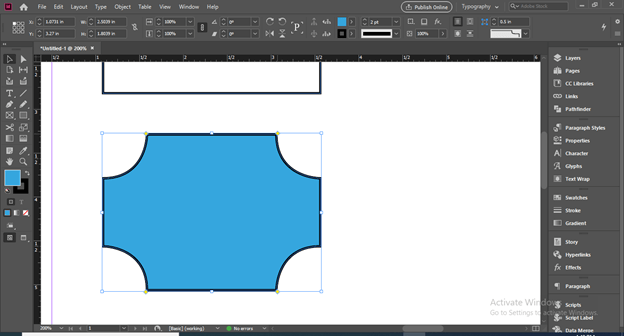
If you hold Alt button of keyboard and then make click on these yellow anchor point then it will change the style of corner and in this sequence you can have this revers round corner.
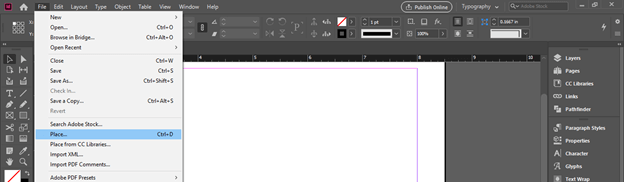
Now let me tell you how this round corner will work with images. For this purpose i will place an image in this software so i will click on Place image option of File menu or you can press Ctrl + D as its shortcut key.
I will choose this image.
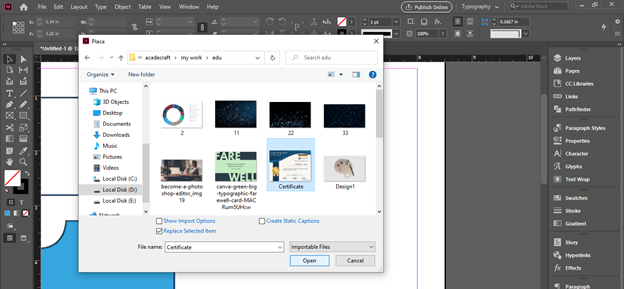
And place it in the document area like this.
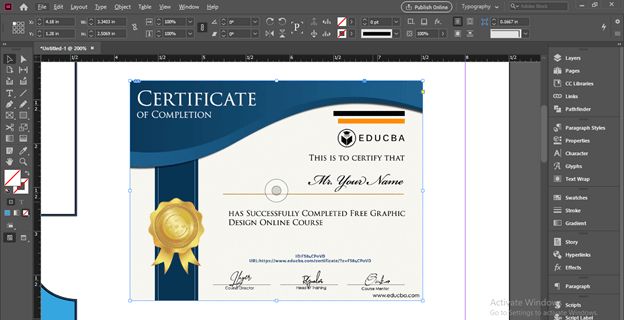
You can see there is same yellow anchor point as we had in shape. So click on it.
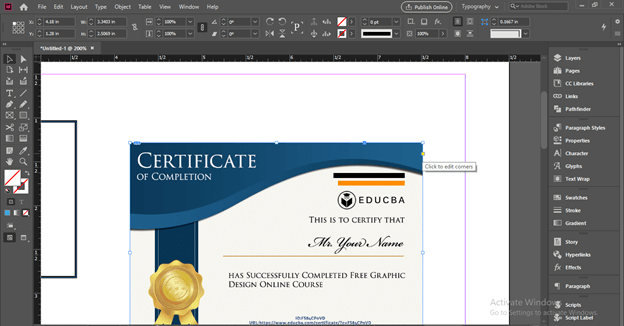
And i will drag it in inward direction like this.
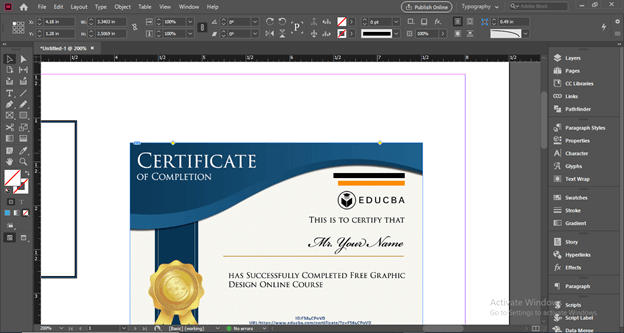
And it turns into round corners.
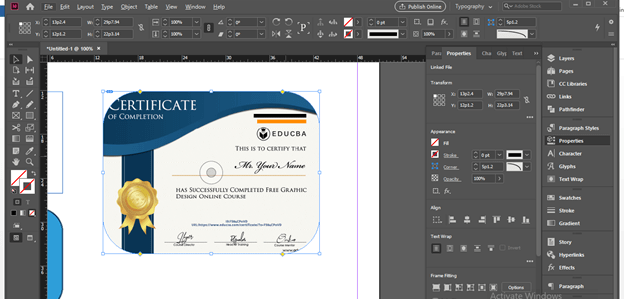
You can do this also from Corner Options as we have used this Corner option for shapes.
These were some important aspects about round corner feature of this software.
Conclusion – InDesign rounded corners
Now Round Corner features of this software will no more unknown word as well as technique for you. You can use it for creating design element in your design layout. After going through this article you can easily handle parameters of Corner Options for having different style of corners of shape or image.
Recommended Articles
This is a guide to InDesign rounded corners. Here we discuss How to create and use Round Corners in InDesign step by step in detail. You may also have a look at the following articles to learn more –