How To Switch Back To the Classic Outlook View
Many users have been using the desktop version of Outlook for a long time, know the application inside and out, and they don’t always appreciate it when Microsoft redesigns it, which is exactly what happened with the release of New Outlook. Fortunately, it’s possible to revert to Outlook Classic view, and we explain how in this article.
Clean Email
Take control of your mailbox
Why Change Back to Old Outlook?
Microsoft Outlook was first released in the 1990s, and it came bundled with Microsoft Office. Since then, it has become associated with enterprise email and calendaring, but many people also rely on it for personal purposes.
Because Outlook has always been trying to meet the complex needs of enterprise users, the application offers a huge number of useful features. The same features, however, can make it somewhat difficult to get into for new users.
To address the usability issues, Microsoft released the so-called New Outlook client a few years ago, delivering a simplified user experience that’s more in line with Outlook.com, a web-based suite of email, contacts, tasks, and calendaring services.
People who install the redesigned version typically notice two things: Outlook looks different and some features are missing, such as the ability to create a new contact list.
Unsurprisingly, many Outlook users want to know how to change back to Old Outlook, and we provide step-by-step instructions for Mac and Windows in the next section of this article.
Mass delete emails, automate commonly performed actions, and unsubscribe from unwanted emails.
How to Switch Back to Old Outlook on Mac
- Open Outlook.
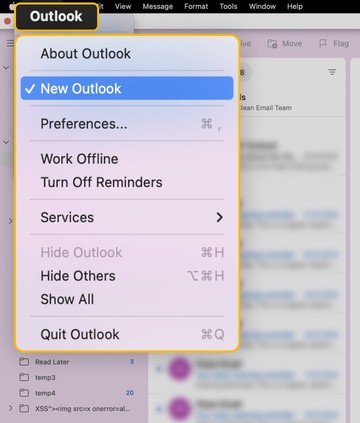
- Click the Outlook menu.
- Uncheck the New Outlook option.
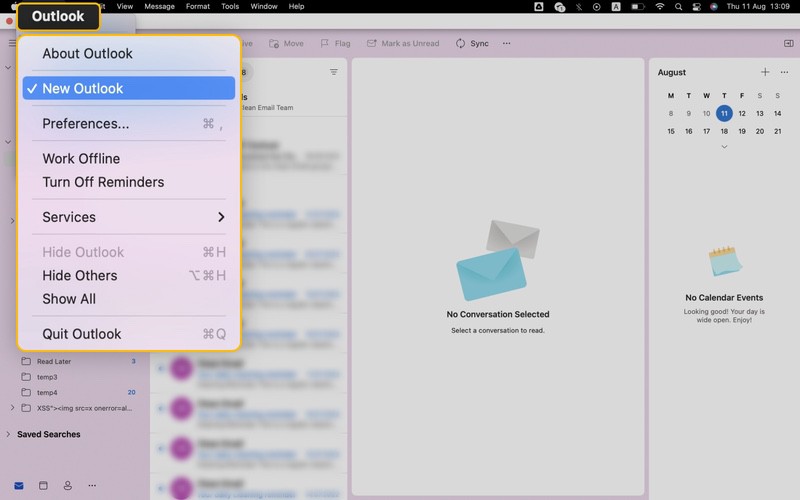
- Open Outlook.
- Click the Help menu.
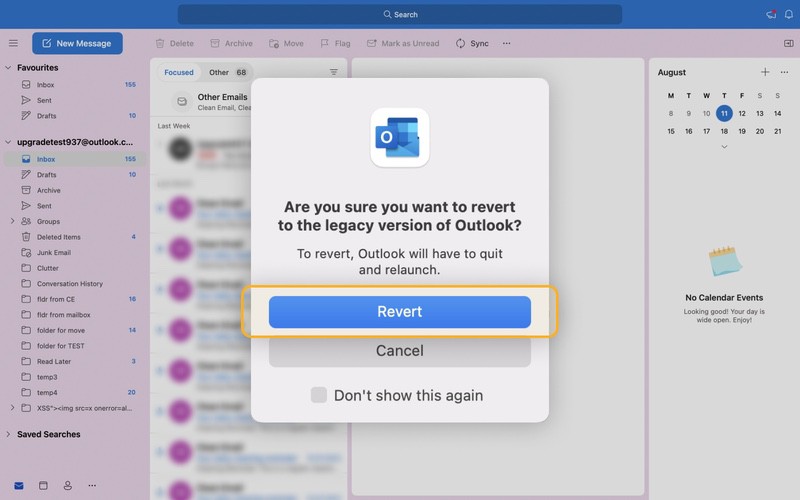
- Click the Revert to Legacy Outlook option.
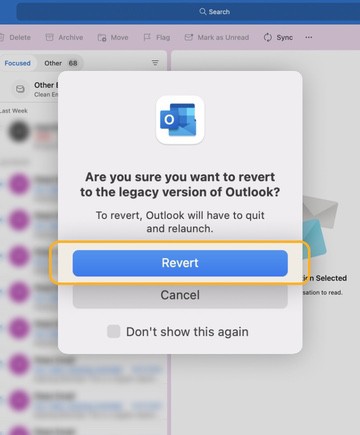
- Confirm your decision to revert to Legacy Outlook Mac.
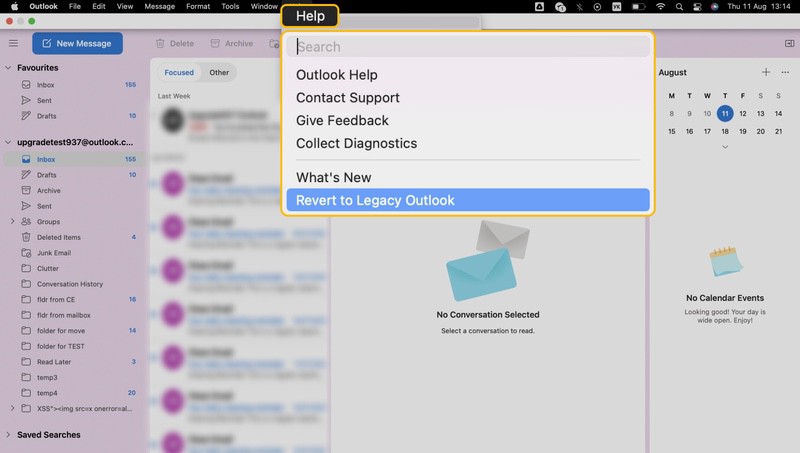
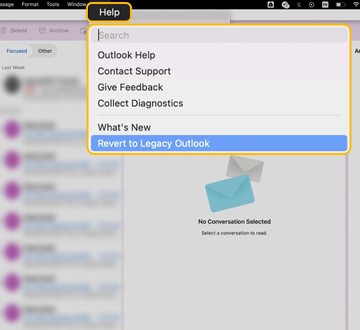
That’s how you can revert to Old Outlook Mac.
How to Enable Outlook Classic View on Windows
- Open Outlook.
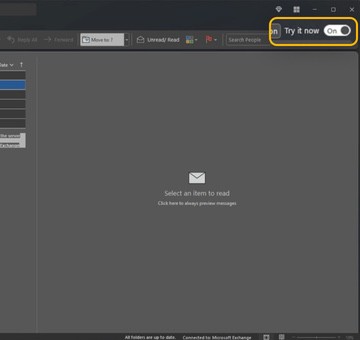
- Switch the toggle next to “Try it now” to the Off position.
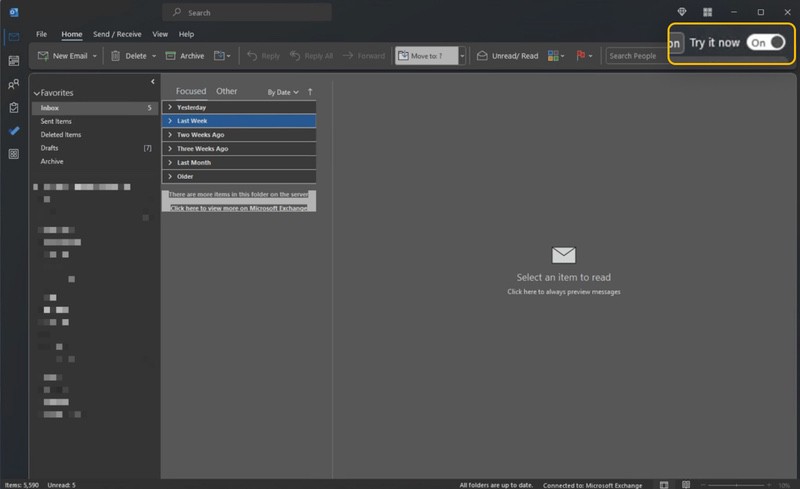
- Open Outlook.
- Go to the View tab.
- Click Change View.
- Make sure the Compact option is selected.
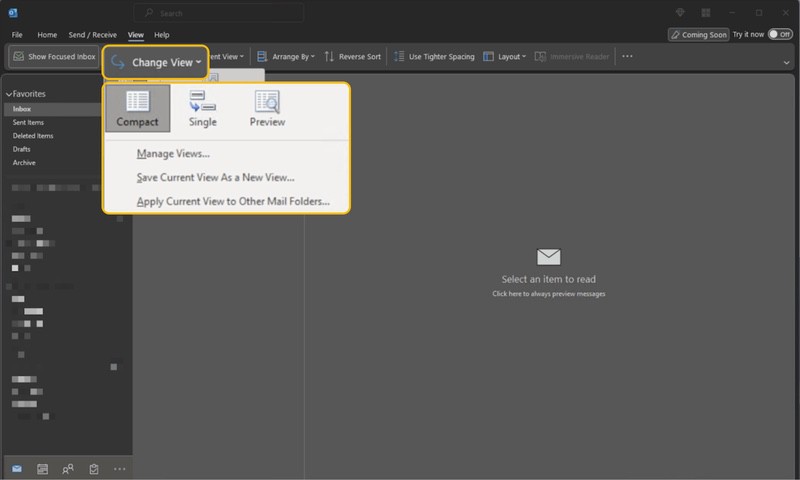
You can also play with other View settings to make the application look and feel exactly how you want.
Organize Outlook Messages Using Clean Email
Regardless of if you’ve decided to go back to Old Outlook on Mac or Windows, you should learn how to organize our inbox using Clean Email to prevent it from becoming cluttered and usable.
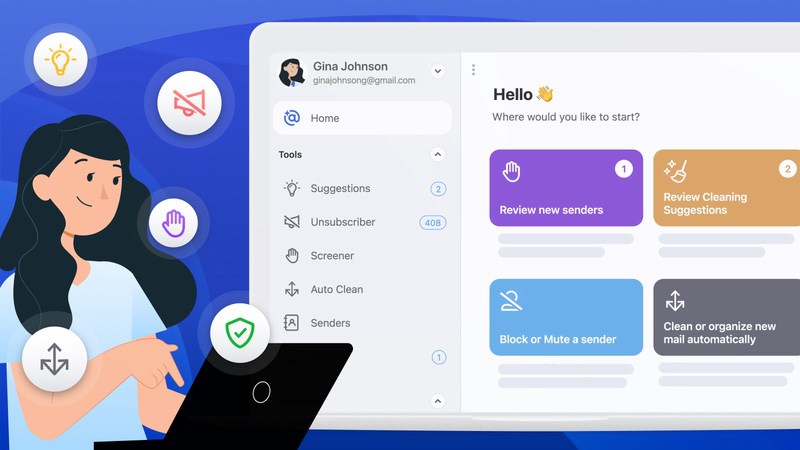

Clean Email can organize all cloud-hosted Outlook, Hotmail, and Office 365 inboxes, and it does so transparently, securely, and with respect to your privacy.
Here’s how you can achieve and maintain Inbox Zero using Clean Email in just three simple steps:
Step 1: Turn messages into easy-to-review bundles
When you connect Clean Email with your inbox for the first time, it automatically groups similar messages into easy-to-review bundles, called Smart Folders.
There are Smart Folders for automated emails, messages that are larger than 10 MB, social notifications, emails you’ve sent to yourself, messages that have been marked as deleted but have yet to be deleted, and more.
Thanks to Smart Folders, you can easily apply a single action to hundreds or even thousands of messages at the same time, which beasts having to organize messages manually one by one.
Step 2: Create Auto Clean rules
Whenever you organize messages using Clean Email, you get the option to create a new Auto Clean rule to perform the same inbox organization action automatically in the future.
Auto Clean rules are basically smarter mail filters you may already be familiar with from Microsoft’s and other email clients. The biggest difference between Auto Clean rules and traditional mail filters is that the former can be created with a single click.
All Auto Clean rules can be managed just as conveniently as they can be created, so pausing, editing, or deleting them is a breeze. Clean Email even lets you know when was the last time each rule was triggered, so you always know if they’re working as intended.
Step 3: Unsubscribe and block unwanted emails
Don’t you hate how you constantly receive unwanted emails from senders you don’t care about? With Clean Email, you can effortlessly unsubscribe from subscriptions that don’t contain unsubscribe links and block senders that don’t understand what “no” means.
To get rid of an unwanted newsletter, for example, you would normally have to find an unsubscribe link at the bottom of a newsletter message, click the link, fill out an unsubscribe form, and pray for the sender to respect your decision.
Clean Email makes this cumbersome process much more straightforward, allowing you to simply open the Unsubscriber feature and click the Unsubscribe button next to each subscription you want to get rid of. You can even pause individual subscriptions instead of getting rid of them straight away.
Wait, there’s more!
In addition to Smart Folders, Auto Clean rules, and its Unsubscriber feature, Clean Email can enhance your security by regularly checking your email against known data breaches and security incidents, which exposed over 22 billion records in 2021 alone.
So don’t wait and start using Clean Email right now!
Can I switch back to the new version of Outlook after?
Yes, it’s possible to go back to Old Outlook on both Mac (open the Help menu and click the Revert to Legacy Outlook option) and Windows (switch the toggle next to “Try it now” to the Off position).
Can I customize the Outlook items view?
Yes, all Outlook views can be customized in a number of different ways, and all available customization options can be accessed from the View menu. For example, this is how you can change the font or font size in the message list on Windows:
1. Open the View menu and click View Settings.
2. In the Advanced View Settings box, select Other Settings.
3. Customize the Column Font and Row Font options.
How to Change Outlook to Classic View [3 Methods]
Hi everyone. Today, we are going to discuss the question of many beginners, how do I change Outlook to Classic View? Well, Microsoft Outlook is an email client that has been in use for many years, and its interface has undergone several changes in that time. Some users prefer the classic view of Outlook, while others prefer the modern view. If you’re one of those who want to switch back to the classic view, this article will guide you on how to change Outlook to the classic view.
Table of Contents
Why Changing Outlook to Classic View is important?
Learning how do I change Outlook to classic view can be helpful for you, if you are one of those who prefer the older interface or are more comfortable with it. Some users may find the modern view of Outlook to be cluttered or overwhelming, making it difficult to navigate and use efficiently. Switching to the classic view can help simplify the Outlook interface and make it more user-friendly.
Additionally, if someone has been using Outlook for many years and is accustomed to the classic view, they may find adjusting to the newer interface challenging. Changing Outlook to a classic view can help some users maintain their productivity and workflow while using a familiar interface. Simply, learning how to switch Outlook to a classic view is a simple and useful skill that can help users customize their Outlook experience to their preferences and needs.
How to Change Outlook to Classic View?
There is mainly one method to learn how do I change Outlook to classic view, but I have also brought some workarounds or some alternative ways to change Outlook to classic view. I will show you different methods, so stay tuned, and keep reading this article.
Change Outlook to Classic View- using Standard Procedure
In this first section, we will show you how you can get the answer to your question, how do I change Outlook to Classic view? Well, my curious fellows, we have a simple and very standard way to do it in Outlook App. It works in the latest versions but can be changed in versions before 2010. I am teaching you Outlook 2016, so if some changes encounter you can resolve them by seeing your current version of Outlook. So, keep this in mind, and let’s move ahead in our journey.
Step 1
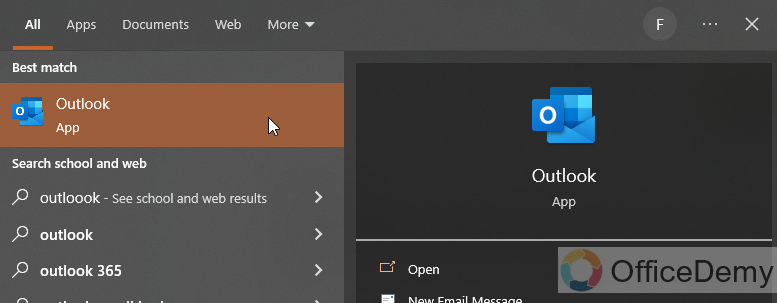
Launch Microsoft Outlook by clicking on the icon on your desktop or by searching for it in the Start menu.
Step 2
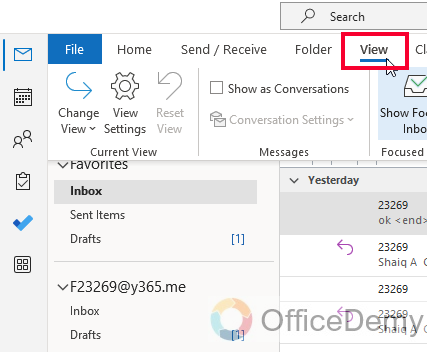
Go to the View tab
Once you have opened Outlook, click on the View tab located at the top of the window.
Step 3
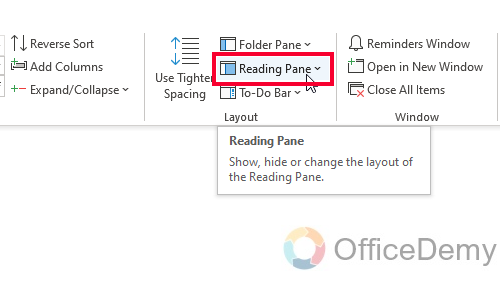
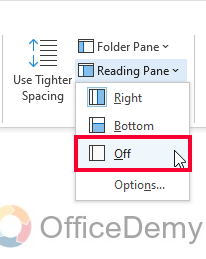
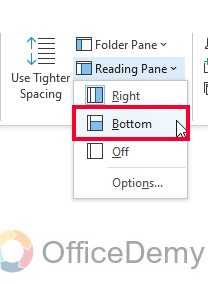
Click on the “Reading Pane” dropdown menu
Under the View tab, locate the “Reading Pane” dropdown menu on the left-hand side and click on it.
Step 4
Select the “Off” or “Bottom” option
From the dropdown menu, select either the “Off” or “Bottom” option. This will remove the reading pane and switch Outlook to the classic view.
Step 5
Customize the Quick Access Toolbar (Optional)
To make switching between the modern and classic view easier, you can customize the Quick Access Toolbar by adding a “Toggle to Classic View” button. To do this, right-click on the Quick Access Toolbar and select Customize Quick Access Toolbar. From the list of commands, select “Toggle to Classic View” and click on Add. Click on OK to save the changes.
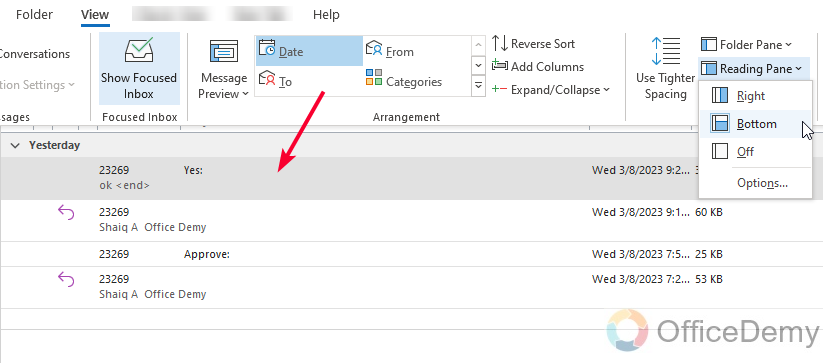
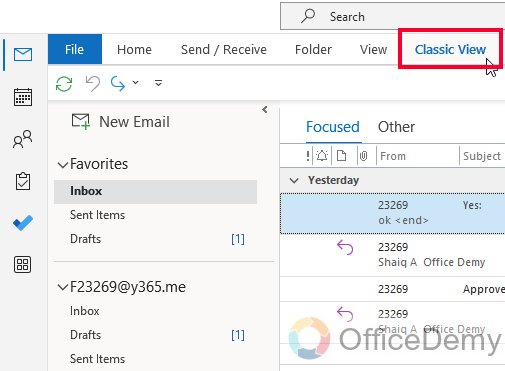
These steps should allow you to change Outlook to the classic view in versions where the “Compact” option is not available.
Change Outlook to Classic View- from Change View
In this section, we will answer your question, how do I change Outlook to classic view using a workaround which is simply the “Change view button ”? The Change view button is a customizable button located at the top left corner of the Outlook window. You can add the Classic View button to the Quick Access Toolbar to switch between the classic and modern views quickly.
Step 1
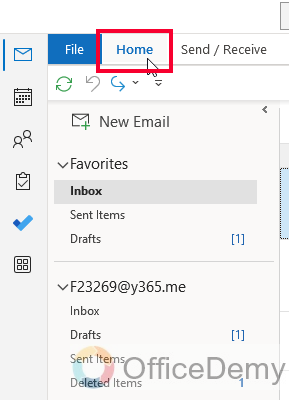
Open Outlook and go to the Home tab.
Step 2
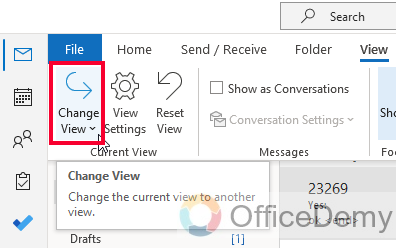
Now click on the View tab.

Step 3
On the left side you will see a button “Change View”, click on it.
Step 4
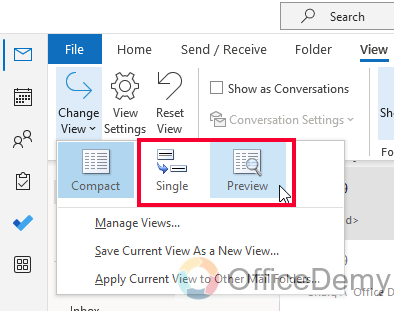
From some given options, select “Single” or “Preview” leaving the default Compact option.
Step 5
You will see your view will change simultaneously, and very quickly
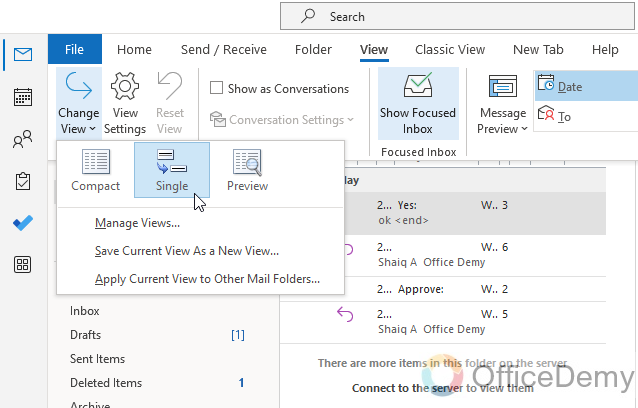
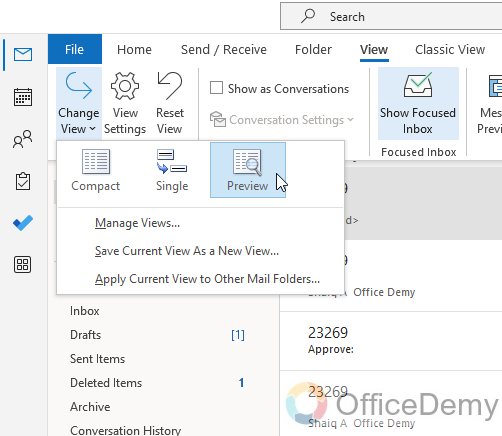
How was it? Yes, this was another easy and simple method to change Outlook to Classic view.
Change Outlook to Classic View- using Keyboard Shortcuts
We all love shortcuts. In this section, I will show you how do I change Outlook to Classic view using a keyboard shortcut. If you prefer using keyboard shortcuts, you can use the Ctrl+Alt+1 shortcut to switch to the classic view and Ctrl+Alt+2 to switch to the modern view. Curious? See the below steps to learn it quickly.
Step 1
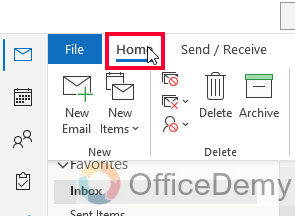
Open Outlook and go to the Home tab.
Step 2
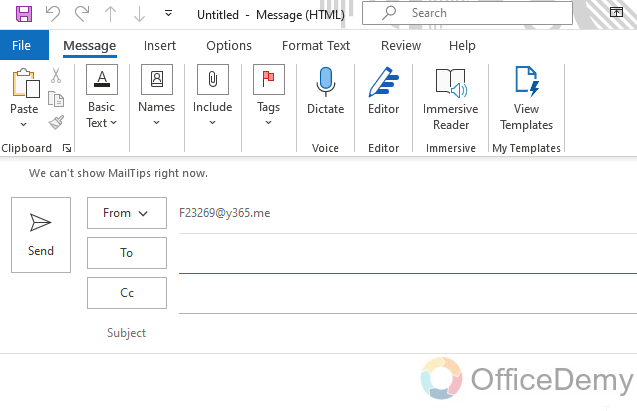
Click on the “New Email” button to open a new email.
Step 3
Press Ctrl+Alt+1 to switch to the classic view or Ctrl+Alt+2 to switch to the modern view.
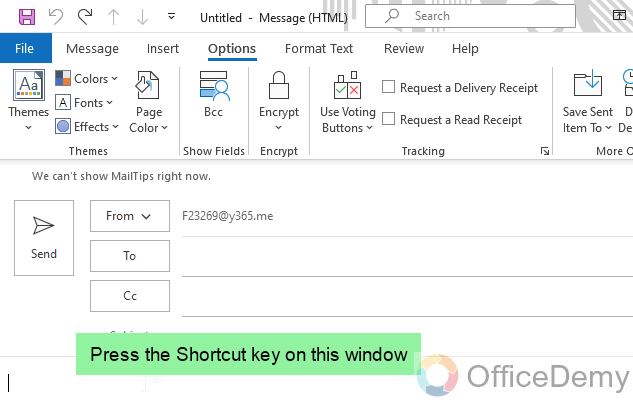
That’s all, I don’t think it could be easier than that. Enjoy!
Important Notes
- Classic View can simplify the Outlook interface for those who prefer it.
- You can change to Classic View by clicking on the View tab and selecting “Classic View“
- The Quick Access Toolbar can also include a Classic View button.
- You can switch to Classic View using the keyboard shortcut Ctrl+Alt+1.
- Changing a registry setting can also switch Outlook to Classic View, but it’s risky.
- The best way to do it is by changing the View to Classic, it can have different methods to follow for different versions.
Frequently Asked Questions
How do I know if I am using the modern or classic view of Outlook?
In the modern view of Outlook, you will see a blue navigation bar with icons for Mail, Calendar, People, and Tasks at the bottom of the window. In the classic view, these icons will be in a toolbar at the top of the window.
Can I switch back to the modern view after changing to the Classic view?
Yes, you can switch back to the modern view by selecting “Toggle to Modern View” from the View tab.
Will changing to classic view affect my Outlook settings or data?
Of course not, changing to the classic view will not affect your Outlook settings or data. It will only change the appearance of the Outlook interface.
Can I customize the classic view of Outlook?
Yes, of course, you can customize the classic view of Outlook by right-clicking on the toolbar and selecting “Customize Toolbar” From here, you can add or remove buttons and tools from the toolbar.
Conclusion
Wrapping up how do I change Outlook to Classic view? I showed you my tricks to do it. The keyboard shortcut method was just amazing I know you all going to use this. Well. I am happy to deliver all the information about this specific topic to you guys, I hope you find this tutorial helpful. I will see you soon, till then take care and keep learning with Office Demy.
How to switch back to the classic / legacy view outlook ?
When you download and install a new version of Outlook, you will notice numerous changes. An example, changes to settings, tools, options, and the user interface. The new version of Outlook contains numerous modifications and also lacks functions that were previously available in the legacy classic edition.
Sometimes Outlook is functioning incorrectly, and finding the source of the problem might be complicated. To repair Outlook efficiently, it is recommended to use a special tool that is able to analyze Outlook data files and find and fix the issues.
Table of Contents
Please enable JavaScript
Outlook for Mac
In the case of Mac, Microsoft has provided the option to return to the previous version and then return to the New Version as desired.
Outlook for Mac has been updated with a redesigned user interface and new features. And if you try to drill down into its features, you may not find what you expect, so you can revert to the old classic one.
How to Switch to New Outlook for Mac?
By default, it will display the legacy outlook, but you can switch to the new outlook by looking in the top right corner for the «New Outlook» Toggle button. Then all you have to do is toggle it.
fig. Switch to New Outlook to try out the new Outlook for Mac.
With Microsoft sync technology, you can rapidly transition between New Outlook for Mac and the latest production version. For this reason, it’s easy for you to compare and experiment with new features and capabilities as they’re made available.
How to switch back to legacy Classic View in Outlook for Mac?
You might not notice these options at first, so here are some simple steps to get a classic View.
1 Click on Outlook in the top left corner.
2 Then deselect the New Outlook option from the list.
fig. Switching Back to Legacy Classic Outlook in Mac
Then your current outlook will be closed, and an old classic outlook will be opened.
Alternatively, you can get it with the help of the Help Menu.
Any time, simply open Outlook and click Help, then pick Revert to the Legacy version of Outlook as shown below.
Before you switch back, you’ll be able to leave comments and set up an in-app reminder for when new features are added to the application.
Outlook for Windows
Current Outlook users can’t switch back to the old version in windows if they have a problem with the layout. However, you can alter your design by changing the layout and design of the outlook.
Changing Reading Pane in Outlook for Windows
1 Open Outlook
2 Goto View Tab
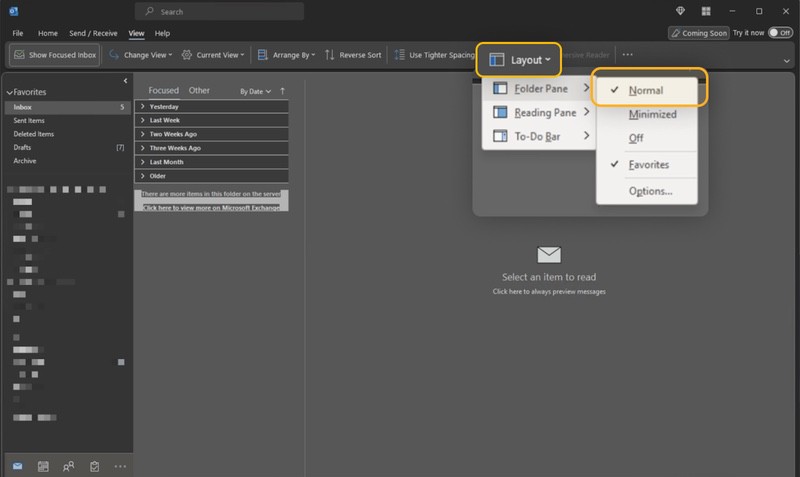
3 Then under the Layout group, click Reading Pane then select your choice whether you want Reading Pane to Right, Bottom, or Off. Reading Pane to Right is something I’m used to, so I’ll change it to Right.
4 Next under the Layout group, click Folder Pane then select your choice whether you want Folder Pane to either Minimized, normal, or Off. fig. Changing Reading Pane Layout in Outlook
Changing Inbox View in Outlook for Windows
You can organize your email to better suit your needs by changing the Inbox view in Outlook.
1 Open Outlook and click on Change View
2 Select Compact View. fig. Change View in Outlook
Changing Message Preview in Outlook
If you want to change «Message Preview» you can do it as follows:
Open Outlook and then go to the View tab. In the navigation ribbon, select «Message Preview» from the drop-down arrow menu. Afterward, you can choose between one, two, or three lines of text to display. fig. Message Preview Layout in Outlook
Change Font, Family, and Size in Outlook to make it look like Legacy Outlook
In the Message List, you can also change the Font and Font Size to make it look like Legacy Outlook. These are the steps to take:
1 Goto View Tab in the title bar
2 Next select View Settings from the Toolbar
3 Choose Other Settings from the popup window.
4 In the next popup window, Select Column Font and Raw Font and set the font family, style, and size you want.
The default font size and family for outlook is 11-point Calibri in black. fig. Outlook font family size to legacy
Change Font Size, Family, and Type of messages in Outlook
The steps are as follows:
1 Click on File
2 Click on Options
3 Click on Mail Tab
4 Click on the Stationary and Fonts button under Compose messages.
5 Under New mail messages, click on Font and set the font family, size, and style.
6 Also Under Replying or Forwarding messages click on Font and set the font family, size, and style.
Is it possible to get Outlook 2016 look a like 2010?

AceOfSpades 
You can remove the «People» image, In Outlook — File — Options — People, and uncheck, «Show user photograph. «

6 Replies

Ross42.
My first thought is a definite «negative.»

Ross42.

Josh_Cunning
Even if there was some workaround to change the Office 2016 look to match with Office 2010. It is going to cause way more problems in the long run.
yeah I can see that

AceOfSpades
You can remove the «People» image, In Outlook — File — Options — People, and uncheck, «Show user photograph. «
This topic has been locked by an administrator and is no longer open for commenting.
To continue this discussion, please ask a new question.
Read these next.
Snap! — Exercise Pays Off in Gold, Halloween Mystery Flavor, E.coli Electricity
Your daily dose of tech news, in brief. Welcome to the Snap! Sorry so late today. Was traveling. Flashback: September 8, 2003: Recording Industry Association of America (RIAA) Sues A Twelve-Year Old (Read more HERE.) Flashback: Septembe.
Office Network slows down after 6-8 hours
Hello,For the past two weeks I have been trying to troubleshoot an office network issue. Currently our network slows down dramatically after 6-8 hours and the only thing that resolves the issue is a complete reboot of our core switch and the network will .
Shutdown — Not Restart — Missing from Start Menu
Start -> Power -> Sleep or Restart only options.Shutdown is not listed. This is not Intune enrolled or a member of a local ad domain. It is Azure AD joined only.This happens logged in as a standard user and administrators. I have check registry setting.
The Birthday Badge Thread
I know I'm a few hours early, but couldn't contain myself any longer (and I might have other obligations tomorrow morning that could prevent me from posting this in any sort of timely manner if I did wait ��)Happy September 8th to the community! As many of.