How to set up OBS Virtual Camera
Why You Need OBS virtual camera Use it as a powerful tool for streaming your games Add multiple sources and set up an unlimited amount of scenes .
Last Updated on June 05, 2023
Why You Need OBS virtual camera
- Use it as a powerful tool for streaming your games
- Add multiple sources and set up an unlimited amount of scenes
- Have advanced audio mixer settings and filters
- Create fully customizable layouts that you may miss in browser-based solutions
But what if you want to get the most out of both — OBS and the current encoder you’re using? The solution is easier than you think. Integrate the layout you created with the help of OBS and use it as a Virtual Camera with live streaming tools like Talk Studio.
How It Works
1. First and most important step is to download OBS Studio on your device. Once downloaded, follow the installation instructions that will pop up (depending on your operating system (OS), steps might be slightly different)
2. Once downloaded and installed, open your OBS studio:
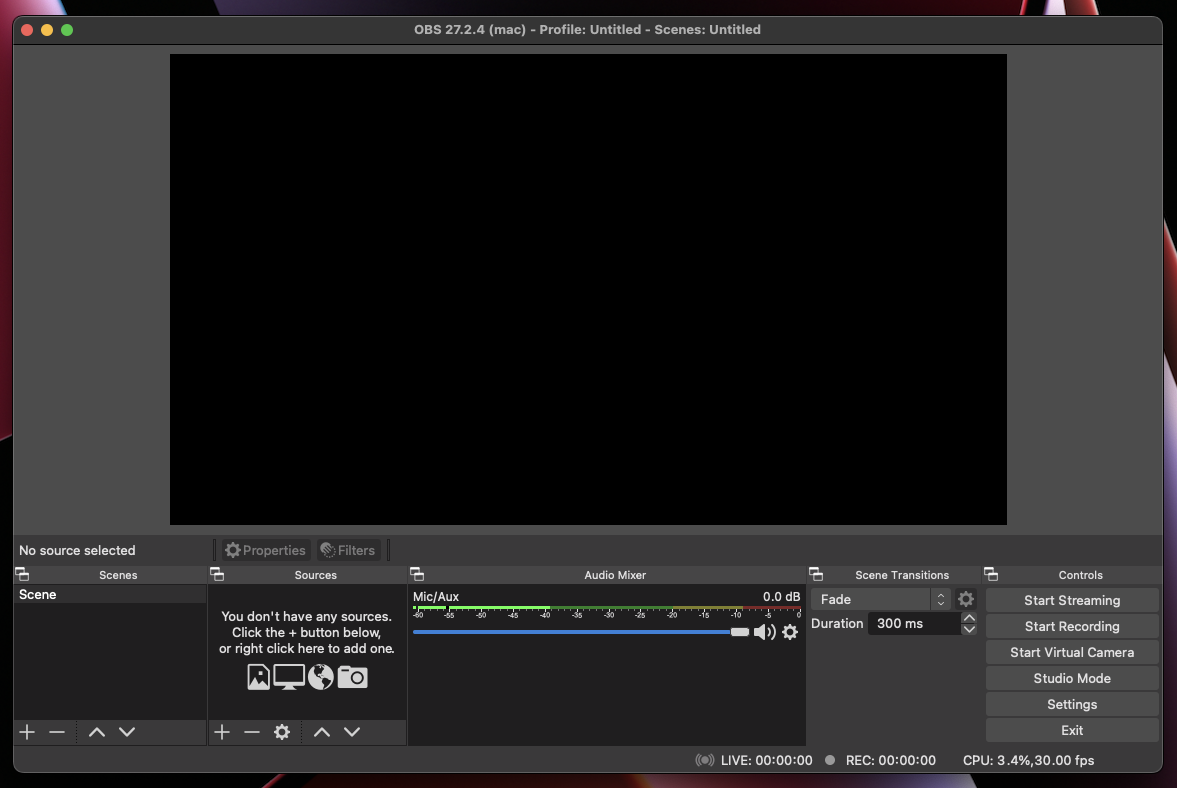
3. Under Sources, click on the + icon to add a new source — we will show you an example with the Video Capture Device option.
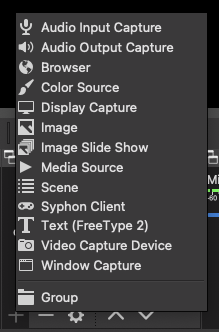
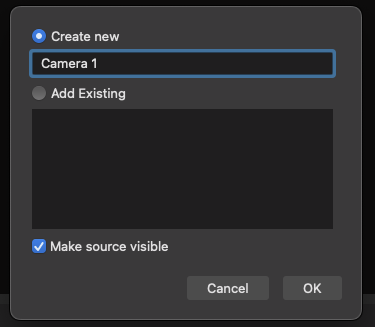
4. Name your Source and click OK.
5. You may see an access request if this is the first time you’re using OBS — please press OK to allow access:
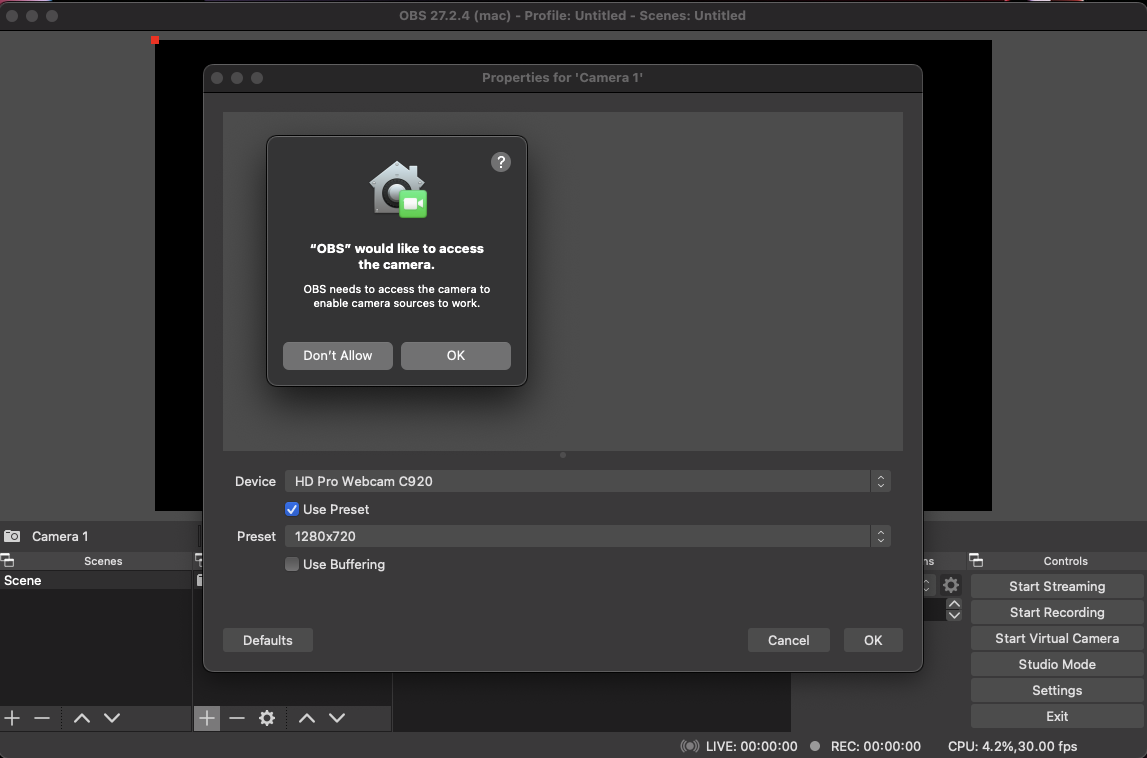 (Mac version)
6. Once you allow camera access, you will see Device options to select from. Please choose accordingly and click OK:
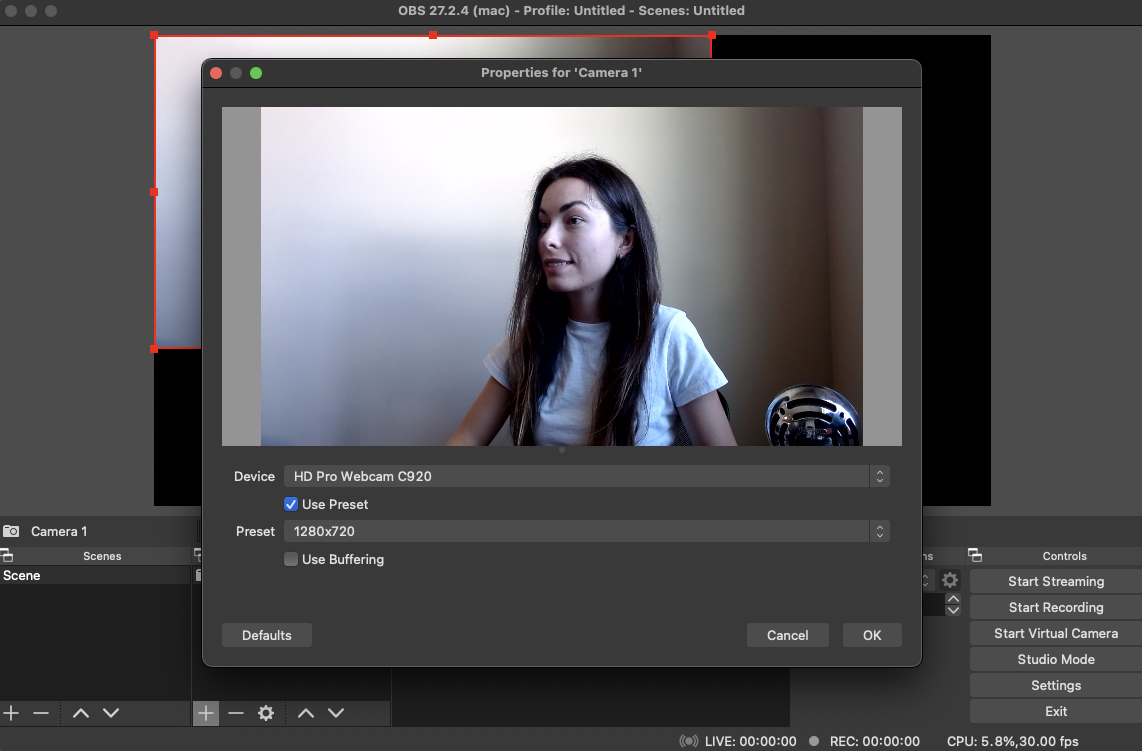
7. You will see a camera added to your main canvas. You now have options to resize your camera feed or change its position on the canvas:
8. Now let’s add a new source by clicking the + icon under Sources — we will be adding an Image this time:
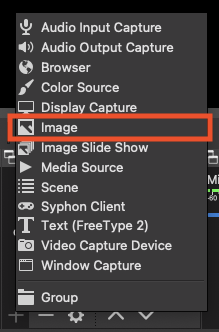
9. Let’s give it a name:
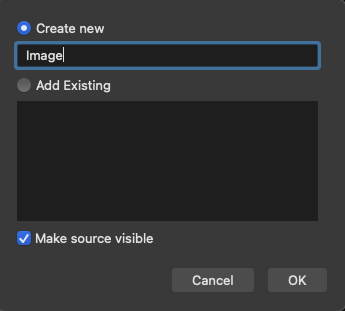
10. Upload the image of your choice from your folder:
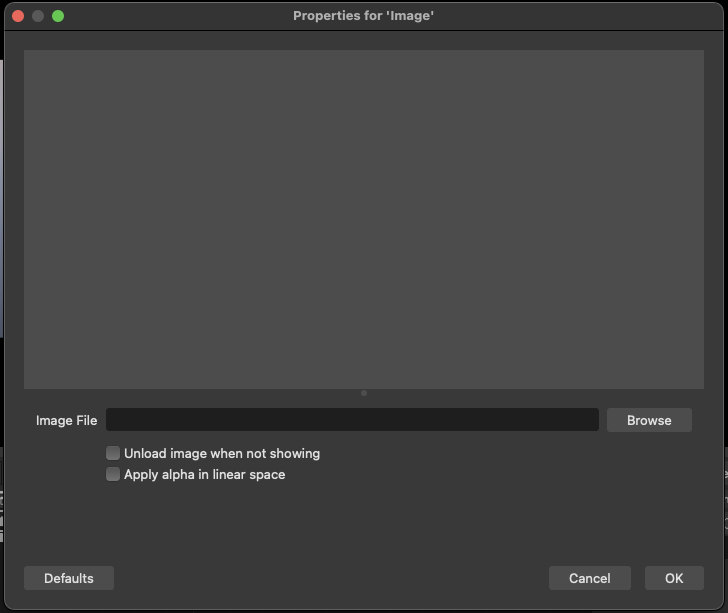
11. Once uploaded — you will see a preview, click OK when ready.
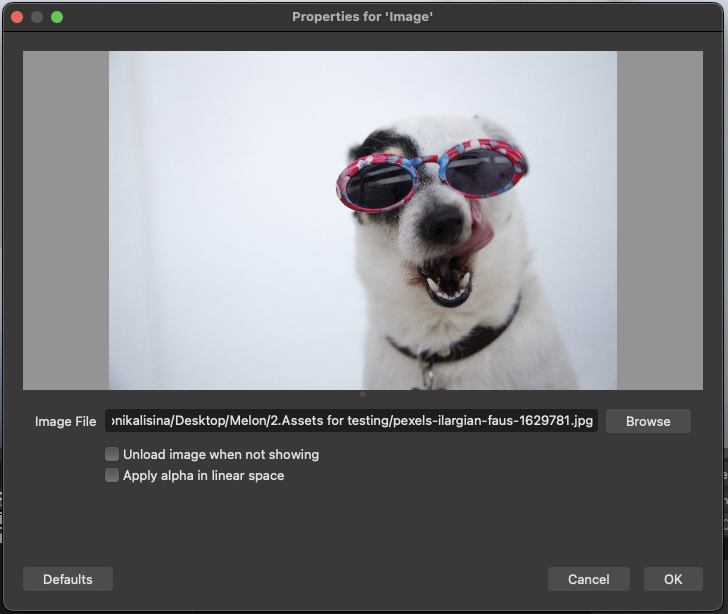
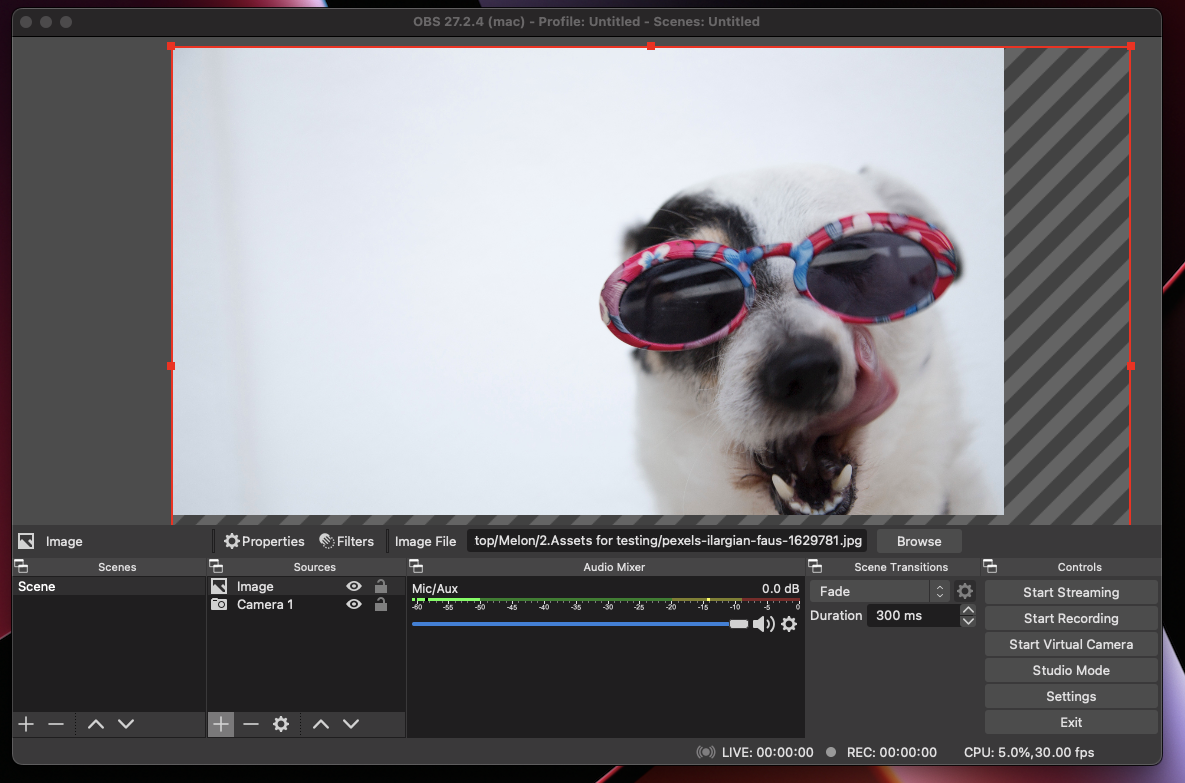
12. If you need to resize, please do so at this point (depending on your layout vision and image dimensions):
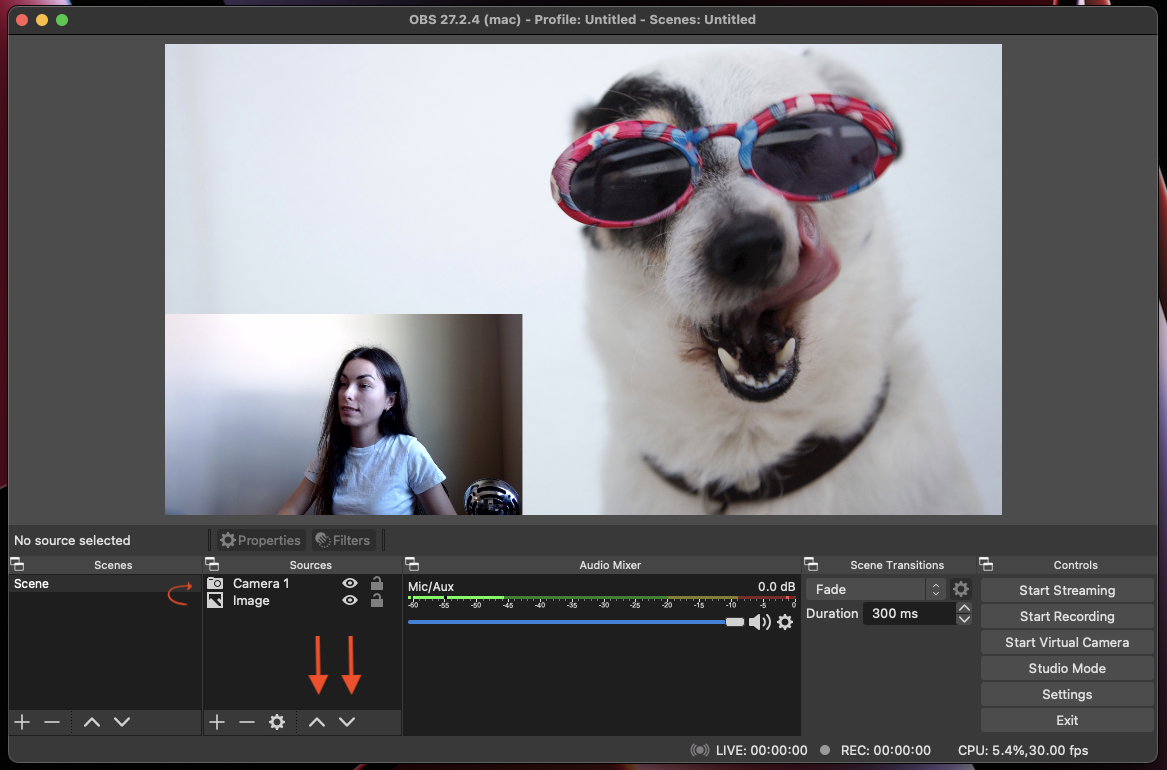
13. You may also notice that your camera is no longer visible. It happens because each new element you add will be forwarded and reflected as the primary source. You can easily make a change in Sources section by dragging and dropping one under another or by clicking on the arrows at the bottom of the section:
Depending on your layout preference, you can add more sources repeating the same steps. We will pause here and show you how you can use newly created layouts in other tools like Talk Studio.
Connecting OBS with Your Tool:
We will be connecting OBS as a camera source on Talk Studio as an example:
1. Open your Talk Studio and add yourself on the main screen by pressing Show on stream.
2. Click the up-arrow next to your Stop Video icon and open the Video Input dropdown:
3. Select «OBS Virtual Camera» from the dropdown.
4. Once you selected OBS Virtual Camera, your Talk Studio canvas will most likely be displayed as the below:
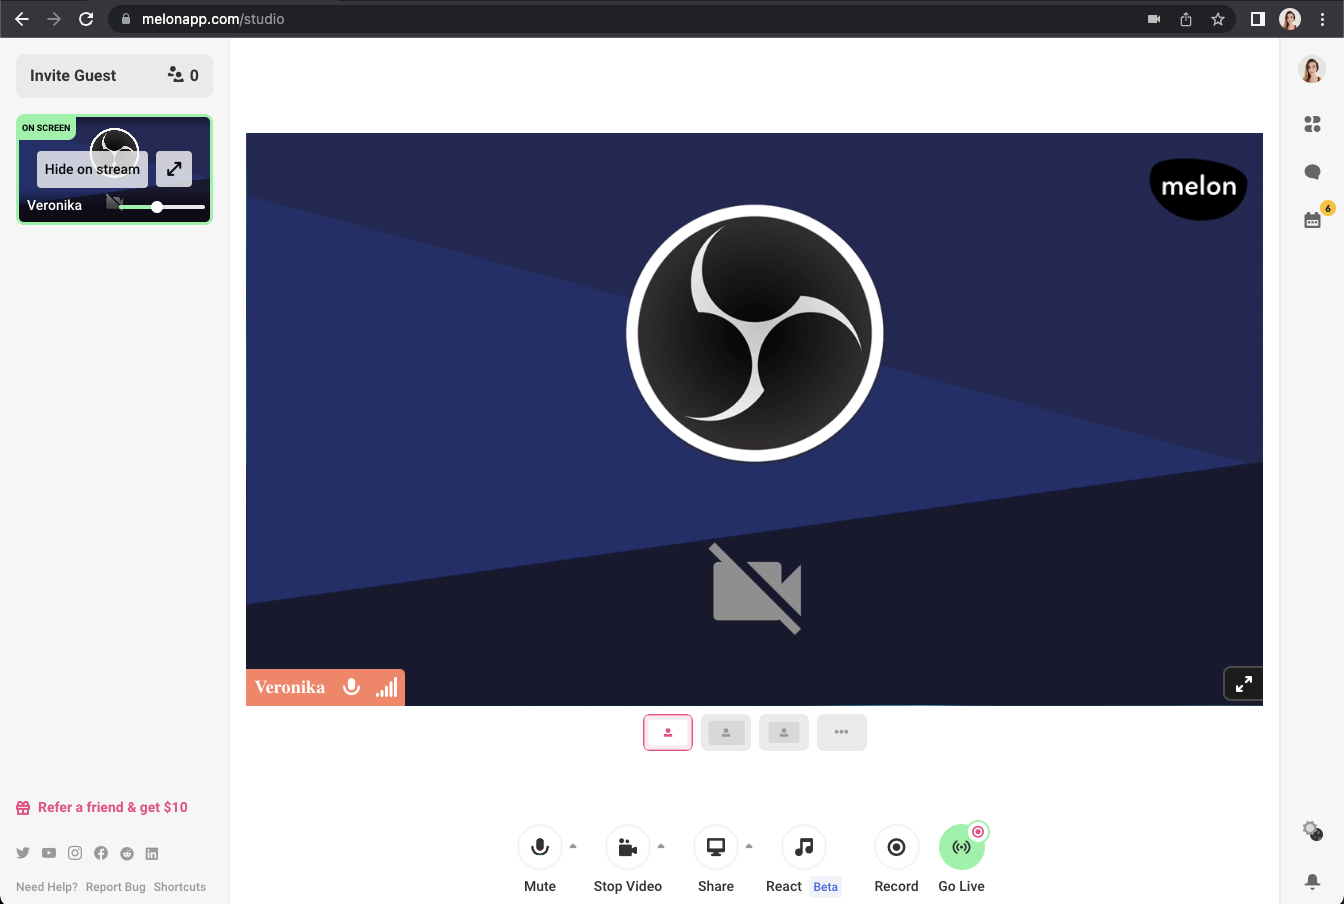
This is expected. We will need to take one more step to fix this:
5. Open OBS and click Start Virtual Camera:
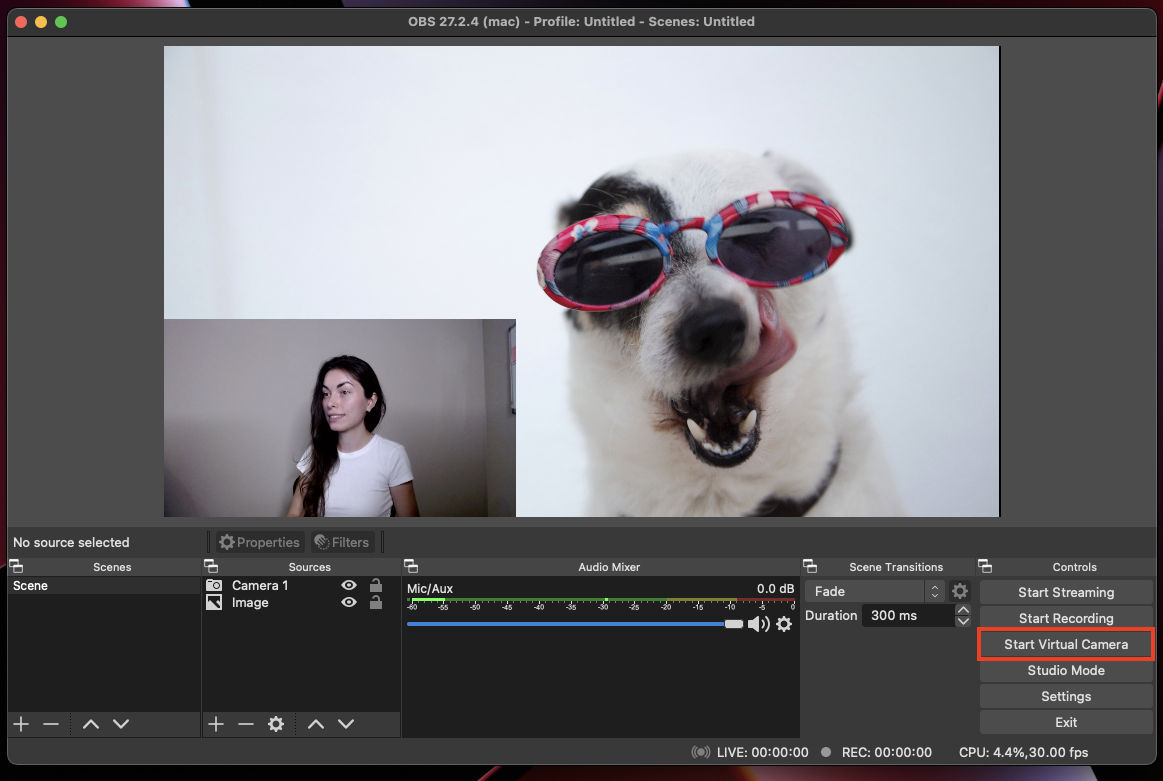
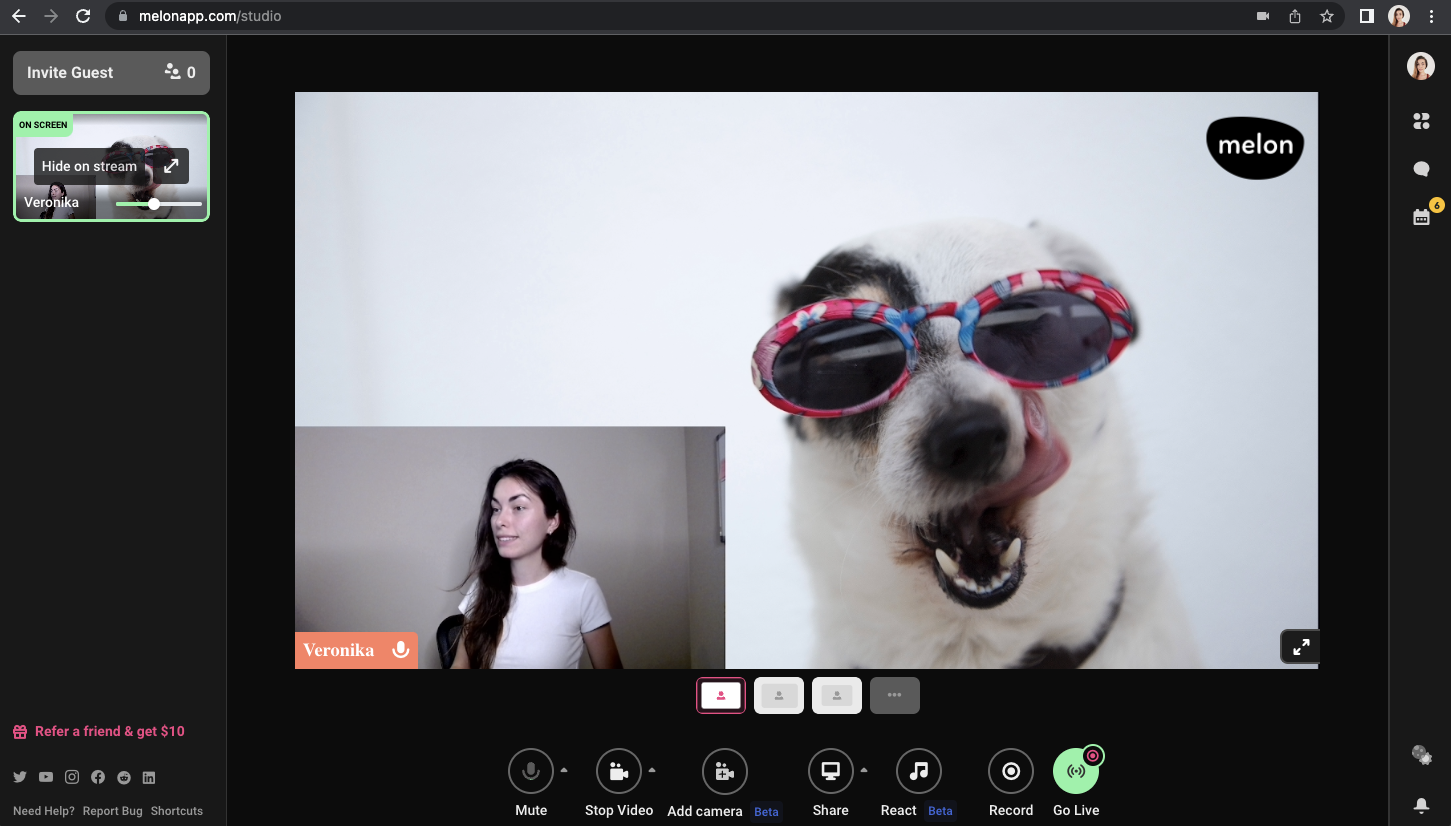
6. You can now go to your Talk Studio and see the new layout of your screen, add overlays, logos and other important elements.
As always, if you have any questions or feedback — don’t hesitate to reach out at [email protected] — we would like to hear from you!
OBS virtual camera with OpenSuse

Wen you search OBS Studio and virtual camera you find a plugin for windows and is hard to find information to how to use with Linux.
On linux is much easiest so I will explain how to install virtual camera.
Install OBS
On open suse obs is updated on the official repository so install it with:
But at this time you cannot see the button for virtual camera.
Install v4l2loopback
Now we must install v4l2loopback with:
Now restart Obs-Studio and you can se the button.
Set your obs studio and start the camera by clicching the new button.
Open VLC and connect to your camera with index 2 and you can see the results.
Now you can use it with Zoom, Teams and what you want.
Conclusions
OBS Studio is a very good software to stream, but it also good to use as virtual camera. Easy to install, easy to use, it is Free and Open-Source!
How to use OBS virtual camera
You can use your OBS software as a virtual camera to get lots of amazing features for your live streams, which you do through a browser or any other streaming software. What’s also cool is that the latest version of OBS doesn’t require you to install any additional plugins or software to use this feature.
The OBS virtual camera allows your computer to use the output from OBS as a video source and present it as a webcam in other software, like Zoom, Skype, Discord, or Google Hangouts. Let’s go through the setup process.
- First, you need to install and set up OBS Studio. You can download it from the official website, install it, and let the Auto-Configuration Wizard set the optimal settings for your device.
- Next, set up scenes and sources you want to be shown on the output preview.
- Now, click the Start Virtual Camera button on the bottom right and you are ready to go. This will allow your computer to use OBS as a video source in another app. Finally, simply choose OBS as a webcam in your other software’s video settings.
�� Pro tip:
With Restream, you can connect to OBS Studio and use your virtual camera in Zoom, Skype, Discord, and other software to live stream your calls and conferences to multiple platforms at once.
What is Restream?

Studio
is the ultimate tool to instantly give your live streams a professional look.

Events
lets you schedule streams in advance and share the links.

Multistream
allows your content to reach a wider audience on social media.

Recordings
gives you access to your stream videos instantly after you finish recording.
Virtual Camera Guide
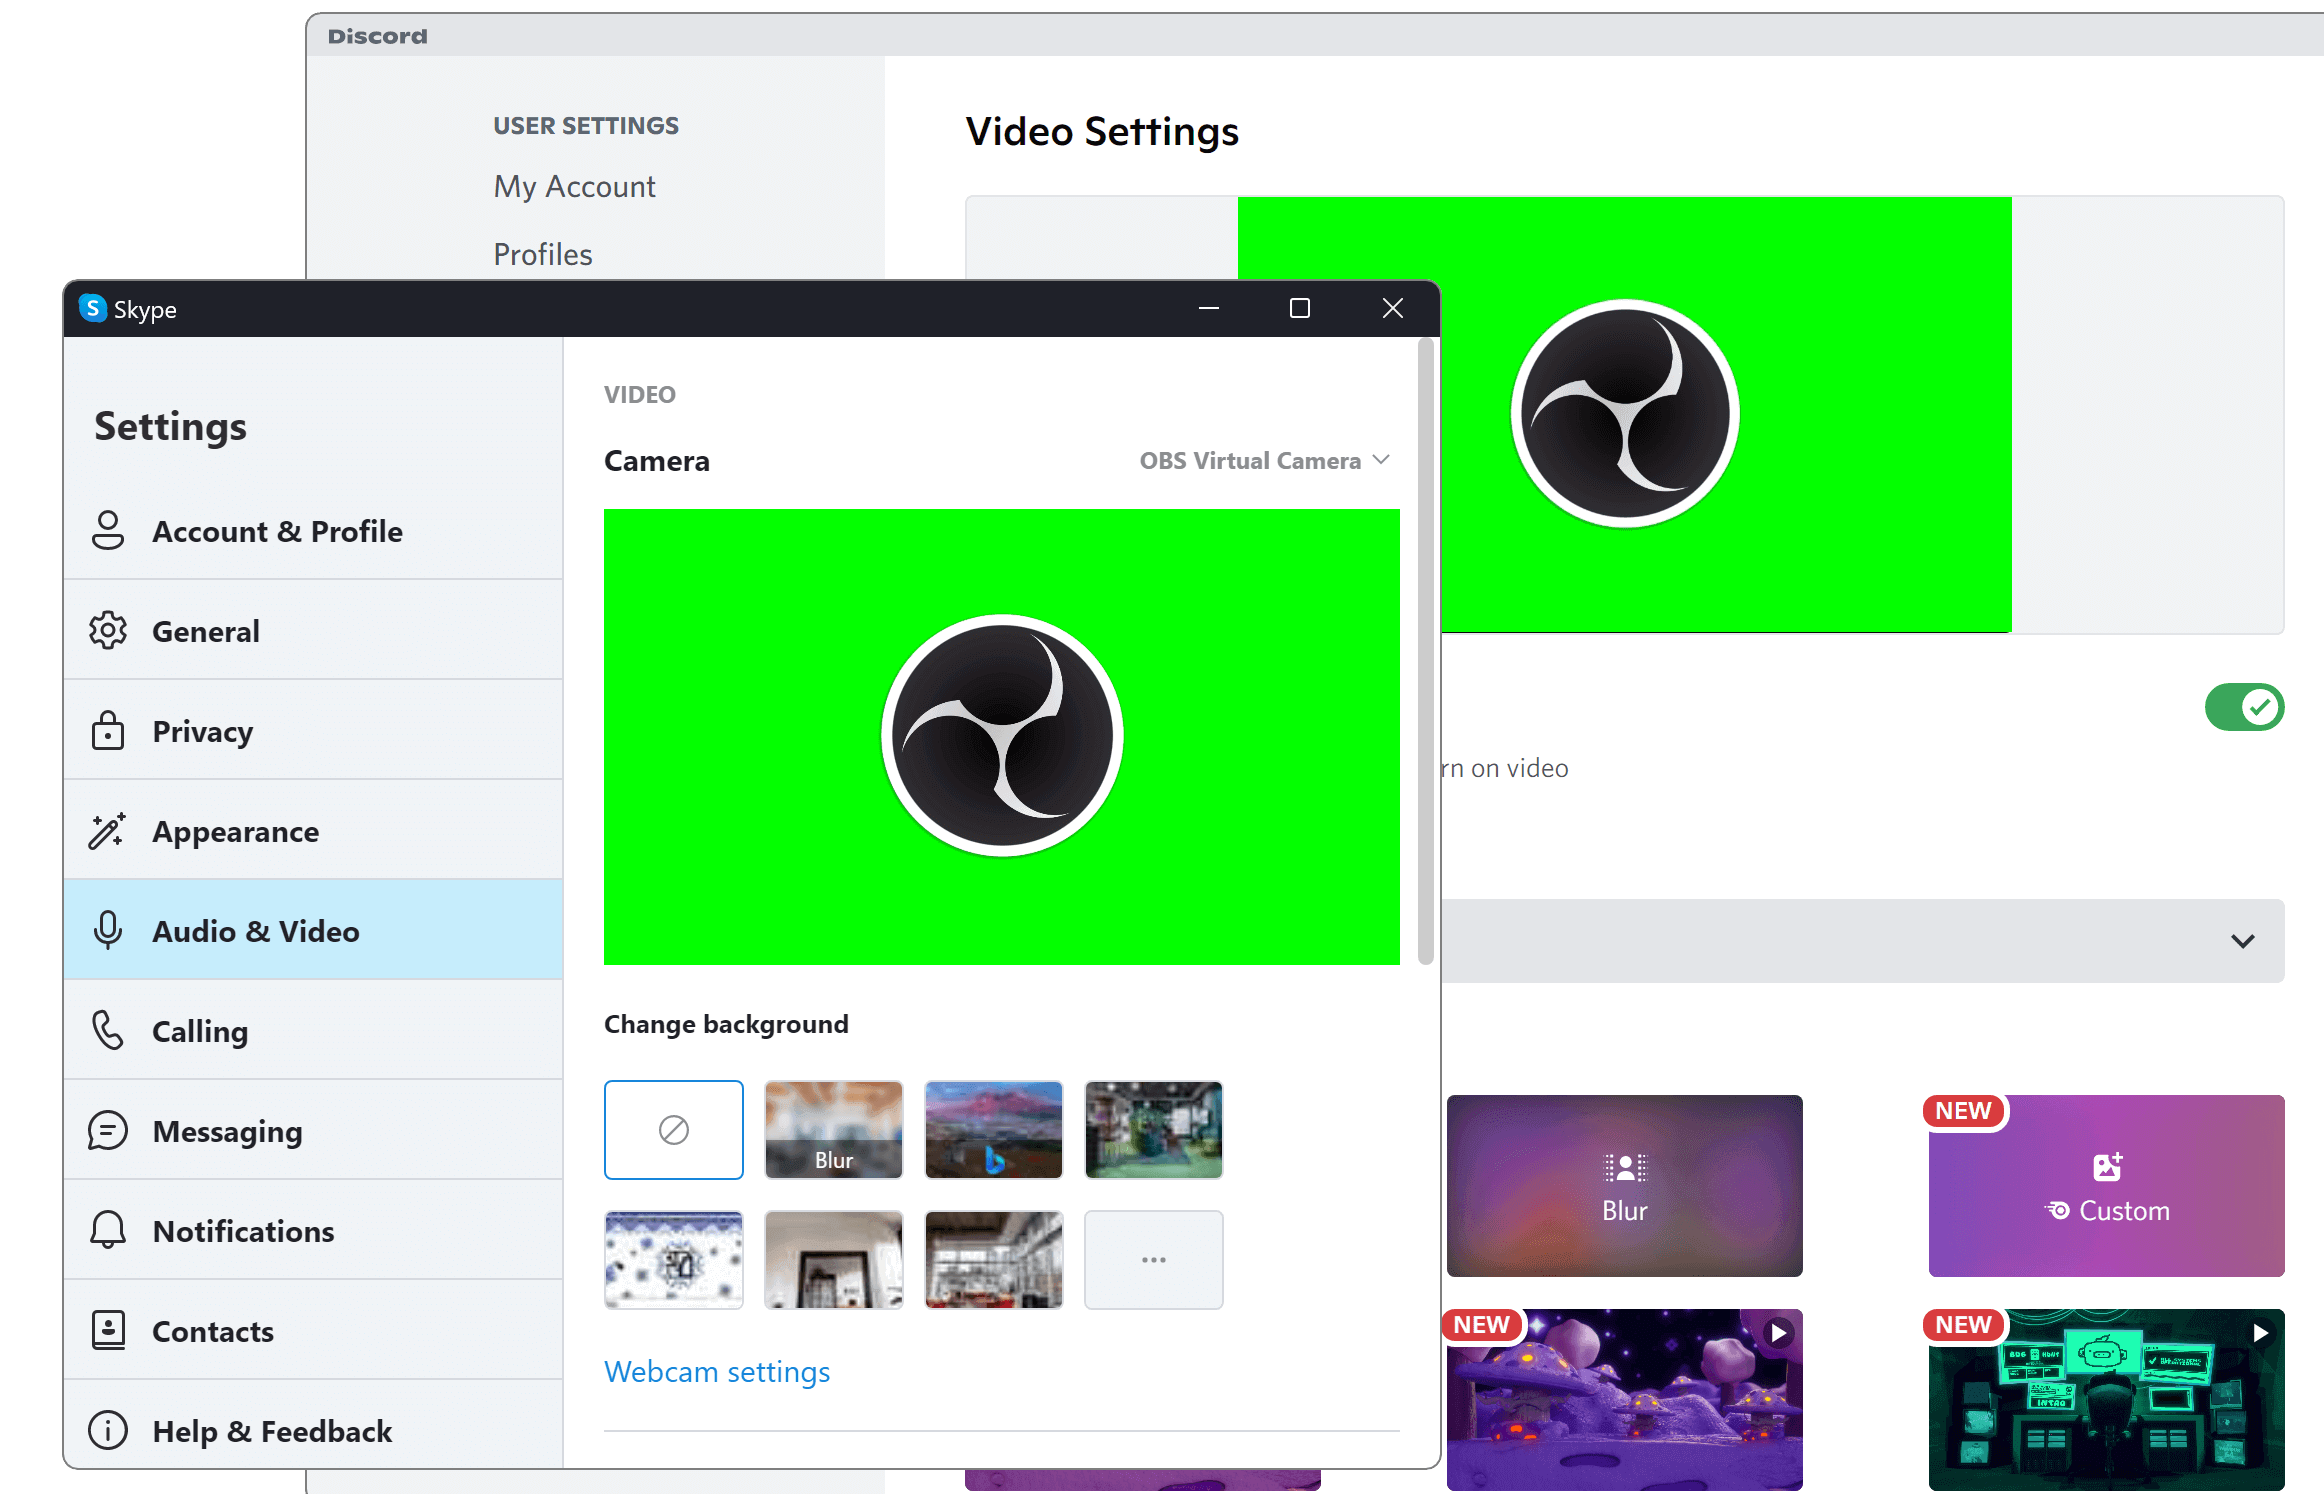
The Virtual Camera is a feature of OBS Studio that allows you to share your OBS Studio scene with any applications that can make use of a webcam, such as Zoom, Skype, Discord, etc. This feature is particularly useful for applications that cannot capture the screen directly.
Using the virtual camera
To start the virtual camera, click Start Virtual Camera in the Controls dock. To stop the virtual camera, click the same button again (which will be labelled Stop Virtual Camera).
To adjust settings for the virtual camera, click on the ⚙ Gear icon in the Controls dock.
From the Virtual Camera settings window, you can adjust the following settings:
- Internal
- Program Output: the virtual camera will show what OBS Studio normally outputs
- Preview Output: if using Studio Mode, the virtual camera will show the Preview. This means anybody watching the video feed will see you changing scenes, making edits, etc.
Show a single source in the virtual camera
In a future update, you will be able to select a single source for the virtual camera to show. Until then, you can show a single source by creating an extra scene containing the source.
- Add a new scene. In this tutorial, it will be called Virtual Camera.
- Add an existing source:
- click on the + Add Source button
- select the type of the source you want to show
- click on Add Existing
- select the source
(Alternatively, you can copy the source and paste a reference to it)
- Your Virtual Camera should contain a single source. You can resize the source to fit the source to the size of the scene.
The quickest method to fit a source to the scene is to right-click on the source and choose: