Sorry, you have been blocked
This website is using a security service to protect itself from online attacks. The action you just performed triggered the security solution. There are several actions that could trigger this block including submitting a certain word or phrase, a SQL command or malformed data.
What can I do to resolve this?
You can email the site owner to let them know you were blocked. Please include what you were doing when this page came up and the Cloudflare Ray ID found at the bottom of this page.
Cloudflare Ray ID: 804228355f68054f • Your IP: Click to reveal 178.175.133.131 • Performance & security by Cloudflare
Установка файлов формата TAR.GZ в Ubuntu

TAR.GZ — стандартный тип архива, использующийся в операционной системе Ubuntu. В нем обычно хранятся программы, предназначенные для установки, или различные репозитории. Установить софт этого расширения так просто не получится, его необходимо распаковать и собрать. Сегодня мы бы хотели в деталях обсудить именно эту тему, показав все команды и пошагово расписав каждое необходимое действие.
Устанавливаем архив TAR.GZ в Ubuntu
В самой процедуре распаковки и подготовки софта нет ничего сложного, все выполняется через стандартный «Терминал» с предварительной загрузкой дополнительных компонентов. Главное лишь подобрать рабочий архив, чтобы после разархивации не возникло проблем с инсталляцией. Однако перед началом инструкций мы хотим отметить, что следует внимательно изучить официальный сайт разработчика программы на наличие DEB или RPM-пакетов либо же официальных репозиториев.
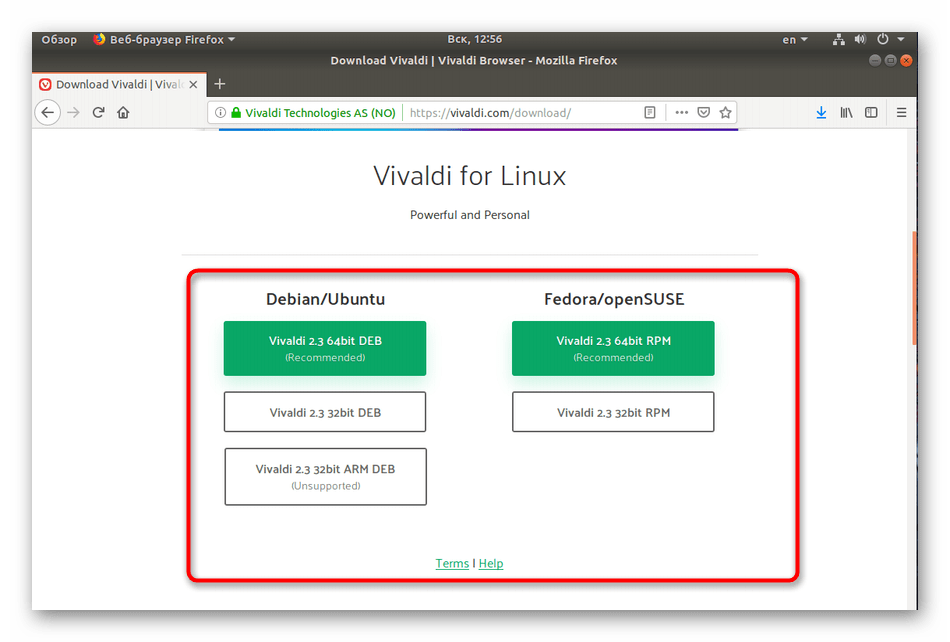
Установку таких данных можно произвести гораздо проще. Детальнее о разборе инсталляции RPM-пакетов читайте в другой нашей статье, мы же переходим к первому шагу.
Шаг 1: Инсталляция дополнительных инструментов
Для осуществления поставленной задачи вам потребуется всего одна утилита, которую необходимо загрузить еще до начала взаимодействия с архивом. Конечно, в Ubuntu уже есть встроенный компилятор, но наличие утилиты для создания и сборки пакетов позволит переделать архив в отдельный объект, поддерживаемый файловым менеджером. Благодаря этому вы сможете передавать DEB-пакет другим пользователям или удалять программу из компьютера полностью, не оставляя лишних файлов.
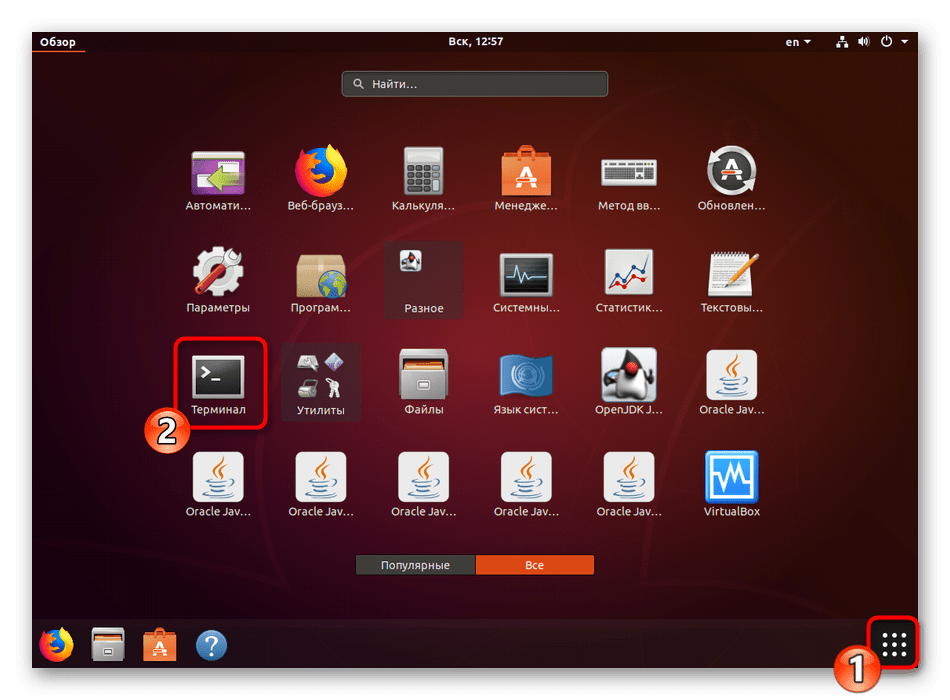
- Откройте меню и запустите «Терминал».
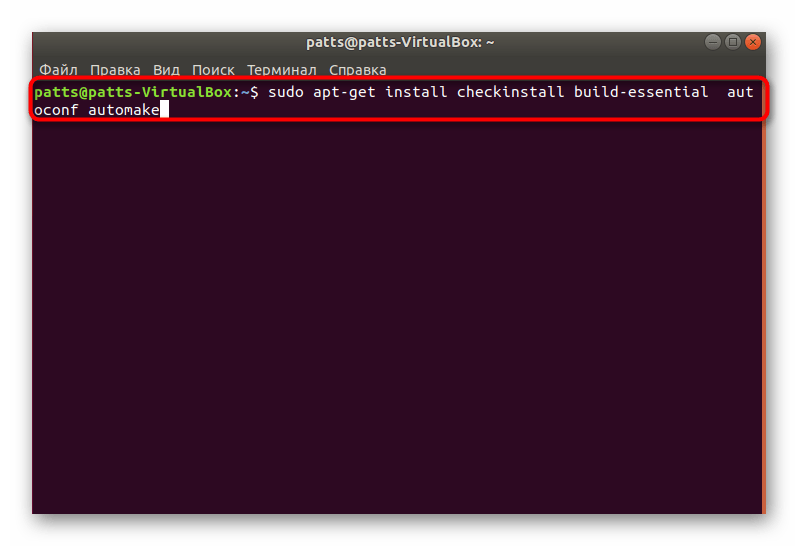
- Введите команду sudo apt-get install checkinstall build-essential autoconf automake для добавления нужных компонентов.
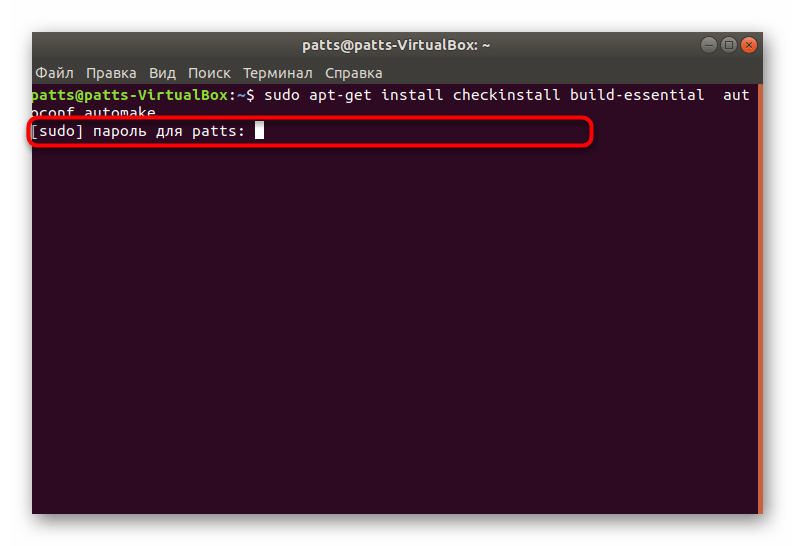
- Для подтверждения добавления потребуется ввести пароль от главной учетной записи.
- Выберите вариант Д, чтобы запустить операцию добавления файлов.
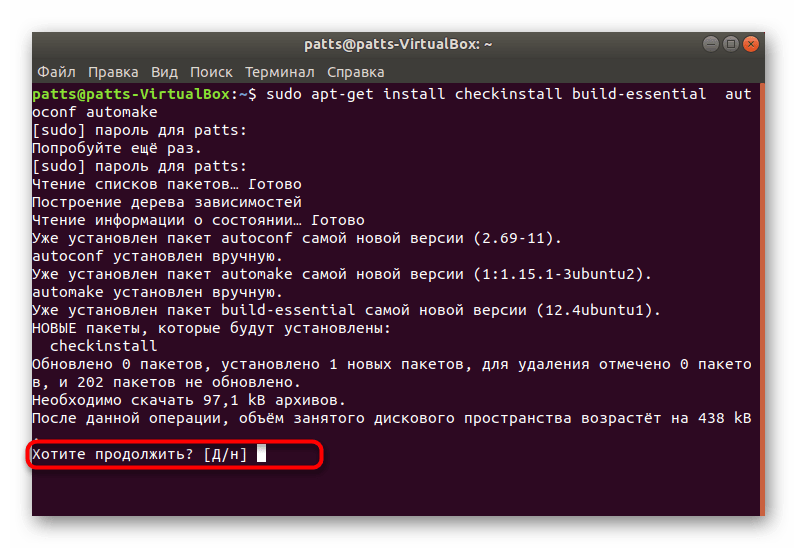
Процесс инсталляции дополнительной утилиты всегда проходит успешно, поэтому с этим шагом не должно возникнуть никаких проблем. Передвигаемся к дальнейшим действиям.
Шаг 2: Распаковка архива с программой
Теперь вам требуется подключить накопитель с сохраненным там архивом или загрузить объект в одну из папок на компьютере. После этого приступайте к выполнению следующей инструкции:
- Откройте файловый менеджер и перейдите в папку хранения архива.
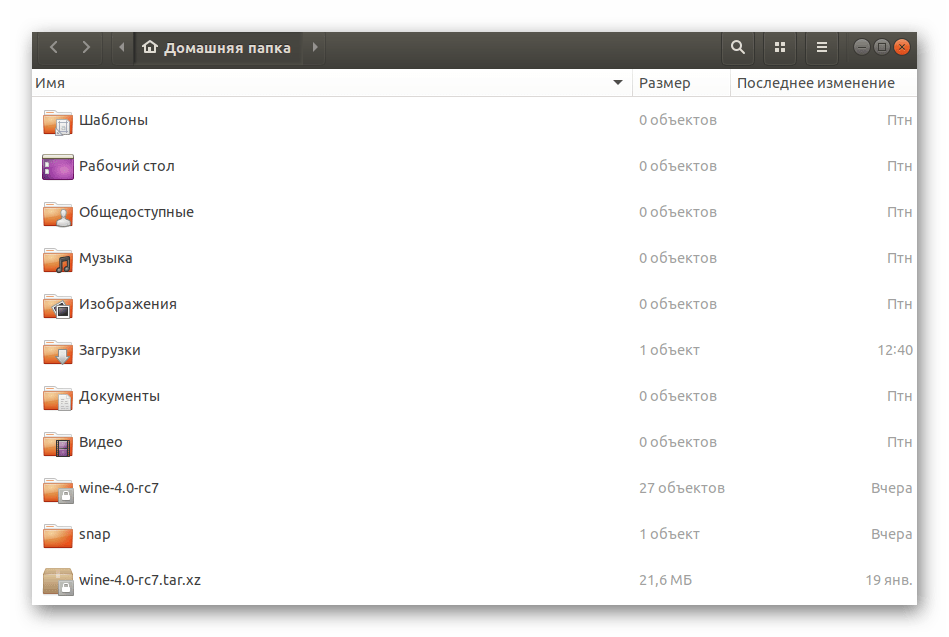
- Нажмите по нему правой кнопкой мыши и выберите пункт «Свойства».
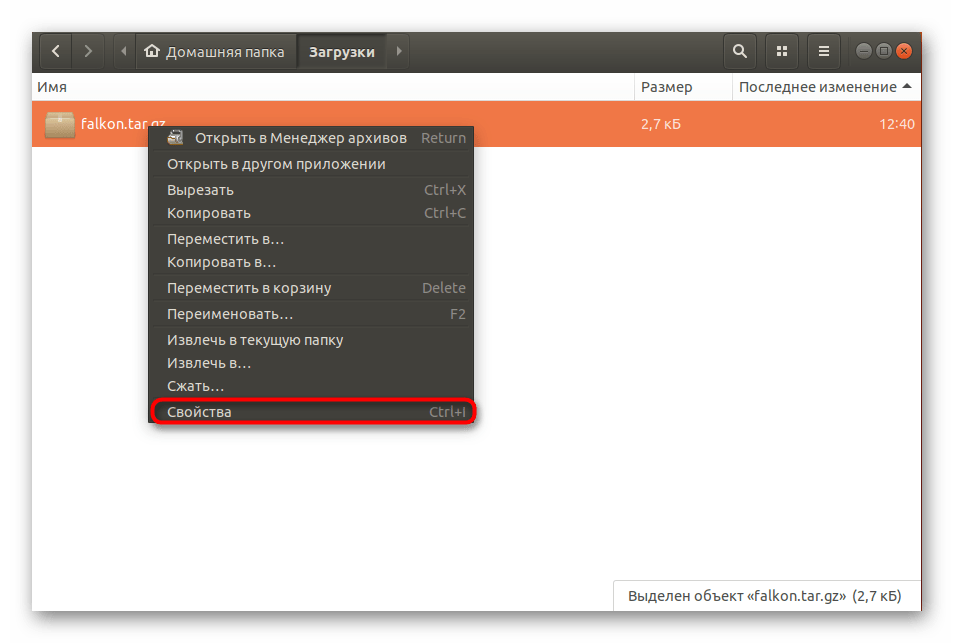
- Узнайте путь к TAR.GZ — он пригодится для осуществления операций в консоли.

- Запустите «Терминал» и перейдите в эту папку хранения архива с помощью команды cd /home/user/folder , где user — имя пользователя, а folder — название директории.
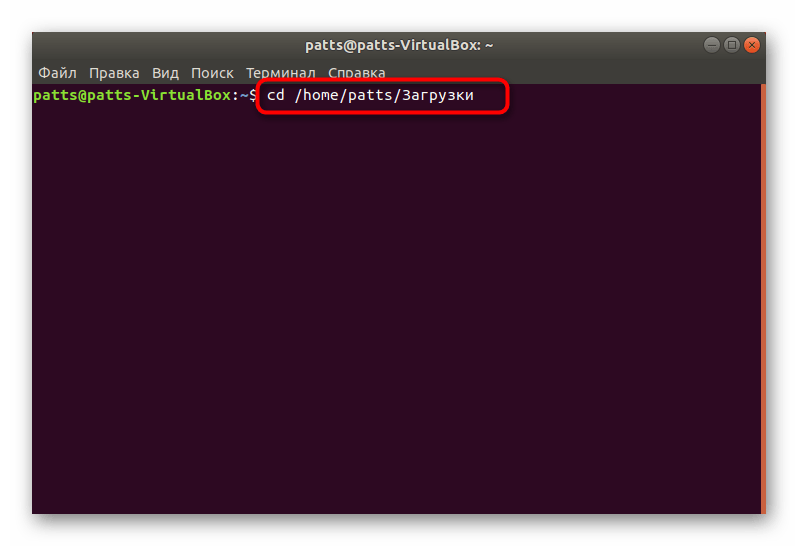
- Извлеките файлы из директории, вписав tar -xvf falkon.tar.gz , где falkon.tar.gz — название архива. Обязательно нужно ввести не только имя, но и .tar.gz .
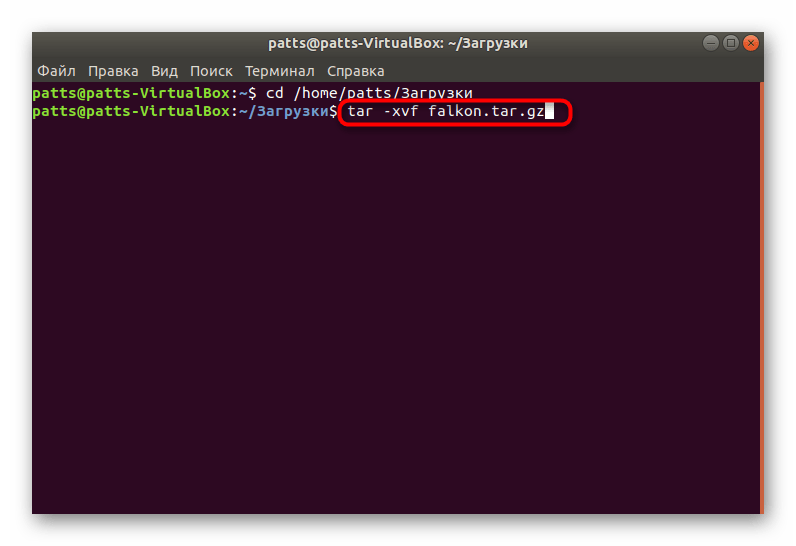
- Вы будете ознакомлены со списком всех данных, которые удалось извлечь. Они будут сохранены в отдельной новой папке, находящейся по этому же пути.
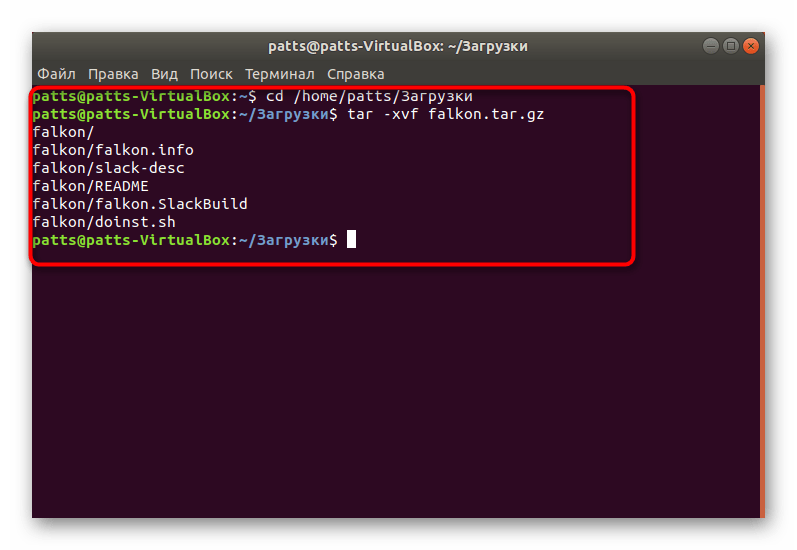
Осталось только собрать все полученные файлы в один DEB-пакет для дальнейшей обычной установки программного обеспечения на компьютер.
Шаг 3: Компилирование DEB-пакета
Во втором шаге вы вытащили файлы из архива и поместили их в обычную директорию, однако это еще не обеспечит нормальное функционирование программы. Его следует собрать, придав логический вид и сделав нужный установщик. Для этого используются стандартные команды в «Терминале».
- После процедуры разархивации не закрывайте консоль и переходите сразу в созданную папку через команду cd falkon , где falkon — название необходимой директории.
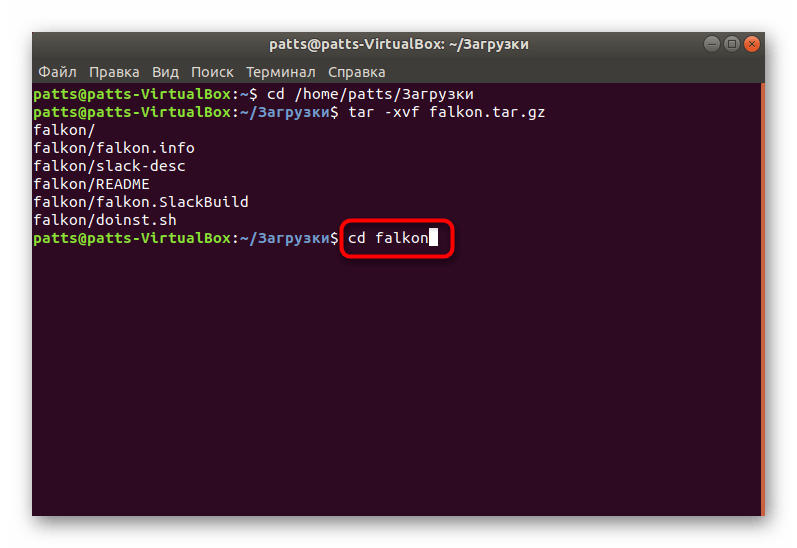
- Обычно в сборке имеются уже скрипты по осуществлению компиляции, поэтому советуем сначала проверить команду ./bootstrap , а в случае ее неработоспособности задействовать ./autogen.sh .
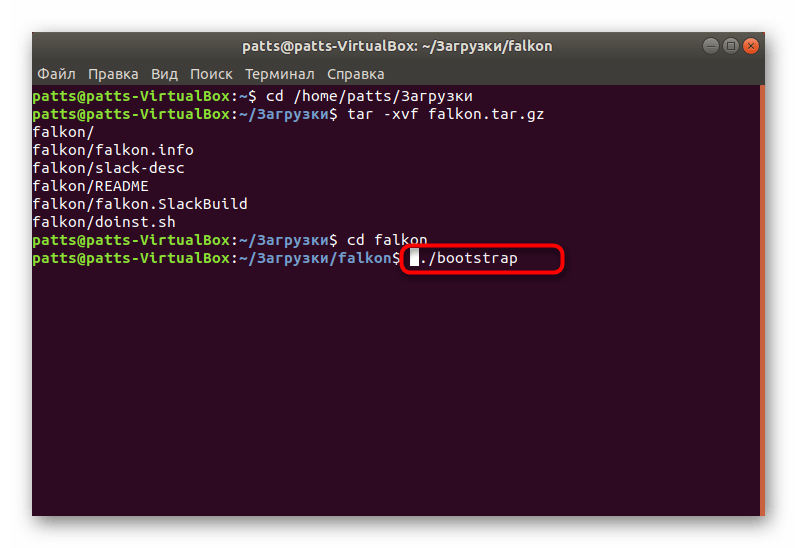
- Если же обе команды оказались нерабочими, нужно самому добавить необходимый скрипт. Последовательно введите в консоль команды:
aclocal
autoheader
automake —gnu —add-missing —copy —foreign
autoconf -f -Wall
How To Install a tar.gz File on Ubuntu. A step-by-step guide
Most of the time, applications are now distributed via the package manager, the app store, snaps, or individual packages. But sometimes, they are only available in a compressed archive, like a tar.gz, that we don’t necessarily know what to do with. If you are in this situation, here is what to do.
In most cases, applications still distributed as tar.gz are just an archive of files that are ready to use. But sometimes, it’s the source code of the program, and it has to be compiled for your system before using it (this can be done with a few command lines).
It’s difficult to give you a short answer to this question, but I’ll make sure to address several examples in this tutorial, so you can find the one that fits your situation and offers a solution.
What exactly are tar.gz files on Linux?
Tar.gz files are simply compressed archives of files and directories. If you are more familiar with Windows, it’s like a Zip file within the Microsoft environment.
Tar.gz is a combination of two technologies:
- The “tar” part stands for “tape archive”, and allows us to gather several files in one piece (in the old days, it was putting several files on the same tape).
- The “gz” part stands for “gzip”, it’s a file compression algorithm.
This file format is often used to create backups (one compressed file storing all the essential files on your PC), but can also be used by software editors, to deliver their applications.
In summary, a tar.gz file can be anything: source code, installer, binaries, or random files. The file extension itself is not what’s important, it doesn’t help you to know what to do with it.
If you want to install some kind of software on your computer and download a tar.gz file, you’ll have to extract it to be able to see the files inside it and understand what to do with them.
In the next section, I’ll explain how to extract files from a tar.gz archive, then we can move to the installation part after that.
How to extract files from a tar.gz archive
Tar.gz files are supported natively on most Linux distributions. That’s why they are often used by software editors.
Whether you have a desktop environment or not, extracting files from a tar.gz archive shouldn’t be complicated. Let’s see how to do it.
With a GUI
If any graphic user interface (GUI) is installed on your Linux system, the tar.gz format is probably already recognized by your distribution.
For example, with Ubuntu, if you double-click on a tar.gz file, you’ll get this message:
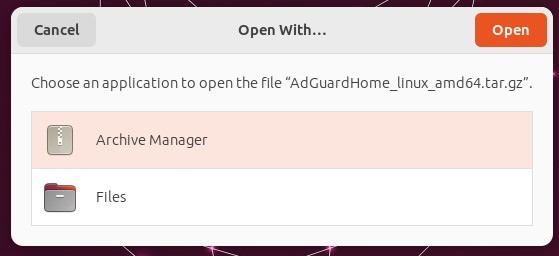
Keep the default application (Archive Manager), and click on “Open” to see the files in it.
Once the archive is opened, you’ll see the files and directories stored in it and can use the app menus to extract them wherever you want.
Another option is to right-click on the file in your Downloads folder. On Ubuntu, you’ll have access to “Extract” and “Extract to…” directly from this menu:
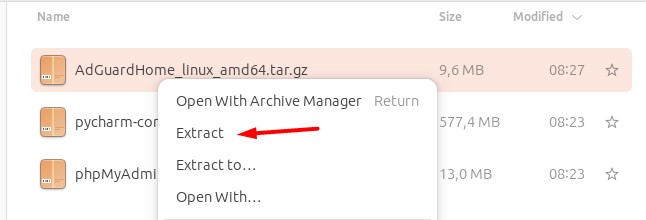
By using one way or the other, you should get a folder containing all the files that were included in the archive. You can then move to the next part to understand what to do with them.
In a terminal
And if you don’t have a GUI, or want to use the terminal instead, the command used in the background is “tar”, which can handle gzip compressed files natively.
To extract a tar.gz file to the current directory on Linux, simply use:
tar -zxvf <filename>
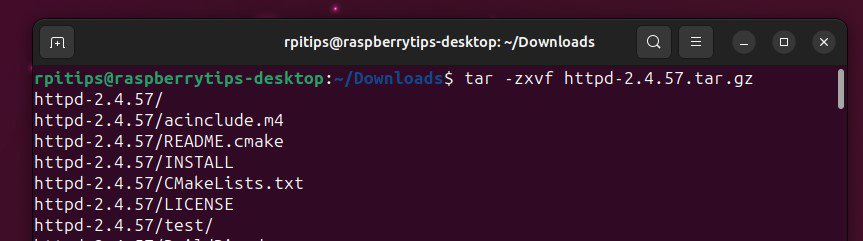
And if you are wondering, here are the options I generally use when extracting a tar.gz file:
- -z: The archive file is compressed with Gzip.
- -x: Ask to extract the files from the archive.
- -v: Verbose. List files processed while extracting them.
- -f: Filename is specified in the command line.
If you’re new to the Linux command line, this article will give you the most important Linux commands to know, plus a free downloadable cheat sheet to keep handy.
Reminder: Remember that all the members of my community get access to this website without ads, exclusive courses and much more. You can become part of this community for as little as $5 per month & get all the benefits immediately.
How to install an application distributed as a tar.gz
Once the content of tar.gz archive is extracted, it’s time to analyze the files to understand what to do with them.

Quickly analyze the files
In most cases, extracting a tar.gz archive will create a new folder on your computer, will all the files in it. Start by moving to this folder and taking a look at its content. Use the file explorer, or these commands in a terminal:
cd <folder>
ls
The goal here is to see if there is any kind of hint that can help us to decide what these files are. With experience, you’ll quickly find patterns and understand what to do with them.
For example, after testing the extraction of the Apache archive in the previous section (http-2.4.57.tar.gz), I see all these files:

I have highlighted files that tell me that we typically have the source code here, and we need to compile it, but it depends on the app you try to install, in general, it will be:
- Software sources: like in the Apache example. A tar.gz file containing files like “configure”, “Makefile” or “build” is typically the source code of the application, that needs to be compiled and installed manually.
- Binaries: Files are ready to use. You’ll generally have a file with the name of the application that you can run directly.
- Installation script: Typically a file named “install.sh” or “something.run”, that you can run to get the application installed “automatically”.
I’ll give you one example for each scenario in the following, but let’s see first how to know which case you are in.
Check the documentation
The easiest way to know how to install a tar.gz file on Linux is to check the official documentation. The editor will generally explain what to do with the file once downloaded.
It’s not so common anymore to get a tar.gz file, and editors know that it’s a pain point for their users to have to figure out what to do with it and install it. So, they will generally have at least a few lines on the download page explaining what to do with it.
Also, check in the extracted files, you’ll often have a README, INSTALL or DOC file giving you more details. For example, with Apache, the documentation URL is mentioned in the README file.
3 examples
Case 1: Software sources
If you identify that the files included in the archive look like my previous screenshot with Apache, including “configure”, “makefile” or “.cpp” files, you are typically in this scenario, where you have to compile the program yourself before you can use it.
You’ll likely need a few prerequisites, at least the command to build a C or C++ program, like this meta package:
sudo apt install build-essential
Double-check the documentation to find a list with the requirements of the packages, or you’ll likely get a ton of errors during the next step.
Once done, the installation is generally in three main steps:
-
Step 1 – configure: A first script is run that will check that you have all the prerequisites installed on your system. You’ll get an error each time a package is missing.
It can be 3 packages as well as 300, that’s why finding the information on the editor’s website is really helpful and will save you a lot of time.
The main command to do this is:
./configure
But there are often parameters that can be used to adjust the options for the installation, so once again, make sure to read the documentation first.
My goal here is just to explain the general steps to follow when you install a program from the source code. Steps, commands, and options might be different for all applications and depend on your environment.
In summary, when you get a tar.gz file with the source code of an application in it, these are generally the steps to follow to install it on your system:
./configure
make
sudo make install
If you have any doubts, you can always run the first command and see what happens. At worst, you’ll get an error telling you no such script is available, and you’ll know that you are not in this case.
Note: This was really to give you an example. If you want to install Apache on Linux, click on the link and install it via the package manager, it’s way easier ;-).
Case 2: Files are ready to use
Sometimes, applications are distributed as binaries included in a tar.gz file. They are ready to use, we’re just looking for something more complicated when it’s straightforward.
For example, PyCharm, a text editor for Python developers, can be downloaded as a tar.gz file on their website. When you extract the files, you’ll get something like this:
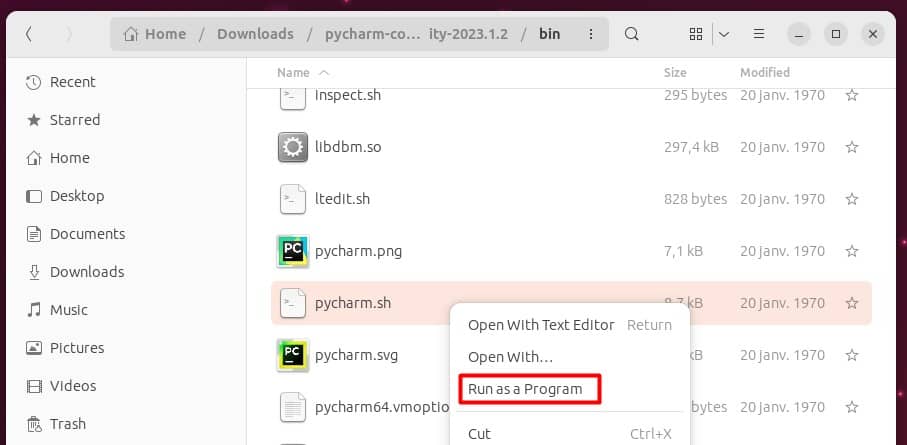
It looks like source code, but if you run “pycharm.sh” directly, the app will open, and you can start using it. It’s probably a good idea to move the files away from your Downloads folder but it works directly, no installation is required.
Another example, that works a similar way (even without a GUI), is AdGuard Home. It’s an ad-blocker, running as a server. As illustrated by the screenshot below, there is almost only one file in the tar.gz archive, and when you run it the app starts directly.
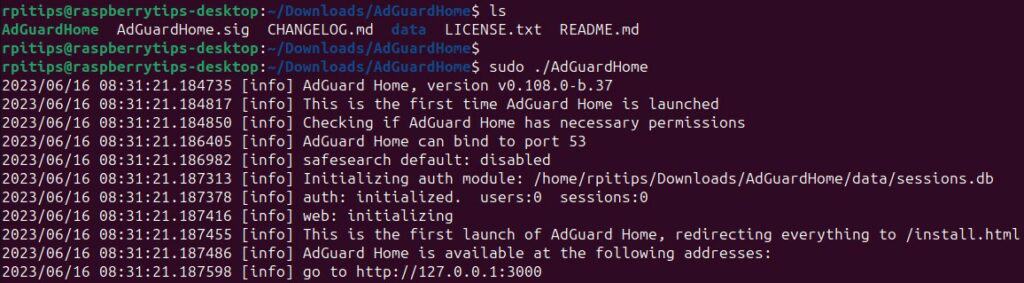
In a terminal, you can run an app with:
./<filename>
Or, like with AdGuard, if root privileges are required:
sudo ./<filename>
Case 3: An installation script is included
And the last scenario you may encounter is that a manual installation is required, but the editor helps you with an installation script.
You’ll typically have a file named “install.sh” inside the extracted folder.
Run it from a terminal with:
./install.sh
And follow the instructions to complete the installation.
The current trend is rather to make you download the installation script directly (from GitHub or other platforms), rather than giving it to you via a tar.gz archive, but you may still encounter this scenario with some applications.
Anyway, I hope this article gave you a better overview of the possibilities and what you should do with a tar.gz archive.
In summary, to install a tar.gz file on Ubuntu:
- Extract the files.
- Check the developer’s documentation or the extracted files list for clues.
- Follow the instructions to compile, install or run the application, depending on the situation.
And if you need more tutorials about Linux or Ubuntu, here are a few suggestions:
Additional Resources
Lost with the command line?
You don’t need to learn and remember everything, just download my cheat sheet where I explain the most important commands on Linux, with a brief explanation and some examples.
Download my free PDF cheat sheet.
VIP Community
If you just want to hang out with me and other Linux fans, you can also join the community. I share exclusive tutorials and behind-the-scenes content there. Premium members can also visit the website without ads.
More details here.
Need help building something with Python?
Python is a great language to get started with programming on any Linux computer.
Learn the essentials, step-by-step, without losing time understanding useless concepts.
Get the e-book now.
How do I install a .tar.gz (or .tar.bz2) file?
I have downloaded tar.gz files. But I don’t know how to install it. How do I install this kind of file?

14 Answers 14
The first thing you need to do is extract the files from inside the tar archive to a folder. Let’s copy the files to your desktop. You can extract an archive by right-clicking the archive file’s icon inside your file browser and pressing the appropriate entry in the context menu. Extracting the archive should create a new folder with a similar name. e.g. program-1.2.3 . Now you need to open your terminal and navigate to that directory using the following command:
Make sure you read a file called INSTALL , INSTALL.txt , README , or something similar if one was extracted. You can check if such a file exists from the terminal by using the ls command. The file can be opened and read with the command:
Where INSTALL is the name of your file. This file will contain the right steps to follow to continue the installation process. Usually, the three «classical» steps are:
You may also need to install some dependencies if, for example, running configure prompted you with an error listing which dependencies you are missing.
Remember that your mileage may vary.
/src to keep my Desktop clutter free 🙂
You cannot «install» a .tar.gz file or .tar.bz2 file. .tar.gz files are gzip-compressed tarballs, compressed archives like .zip files. .bz2 files are compressed with bzip2. You can extract .tar.gz files using:
Similarly you can extract .tar.bz2 files with
If you would like to see the files being extracted during unpacking, add v :
Even if you have no Internet connection, you can still use Ubuntu’s package management system, just download the .deb files from http://packages.ubuntu.com/. Do not forget to download dependencies too.
For an easier way to install packages offline, see the question How can I install software offline?.
How you compile a program from a source
- Open a console
- Use the command cd to navigate to the correct folder. If there is a README file with installation instructions, use that instead.
Extract the files with one of the commands
- If it’s tar.gz use tar xvzf PACKAGENAME.tar.gz
- if it’s a tar.bz2 use tar xvjf PACKAGENAME.tar.bz2
Download a package from the software sources or the software center.
If you install a package via the software sources and not downloading the package on your own, you will get new updates to that package and install them via the Update Manager.
You could just install MYPACKAGE by typing in a terminal:
or by using the software center and searching for MYPACKAGE . But if it’s not there go with the source.
/yourprogram . Then put
/yourprogram/bin in your $PATH or make symlinks to it in
This is only for .tar.* files which have the code pre-compiled but packed into a tar file.
Okay, this is a fairly challenging task for a beginner, but just follow my instructions, and it should be fine.
First off, download the .tar.* file, and save it. Don’t open it. (In these examples, I’ll be installing the Dropbox Beta build, because I was going to install it anyway, so I figured that I might as well document the installation.)
After you’ve downloaded your file, (assuming that you saved it to Downloads ,) type the following:
NOTE: use the name of whatever file you downloaded. (e.g., for the Firefox Nightly 19.0a1 64-bit build, you would type sudo cp firefox-19.0a1.en-US.linux-x86_64.tar.bz2 /opt/ )
Now, change to the /opt/ directory, extract the program, and remove the old file:
(again, use the name of the downloaded file. Don’t forget the extension.)
Okay, check to see what the extracted folder is called:
you’ll get something like this:
Okay, in our example, we installed Dropbox, and the only folder there is called .dropbox-dist . That’s probably the folder we want, so plug that in to the next step (add a / to the end, since it’s a folder.):
Okay, it’s now marked as executable, so it’s time to create a symbolic link (this is what allows you to run it from the Terminal):
NOTE: this is sudo ln -s /opt/
Okay, you’re done. The program is now installed and runnable from the Terminal.
What’s this? You say you want to run it from the launcher, AND you want it to have an icon? No problem!
This part is fairly simple:
NOTE: If you’re installing OVER a previous installation, use ls -a /usr/share/applications and search for pre-existing .desktop file. Plug that file’s name in instead.
Now, here’s where you create the icon. Here’s good template; edit it appropriately.
You may want to leave off the MimeType option completely. That could be very bad if you didn’t.