How To Open SVG Files In Photoshop

While Photoshop is not usually used to edit scalable vector graphics (SVG), it is useful to know how to open SVG files in Photoshop. Adobe Illustrator is primarily used to create and edit SVG files, but sometimes you may need to add SVG files to your Photoshop project.
To open an SVG file as a rasterized layer go to File > Open and select your SVG file. Alternatively, you can open an SVG as a vector by creating a new document, going to File > Place Embedded or Place Linked, and selecting the desired SVG file.
With these two methods to open SVG files, you can take advantage of raster or vector layers depending on your project. Let’s get into this process more in-depth and discover when you should use each of these opening methods.
How To Open SVG Files In Photoshop
Photoshop has two ways to open an SVG file, as a rasterized layer or as a vector layer. Follow these steps to open your file.
1. As A Rasterized Layer
To open your SVG file as a rasterized layer, select Open from Photoshop’s home screen. You can also navigate to File > Open or press Control + O (Windows) or Command + O (Mac).

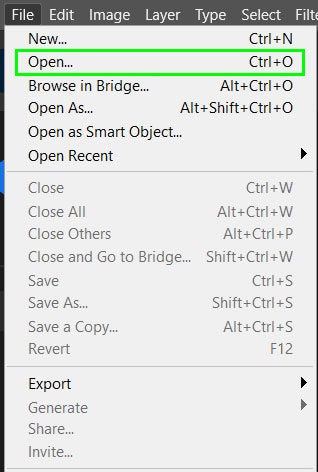
A window will open to allow you to select a file from your computer. Select the SVG file you would like to open and select Open at the bottom right of the window.

Once you select Open a new window will pop up to give you options of how to rasterize the layer. If you change the width and height of the file, it may distort your image. You can change the resolution if needed, although 300 pixels/inch is fine if you don’t need a specific resolution.
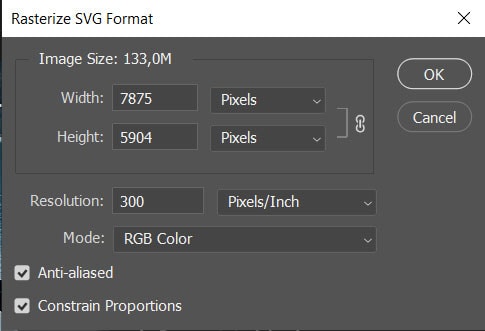
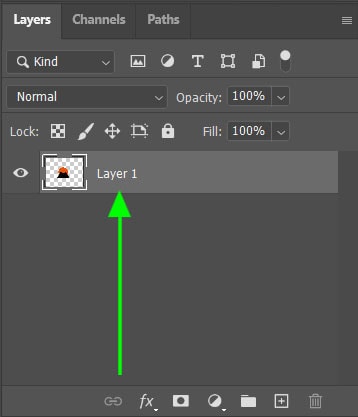
Once you select OK, the image will open as a rasterized layer. You can now edit it just like any other Photoshop layer.
2. As A Vector Layer
To open an SVG file as a vector layer, you first need to create a blank document to place the vector layer on. To create a new document, select New file from the Photoshop home screen, or navigate to File > New. Alternatively, press Control + N (Windows) or Command + N (Mac).

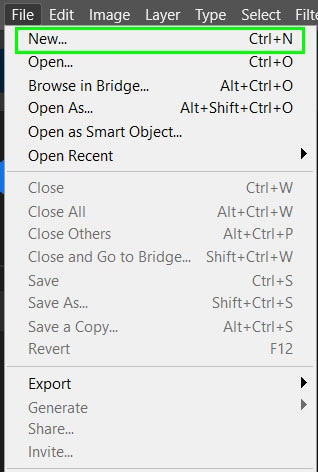
Next, set the parameters for your document in the window that pops up. You can adjust the width, height, resolution, and other elements in this window. Select Create when you’re happy with the document settings.

Once the document is created, navigate to File > Place Embedded or File > Place Linked. Both these options create the same vector layer with your SVG file.
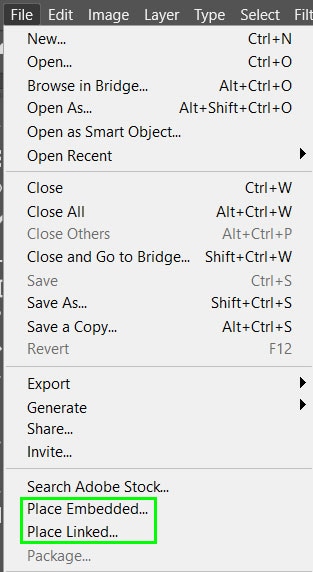
Select your SVG file from the window that opens and click on Place at the bottom right corner of the window.

Your file will now open as a vector layer. The layer will open with the option to transform the vector layer. Click on the anchor points around the image and drag to increase or decrease the size of the vector image. To prevent the image from distorting, hold in Shift while dragging the anchor points.
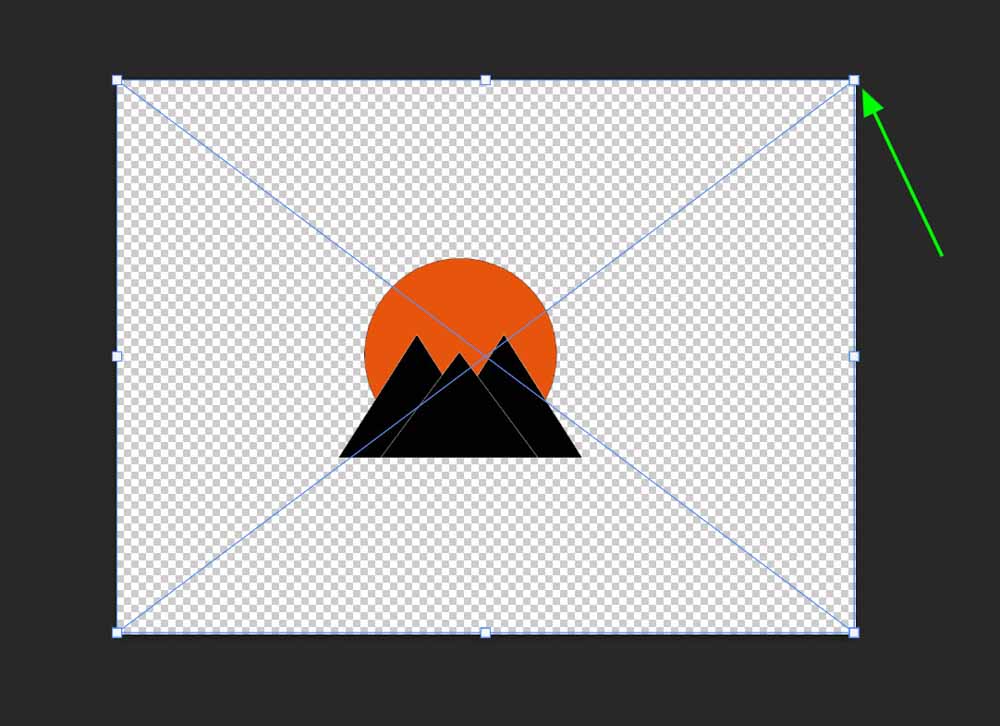
Once you have resized the vector layer to your liking, click the checkmark on the options bar to save your changes.

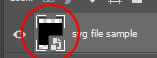
Your vector layer automatically becomes a smart object shown by the icon in the image thumbnail.
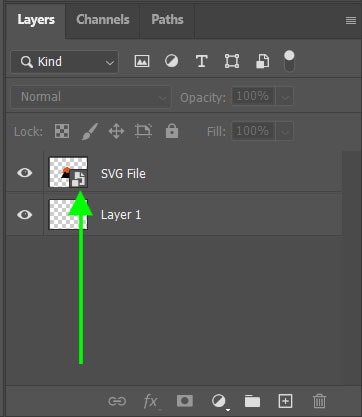
If you want to delete the original background layer you created, drag the layer and drop it on the bin icon at the bottom of the Layers panel.

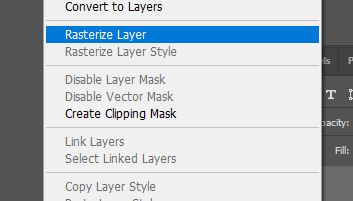
You can also rasterize the smart object at a later stage if needed. To rasterize the layer, right-click on the layer and select Rasterize Layer. This will give you the ability to alter the pixels in the layer directly, such as brush or clone stamp adjustments.

What’s The Difference When Working With These Layer Types?
A rasterized layer is different from a vector layer and will affect the editing capabilities of the image. Here is what each layer type is and how the layers can be edited in Photoshop.
– Rasterized Layers
Rasterized layers are made up of pixels with each pixel being a solid color. When zooming in to an image, you will see the blurred pixel boxes on a raster image.
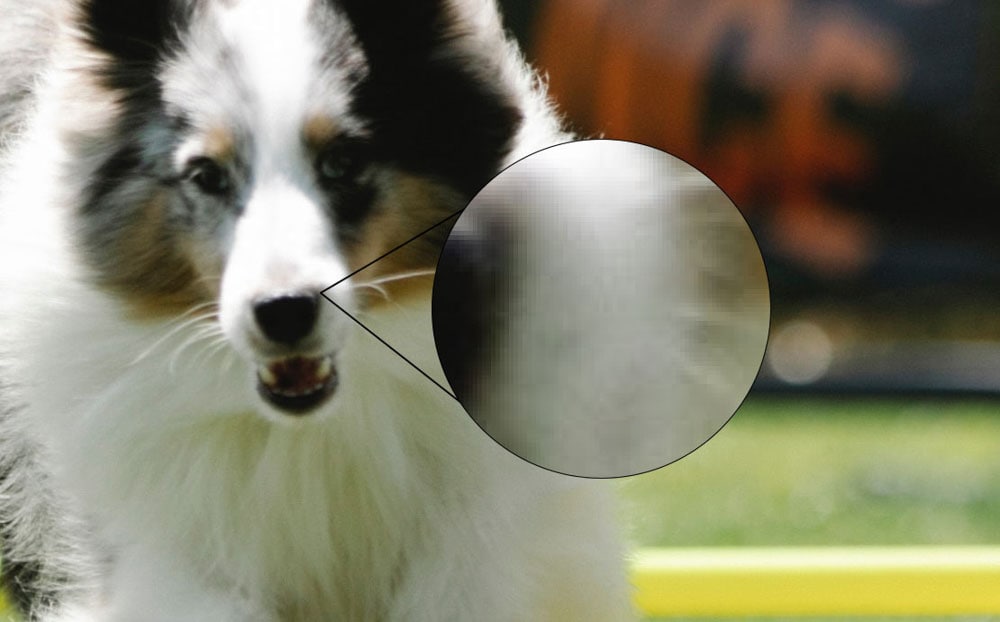
Raster images are the images created by digital cameras, images published online, and printed images. These images are found in various formats including JPG, PNG, and GIF among others.
Rasterized layers can be manipulated to a greater extent than vector layers as each pixel can be altered with various Photoshop tools that affect the pixels. These tools include the eraser tool and the brush tool for example.

Raster images become pixelated if they are scaled up beyond the capability of the image. This creates a blurred look which is not desired in professional images. However, raster images can be scaled up and down without affecting the quality of the image.
The quality of the image is determined by the resolution, which also affects the digital size of the photo. This resolution is often dictated by the quality of the camera on which the image was taken, however, you can change the resolution of new Photoshop documents to a certain extent.
– Vector Layers
Vector layers are made up of paths rather than pixels. These paths are created by a mathematical formula that allows the image to be manipulated without decreasing the quality.
A vector layer can be scaled up to any size without the elements becoming blurred. This allows designers to create logos and icons that can be blown up to large sizes while remaining sharp and clear.
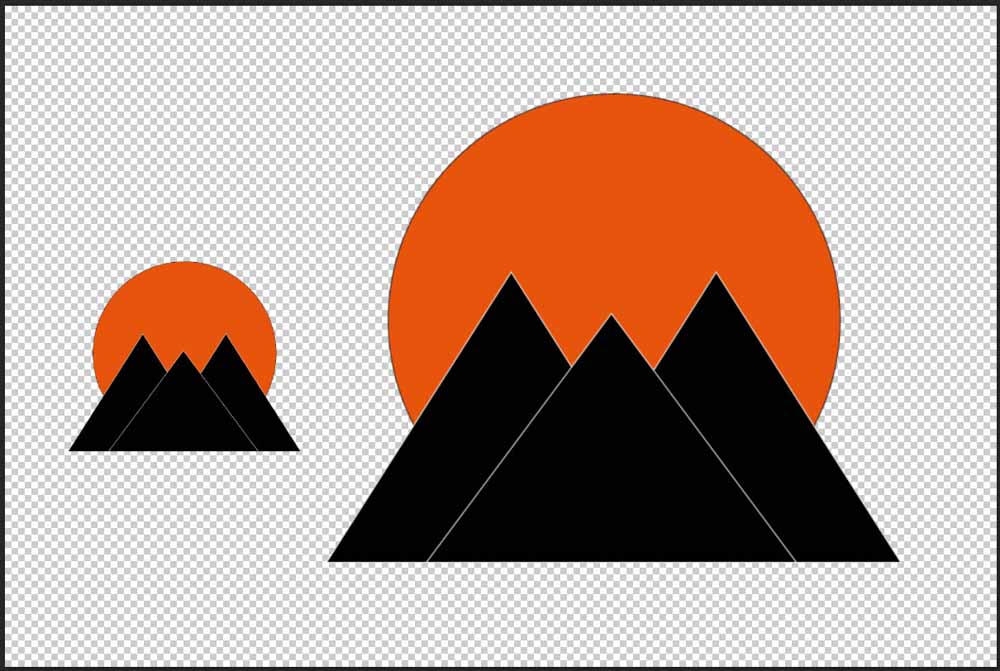
Vector images are created in design programs such as Adobe Illustrator or Sketch. Good examples of vectors are fonts and shapes, as even in programs such as Photoshop, you can scale these elements as large as you like while still keeping them clear.
Vector formats include SVG, PDF, AI, and EPS. When using vector images, there is less detail than in raster images but the file sizes are a lot smaller.
Vector layers have limitations in Photoshop that prevent you from using certain tools and effects. When you attempt to use these tools on a vector layer, you will receive a message telling you to rasterize the layer before using the tool.

If you don’t plan to scale the image any further, rasterizing a vector layer isn’t a huge deal and opens up more editing options. However, if you do need to scale your layer, try to make your required adjustments on a separate layer so you don’t need to edit the vector file directly.
Как открыть svg в фотошопе
Масштабируемая векторная графика (SVG) — это спецификация для изображений, которая предлагает преимущества для онлайн-просмотра и хранения на устройствах с ограниченной памятью. Разработанная Консорциумом World Wide Web (W3C), эта спецификация использует файлы XML для определения внешнего вида, рендеринга и поведения изображений.Большинство интернет-браузеров и графических приложений поддерживают файлы SVG или планируют сделать это в будущих выпусках. Поскольку Adobe Photoshop является растровым редактором, он не поддерживает напрямую SVG, который является векторным форматом. Рекомендуемое решение — открыть файл SVG в Adobe Illustrator, который является векторным редактором, и сохранить его в формате, который распознает Photoshop, например EPS.

Вещи, которые вам понадобятся
- Adobe Illustrator установлен и настроен на вашем компьютере
- Adobe Photoshop установлен и настроен на вашем компьютере
Шаг 1
Запустите Adobe Illustrator. Откройте файл SVG, который вы хотите открыть в Adobe Photoshop.
Шаг 2
Выберите «Сохранить как» в меню «Файл». Выберите «Illustrator EPS» в меню «Сохранить как тип». Нажмите «Сохранить».
Шаг 3
Нажмите «ОК» в диалоговом окне «Параметры EPS». Вам не нужно менять какие-либо настройки по умолчанию.
Шаг 4
Запустите Adobe Photoshop. Откройте файл EPS, который вы сохранили в Illustrator. Нажмите «ОК» в диалоговом окне «Растеризация общего формата EPS».
Adobe обеспечивает поддержку формата SVG файла с помощью Adobe Illustrator, однако люди, которые используют Adobe Creative Suite может потребовать открытия такого файла через другие приложения Adobe Photoshop, как, что невозможно без преобразования файла SVG в первую очередь. Проще решение этой проблемы может быть просто использовать инструмент стороннего производителя, известного какSVG Kit, который позволяет напрямую открывать файлы SVG , используя различные Adobe Suite , приложения , такие как Adobe в InDesign Server, Adobe Photoshop, Adobe InCopy и Adobe Bridge.Этот вектор графический инструмент совместим как с Windows, и компьютерах Mac, в том числе 32-разрядные, так и 64-разрядных операционных систем. Давайте посмотрим, как вы можете использовать SVG Kit, чтобы открыть SVG файлы непосредственно с помощью Adobe Photoshop.
Открыть SVG файлов непосредственно в Adobe InDesign, Photoshop и других приложений
После того, как SVG Kit установлен, вы будете иметь возможность приобрести необходимые функциональные возможности для открытия SVG файлов с помощью InDesign или Photoshop. Все, что вам нужно сделать, это просто запустить InDesign или Photoshop и выберите файл SVG (как показано ниже).

Работа с типичным качеством изображения в Photoshop
С помощью этого метода можно непосредственно поместить изображения для манипулирования в типичных качества без необходимости какого-либо типа по конверсии. Это даст вам возможность работать с оригинальными SVG изображений, не беспокоясь о каких-либо нежелательных изменений или деградации в импортируемом файле. Этот плагин отображает предварительно сгенерированный растр прокси-изображения, чтобы предоставить вам обзор того, что было помещено на холсте. Таким образом, вы можете легко использовать SVG файлы в неподдерживаемых приложений Adobe, чтобы использовать их позже в презентации PowerPoint, таблиц стилей и других видов проектов.
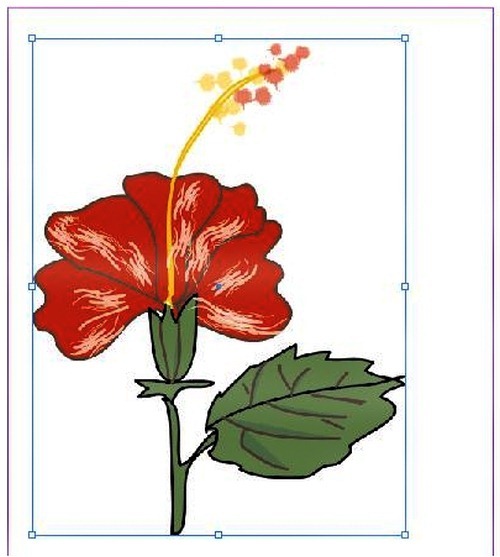
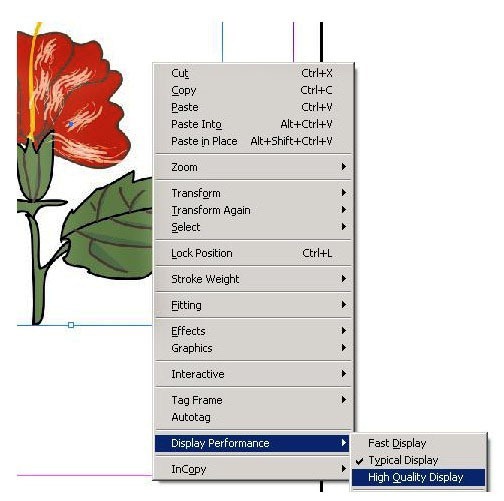
Не беспокойтесь, если вы находите изображения немного туманные, как конечный результат, вероятно, будет гораздо тоньше. Для того, чтобы просмотреть, как напечатанный файл SVG будет первоначально появляться, использовать высокое качество предварительного просмотра.
SVG Kit работает с операционными системами под управлением Adobe CS3 для CS6, за исключением 64-битных операционных систем Windows, так как они совместимы с версией CS4 к CS6. Одна лицензия SVG Kit стоит $ 99.
название говорит само за себя. Есть ли способ открыть / импортировать файл SVG в Photoshop CS2 или CS3? Я нахожусь на Mac OS X, но предпочитаю кросс-платформенные решения. Illustrator может открывать файлы SVG, поэтому мне кажется странным, что Photoshop не может. Я понимаю, что Illustrator основан на векторах, но Photoshop также имеет ограниченные векторные возможности.
9 ответов
вы можете открыть его в Inkscape (это бесплатно,inkscape.org) и экспортировать как PNG оттуда, с размером вы предпочитаете.
Adobe потеряла всякий интерес к SVG, когда они купили Flash. Лучше всего открыть его в Illustrator и преобразовать в нечто другое, что Photoshop может проглотить.
для использования SVG изображений в Photoshop CS3 попробуйте "SVG Kit for Adobe Creative Suite" изsvg.scand.com и это вся история!
да, SVG Kit для Adobe Creative Suite только для Photoshop / Elements составляет $ 100! Adobe CS5 по-прежнему не открывает эти файлы. Лучший вариант сейчас-скачать Inkscape (бесплатно) и экспортировать его в другой формат.
SVG Kit для Adobe Creative Suite имеет бесплатную пробную версию в любом случае, так почему бы не попробовать? Кроме того, он поддерживает CS5.5, CS5, CS4 и CS3, и вам не нужно конвертировать SVG в другие форматы.
вы можете использовать GIMP для открытия и растеризации SVG, а затем Сохранить как PSD. Gimp также может импортировать пути, но я не уверен, как их сохранить, чтобы сохранить векторную графику в photoshop.
Я всегда просто помещаю [ctrl+shft+p] в Illustrator, а затем копирую и вставляю в photoshop как смарт-объект. Его быстрый и грязный, но он работает.
Я знаю, что вы спрашивали о CS2 или CS3, но Photoshop CC 2015.1 теперь поддерживает открытие и импорт статических SVG файлов.
кроме того, GIMP (free и open source) может открывать их. затем вы можете экспортировать его или даже скопировать-вставить как растеризованное разрешение по вашему выбору.
Using SVG Files in Photoshop (What, Why, and How)
One area of confusion in Photoshop is the humble SVG file. Discover everything you never knew you needed to know about the Photoshop SVG right here!
What are the advantages of using SVG files, when would you use them, and how would you use them?
Keep reading if you want to learn more about SVG files and how to use them in Photoshop.
Download Adobe Photoshop 
Download the latest version of Adobe Photoshop to follow along with this simple tutorial.
Start a free 7-day trial today
Table of Contents
Using SVG Files in Photoshop (What, Why, and How)
What is an SVG Files
Before you jump in and start converting all your files and images to Photoshop SVG files, you might want to know what an SVG file is.
SVG stands for Scalable Vector Graphic.
The SVG format is a superior format that uses an algorithm to determine how information is added to the file when scaled.
The SVG file format is made using a mathematical formula that keeps track of points and the lines that connect them.
Photoshop started supporting SVG OpenType fonts in 2017 – see all the Photoshop versions here.
Why Use an SVG File
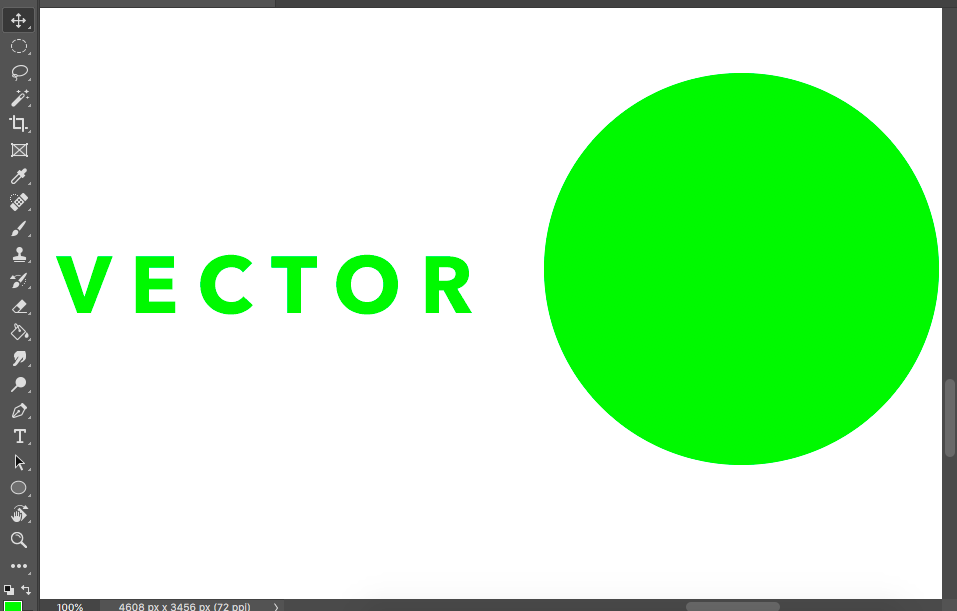
Scalable Vector Graphics will look like a high-quality image when increased or decreased in size, as no file information will be lost.
This makes SVG files the best option for complex graphic images and logos.
The SVG logo or graphic can be scaled up and used for billboard advertising without distortion of the file information.
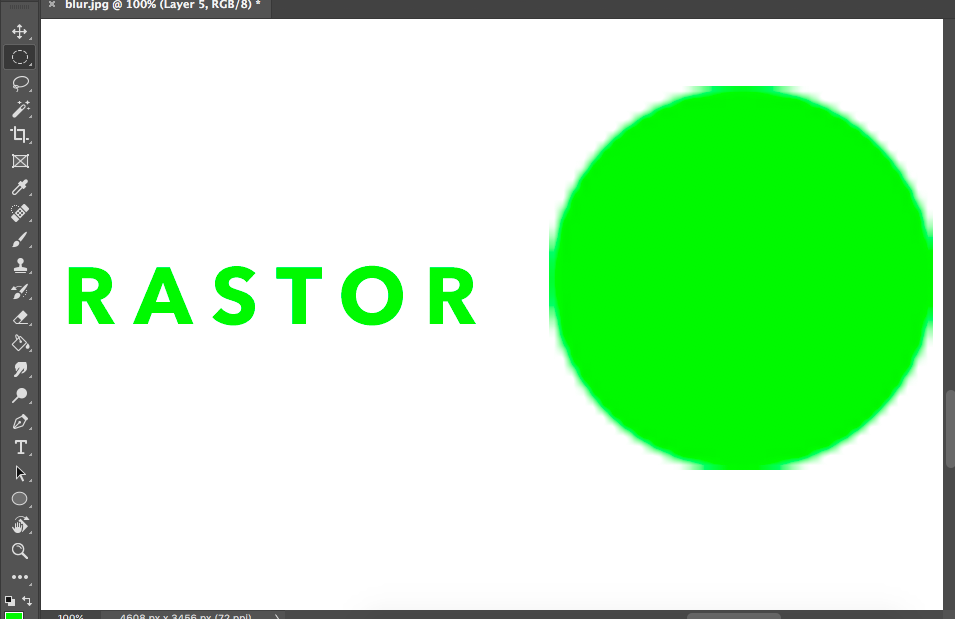
A raster file is pixel-based and loses information when scaled up or down, resulting in image blur.
In Photoshop, a Text or Shape layer will be created as a vector file so that it can be scaled up or down without distortion.
Another advantage of using the SVG format in preference to raster images is that the SVG format is text-based.
Text is stored in the SVG file as XML code, making it desirable to web browsers.
Google and other browsers will recognize the text in an SVG file and can include them as keywords. Thus the SEO of the web page using SVG files can be improved.
Web browsers cannot read text written in raster images, jpg, or pngs.
How to Use an SVG
SVG files are more commonly edited and created in Adobe Illustrator, which is a vector-based graphics editor.
Photoshop is raster based graphics editor but it is still possible to edit an SVG file in Photoshop.
When you open an SVG file in Photoshop this way it will be converted to a raster image.
You can open the SVG file as you would any other image by using File > Open.
When you locate your image and click to open a pop-up window will appear, letting you know that the SVG format will be rasterized when opened.
Click OK and the SVG file will be opened.
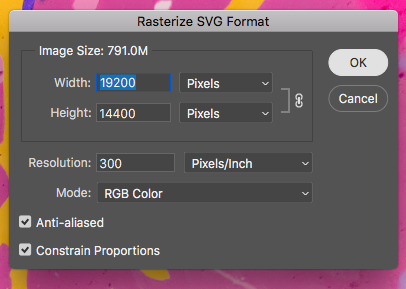
When the image is opened, you can edit and manipulate it the same as a raster file.
If you want to open the SVG file as a vector image you can use File > Place Embedded.

The SVG file will be embedded in the new document.
You will find it in the layers panel as a new smart object layer.

You can now edit it as you would any other smart object.
How to Save SVG in Photoshop
You can change any file format to SVG format and export using Photoshop.
You will not be able to use the Save as option when exporting SVG files in Photoshop
Open the file you want to save as an SVG file.
Navigate to File and in the drop-down menu select Export.
Beside Export a drop-down menu will appear, if you have saved other images as SVG files you can select Quick Export as SVG File.

This quick export option won’t always appear, as Photoshop’s default setting is to export a PNG image.
Select Export As.. and an Export As Dialog box will appear.
Here you can check the properties of the SVG file to be saved.
Select SVG in the box beside Format:

Leave the rest of the settings as default settings.
The dialog box will give you a preview of the SVG file and the option to zoom in or out to view the SVG file in greater detail.
If you are happy with the SVG file format preview click Export in the bottom right-hand corner of the dialog box.
When pressed, a pop-up box will appear, giving you the option to Rename the file and decide where you want to save it.
When you have selected the location and name of the SVG image and click Save.
You can now go to the file’s saved location and check your SVG image.
As SVG files are larger files than JPG or PNG files as they contain more information.
If you want to learn more editing tricks in Photoshop, check out – How to Outline Text in Photoshop.
Can Photoshop Open SVG Files and What Can You Do with Them?
Although Photoshop is not primarily a vector editor, it does allow you to open SVG files. The versions from 2015 onwards support the vector-based file type and offer options to either preserve the vector paths or rasterize the file.
Note, however, that Photoshop is not highly suited towards editing vector-based graphics. If you want access to a wider range of capabilities, and if you want to make more specific edits to your vector files, then you should consider opening the SVG file in Adobe Illustrator.
In short, you can open the file as a rasterized image by heading to File > Open then selecting the SVG document, before adjusting the Resolution in the window that opens up. To open the SVG file whilst maintaining its state as a vector object, open it by choosing File > Place Embedded or File > Place Linked.
In this article, we will discuss the above methods in more detail by walking you through the following steps:
Table of Contents
Open the SVG as a Rasterised Layer
First, we’ll explore how you can open your SVG document in Photoshop as a single rasterized layer. This means that the vector contents will be converted into bitmap graphics (making any vector objects uneditable and merging the components into a single layer).
1: Select File > Open and Click on the SVG File
To begin with, let’s head along the top of the screen and select File > Open.
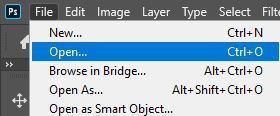
Doing so will cause a new window to open in which you can select a document to open in Photoshop. Once you have located your SVG file, you can open it by double-clicking on its thumbnail.
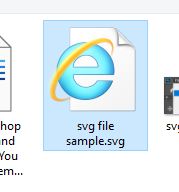
2: Set the Document’s Properties in the Rasterise SVG Format Window
When you specify a file of the SVG format to be opened in Photoshop, the program automatically brings up a new window called the Rasterise SVG Format Window. Here, you can set the properties of the document, such as the dimensions and the resolution.
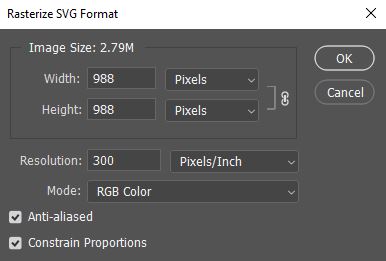
Within this window, you’ll notice options to edit the Width and Height of the file. We’d recommend that you leave these values as they are, as editing them will alter the dimensions of the image, causing the contents of the file to be distorted.
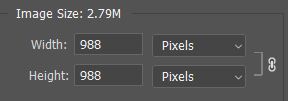
Beneath these boxes is an option to set the Resolution of the document. Here, type in the number that corresponds to the resolution you want. A higher value will result in a higher quality and a greater file size.

If you are in doubt, a value of around 300 pixels per inch tends to work well.
Once you are happy with the settings in this dialog box, you can go ahead and hit the OK button to confirm the edits and open the file.

And you should notice that the contents of the SVG file now appear in Photoshop! Since the contents have been rasterised, you can no longer edit their vector properties, and any edits you make to the layer will affect the quality of the objects on it.
In addition, any separate layers that may have existed in the original SVG file will have been merged into one.
However, you can still make general edits to the document, such as color adjustments and adding text or other layers. For a more extensive list of edits that you can make to Photoshop files, take a look at our complete guide to Photoshop for beginners, which explains how you can use the program’s many functions to make awesome edits to your images!
Open the SVG File as a Vector-Based Document
Next, let’s take a look at how you can open the SVG file without having to rasterise the contents. This method will preserve the vector paths within the document, meaning that the components remain fully editable in their vector forms.
1: Choose File > Place Embedded or Place Linked from the Menu Bar
To start, simply head over to the Menu Bar at the top of the screen and click on File > Place Embedded.
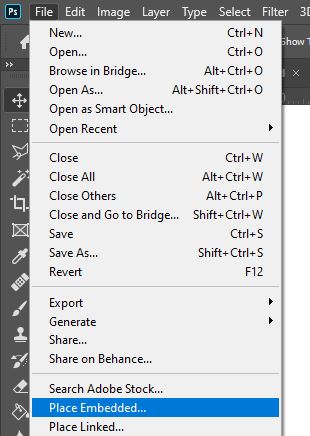
Alternatively, you can select File > Place Linked, which will yield the same result.
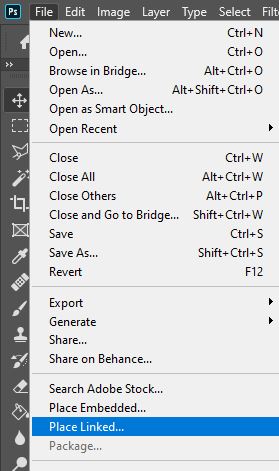
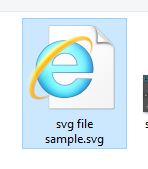
Clicking on these headings will cause a window to open, where you’ll be prompted to select the file you want to open in Photoshop. Locate the SVG file and double-click on it to open it.
And you’ll hopefully see that Photoshop opens the file as a smart object, which is visible in the Layers Window at the bottom right of the screen.
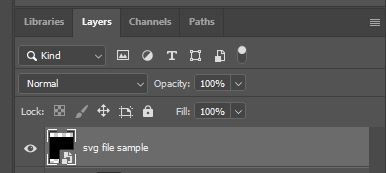
This means that the vector properties of the file remain editable through a process that we will discuss shortly. This method leaves you with a wider range of editing capabilities than the first method we discussed.
2: Edit the Document Within Photoshop
Opening an SVG file in Photoshop gives you access to a whole new range of editing tools which you would not have had access to in vector-based editing programs. Just as if it were a regular image layer, the smart object can be edited in a variety of ways in Photoshop by adding adjustment layers, text layers, and more.
There are some edits for which the smart object will need to be rasterized, such as warping and merging. If you want to make these edits to the layer, you will therefore have to first right-click on the smart object in the Layers Window and select Rasterise Layer. Note that in doing so you will lose the vector properties of the layer’s contents.
For some inspiration regarding what edits you can make to your file, feel free to take a look at this list we have compiled of 50 great Photoshop editing tutorials!
3: Double-Click on the Smart Object to Edit it Within Illustrator
Whilst you can make general edits to the file within Photoshop, if you want to make more specific edits to the vector objects themselves then you can follow a method that opens the smart object in Illustrator, where you can make edits that apply directly to the Photoshop file in real-time.
To do this, simply double-click on the thumbnail of the smart object in the Layers Window.
From the list of programs that appears, select Adobe Illustrator, or any other vector-based editing program of your choice. You will see that the file now opens in the selected program, where you can make edits such as shape adjustments and style changes to the vector objects.
As you make any edits in the external program, the changes will be immediately and automatically applied to the Photoshop file!
And that’s about all there is to know about how to open and edit SVG files in Photoshop! Want to learn more? Then check out this video by Web Design Blog which walks you through another technique that lets you open an SVG file in Photoshop!