Using Sprite Sheets in Pygame
When we built Alien Invasion, we only needed two images: one for the ship, and one for the alien. In some games, however, you’ll need lots of different images.
Game developers realized a long time ago that loading many images from separate files causes a game to run really slowly, so people came up with the idea of sprite sheets. A sprite sheet is a single file that contains many smaller images, all on a plain or transparent background. To use a sprite sheet, you load the sprite sheet as a single large image, and then you load the individual images from the sprite sheet image. This turns out to be much more efficient than loading a bunch of separate image files.
For this example we’ll look at how you can load a full set of chess pieces from one sprite sheet. To build a chess game, you need 12 pieces: a black and white king, queen, rook, bishop, knight, and pawn. Instead of loading 12 separate images, we’ll load one image that contains an icon for each of these pieces. We’ll then create 12 separate objects representing each of these pieces. What you learn in this guide will be useful any time you want to load a number of icons from a single image file.
A Simple Sprite Sheet
Here’s the sprite sheet we’ll work with:
I downloaded this image from Public Domain Clip Art, and converted it to a .bmp file. You can right click and save the image file from this page, or you can find it in the beyond_pcc folder when you download the resources for the book.
Starting a Chess Game
We’re not going to make a chess game in this tutorial, but we’ll set up this project so you could continue to expand on it and start building a game if you want to. So let’s start with a simple Pygame file, just like we did for Alien Invasion. Make a folder called chess_game, and save this file as chess_game.py:
And here’s settings.py:
This gives us an empty game window, and we can press ‘q’ to quit the game at any time. I like to have this option because sometimes I run games in fullscreen mode, and you can’t click the close button in fullscreen mode.
You’ll also need to create an images folder, and save the sprite sheet as chess_pieces.bmp in this folder.
Modeling a Chess Piece
A chess set is made up of a number of pieces. Let’s think about the pieces first. Each piece needs a name and a color, and an image. We need to be able to draw each piece to the screen. In a fully implemented game we might add attributes such as starting_position , current_position , captured , and others.
We’ll make a file called chess_set.py, which will contain a class for representing pieces and a class for representing the set as a whole. Here’s the start of that file, with the Piece class defined:
The Piece class allows us to assign each piece an image, a name, and a color. Each piece will start off at the top left corner, but we can move it wherever it needs to go. The only argument needed to create a piece initially is a reference to the overall game object. When we’re ready to draw a piece to the screen, we can do so by calling blitme() .
Modeling a Chess Set
Now we can start to model the set as a whole. The set will handle the task of creating all the pieces. In a fuller implementation, it might also track attributes such as the overall strength of the player’s remaining pieces, which can be useful in developing playing strategies.
The ChessSet class
Here’s the start of the ChessSet class. To begin with, we want an __init__() method that accepts the overall game object, and we want to call a helper method that builds the pieces that make up the set. Add this code to chess_set.py:
We have an __init__() method which accepts a reference to the overall game object, and we have an attribute for storing the pieces in the set. We also call _load_pieces() , which is a stub for now.
Loading the first piece
When loading images from a sprite sheet, it’s helpful to start with a library if possible. If you search something like “pygame sprite sheet”, one of the top results is from the Pygame wiki. Here’s a cleaned-up version of the code featured there:
Copy what you see here and save it as spritesheet.py, in the same folder where you saved chess_game.py.
This file contains a class called SpriteSheet that can help us work with sprite sheets. The method we’re most interested in is image_at() . To use this, we’ll make an object from the SpriteSheet class, passing it the location of our sprite sheet file. We’ll figure out which rectangular portion of the sprite sheet we want to load — the coordinates of its top left corner, and the width and height of the region we want to load. We’ll call image_at() with these four values.
If you look at the file chess_pieces.bmp, you can see that the left edge of the black king is about 68 pixels from the edge of the image, and the top of the king is about 70 pixels from the top edge of the image. These will be the first two values we pass to image_at() . The king is about 85 pixels wide by 85 pixels tall.
Here’s what we’ll do:
- Import the SpriteSheet class.
- Create a SpriteSheet object.
- Pull the image associated with the rectangle (68, 70, 85, 85).
- Create an object from the Piece class.
- Assign this object the name ‘king’ , the color ‘black’ , and the image we just pulled.
- Add this object to the list pieces .
We’ll do all of this in chess_set.py, in the _load_pieces() method:
There are many ways we could have done this. You can create the piece first, and then load the image, or you can load the image and assign it to the piece in one line. I’m doing it the way you see here because in a little bit I’m going to show you how to load all the images at once, and then write a loop that creates the pieces all at once as well.
To see the piece that we grabbed, let’s modify the _update_screen() method in chess_game.py:
We first import ChessSet . Then in __init__() we make an attribute called chess_set , which is an object of the ChessSet class. This object needs a reference to the overall game object, which in this file is represented by self . In _update_screen() , we call blitme() on the first (and only) piece in the set.
The output shows the black king in the upper left corner of the game window:
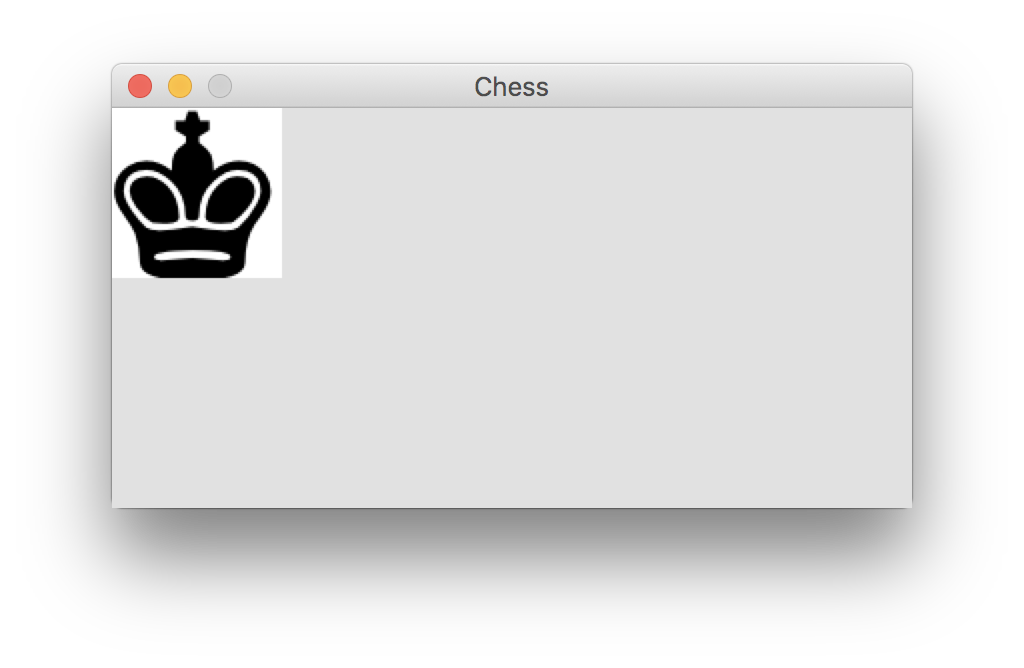
We’ve pretty much got the image we want. We might want to go back and refine the rectangle we used for pulling this image, to even out the amount of background on each of the margins.
Don’t be surprised if you see a much different area of the sprite sheet than you were expecting when you run your own code. It can take a bit of practice to understand how to choose the right rectangle coordinates, and even with practice it’s easy to make a mistake that grabs the wrong part of the sprite sheet. If you see a black rectangle, it’s possible you asked for a portion of the sprite sheet that doesn’t exist.
Loading all the pieces
As mentioned earlier, it’s possible to load all of the images we need from the spritesheet at once, and then assign each one to the appropriate piece. This can be much easier than figuring out the coordinates by hand for each individual piece, especially if you’re working with multiple sprite sheets.
Consider the original sprite sheet again, this time with a couple aspects of the sheet highlighted:
The dark blue rectangle shows the space to the left of the first column, which we can call a margin. The light blue region shows the horizontal space between columns, which we can call padding. The dark green bar shows the margin above the first row, and the light green bar shows the vertical padding between each row.
These spacings allow us to work out a pattern for where each image should be grabbed. For example the left position of the black king is equal to the width of the horizontal margin. The left position of the black queen is equal to the width of the horizontal margin, plus the width of a piece, plus the width of one strip of padding. For the third icon in the first row, the horizontal position is one margin width, plus two padding widths, plus two icon widths. The width of an icon should be the width of the overall image, minus the space taken by the margins and padding, divided by the number of columns.
If you want a challenge, try adding a method called load_grid_images() to SpriteSheet . The method should take in the following arguments: num_rows , num_cols , x_margin , x_padding , y_margin , and y_padding . The method should use these values to figure out the width and height of each piece, and call image_at() with the appropriate parameters. You should be able to call load_grid_images() with the appropriate values, and the method should return a list of all sprites in the sprite sheet. If you want to try this, pause and try it now, because I’m going to show that method and then we’ll use it to load the rest of the pieces.
The load_grid_images() method
Here’s the load_grid_images() method, which we can add on to the end of SpriteSheet :
This might look like a long method, but it’s only about 15 lines of code. Real-world functions and classes can include more comments than you typically see in books. It’s also a little longer than it needs to be, for clarity in a tutorial. For example if you didn’t need to see how many images were loaded, you could collapse the last three lines into one line:
Using load_grid_images()
We’ll first use this method to load all the images, and see if it’s grabbing all the correct portions of the sprite sheet. We’ll do this in _load_pieces() , in ChessSet :
We use load_grid_images() to load 2 rows with 6 columns each, and specify appropriate margin and padding amounts. We then create one Piece object for every image that was loaded; we’ll take care of setting the name and color values in a moment.
When we run chess_game.py again, we should see the black king in the upper left corner, since it was the first piece loaded. This works; the game window looks just like it did when we loaded a single image, with a slightly different cropping region.
Setting values for name and color
There’s a pattern in the sprite sheet, which we can use to efficiently set the name and color values for each piece. We’ll create a list of colors, and a list of piece names. Then we’ll set up nested loops that cycle through the pieces in the same order that load_grid_images() works, one row at a time.
Here’s the complete _load_pieces() :
We load all the piece images, just as we did before. Then we set a counter, piece_num , to keep track of how many pieces we’ve made. This will serve as an index to the image we want from the list piece_images . We loop through the colors, and then through the names. This will result in processing each of the black pieces, and then each of the white pieces. For each piece, we set the appropriate values, add it to the list self.pieces , and increment the value of piece_num .
When we run chess_game.py again, we should still see the black king because it’s always the first piece in the list.
Seeing all the pieces
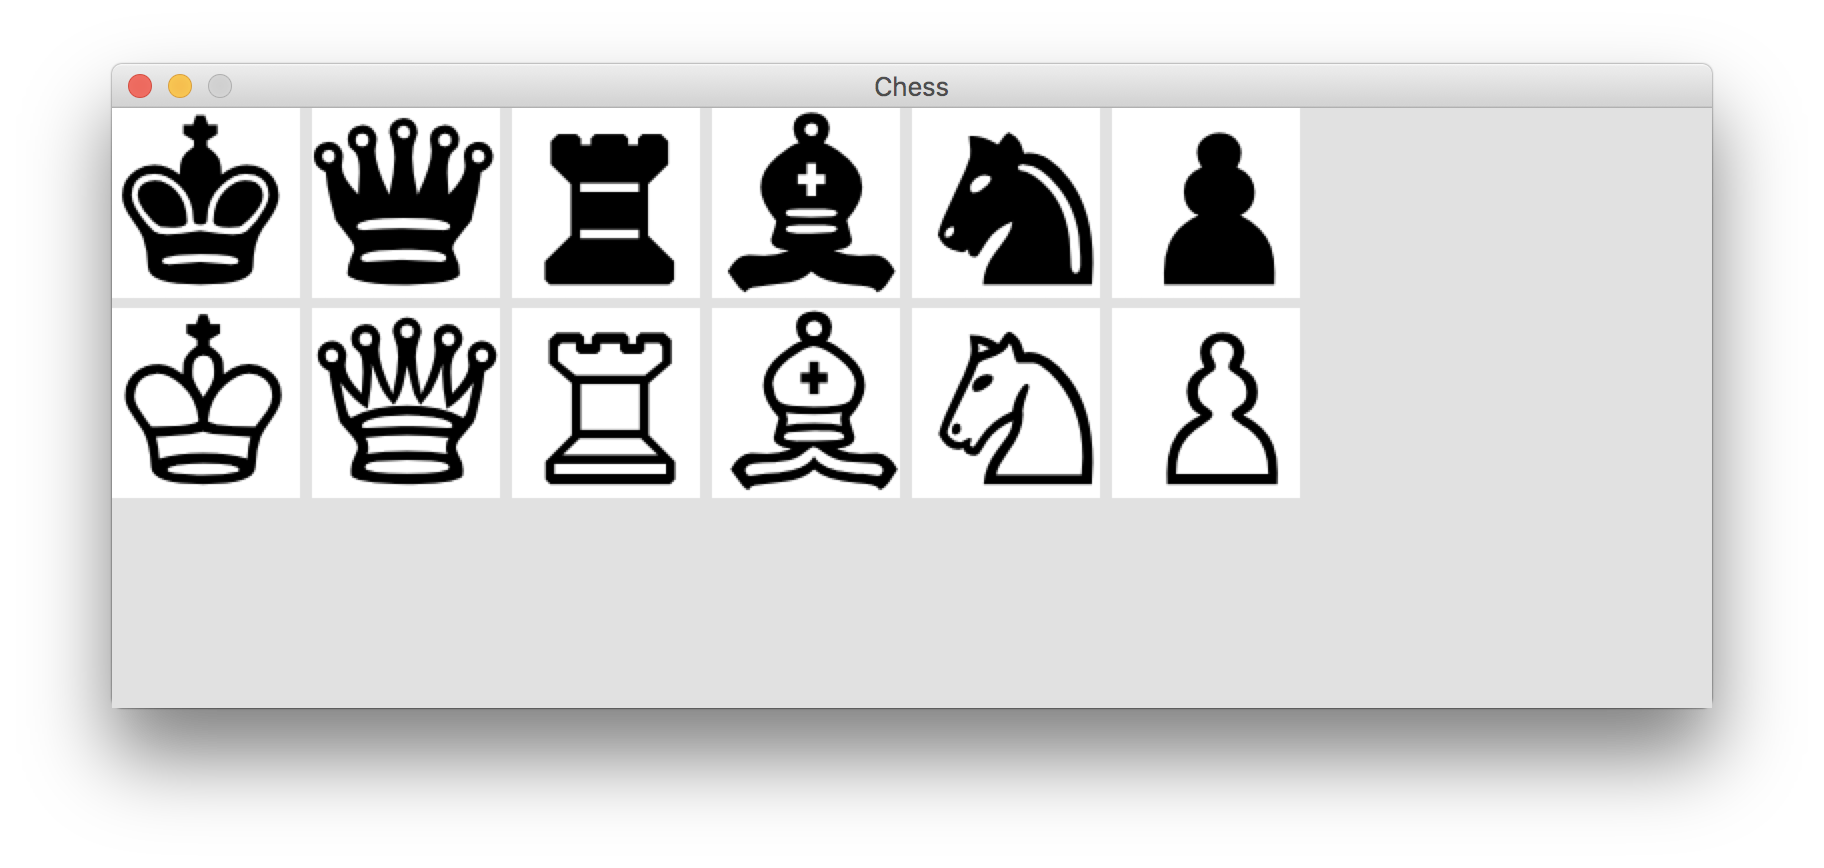
Now let’s check that all of the pieces were pulled correctly. We can do this in _update_screen() , in chess_game.py:
We loop through the first 6 pieces. For each piece, we set the x value 100 higher than the piece before it. If you haven’t seen the enumerate() function yet, it’s mentioned on page 335 in the book. The enumerate() function returns the index and the value of each item as you loop through a list. We do the same for the white pieces, except we set the y value to 100 so they appear as a second row.
Here we can see that all of the pieces were grabbed appropriately:
Making mistakes
When you’re reading a tutorial like this, it’s easy to think that everything is supposed to work out perfectly the first time you write your code. That’s not at all the case! I made a number of mistakes in the process of working out load_grid_images() , and more mistakes when using it to grab the images for each piece. For example when I first called load_grid_images() , I mixed up the values for the number of rows and columns. When I ran chess_game.py, I saw a blank game window. I had no idea why the images weren’t being grabbed. I ended up looking at the value of sprite_rect in load_grid_images() , and saw that the width of the image being grabbed was negative. That led me back to looking at the values I was passing to load_grid_images() , and I spotted the mixup. But it took a while, and it was not at all obvious what was going on at first.
If I were going to use this module to create a lot of games using sprite sheets, or if I was maintaining this for a widely-distributed package, I’d probably add some error-checking code to make sure all of the sizes in load_grid_images() come out positive. But I’m trying to keep things simple for now, so I’m not adding that degree of error-checking at this point.
If you run into mistakes in the game you’re working on, or any project you find yourself involved in, please know that everyone makes mistakes almost every single day. You are not alone. 🙂
Loading Your Own Images
Some people like to place files like spritesheet.py in a directory called utils inside their main project folder, and then their import statement looks like this:
This makes it clear what code is specific to your game, and what code is a utility module that could be used for any game. If you’re making a lot of games, you can place the utils directory in a location that’s accessible to all your games, so you don’t have a bunch of copies of the same utility module all over your system.
You can find the full spritesheet.py module here. It’s also in the beyond_pcc folder in the zip file of online resources for the book. If you don’t see that folder, you might need to download a newer copy of the online resources, as I’ve just recently added this section.
Final Words
Groups vs Lists
The point of this guide was to show how you can load images from a sprite sheet when using Pygame. There’s a lot that we might do differently if we were focused on building a fully-functioning chess game. For example, should we store the pieces in a list like we did, or should they be placed into a Pygame Group ? I used a list here because a list is ordered, and I wanted the order of self.pieces to match the order we see in the sprite sheet. A group is not ordered, so it wouldn’t necessarily work for this purpose. A group is great when you want to repeatedly draw a bunch of elements to the screen, and the order you’re keeping them in doesn’t matter.
Sprite sheets with non-uniform grids
Many sprite sheets are set up in a grid like we saw with chess_pieces.bmp. For example a deck of cards might have four rows of 13 cards each, and maybe an extra row for a card back and a joker. However, some sprite sheets have icons of different sizes on them. In that case you might be able to call load_grid_images() for most of the icons, and then call image_at() for some of the oddly-sized icons.
Determining margin and padding sizes
If you’re not sure how to determine pixel sizes on a sprite sheet, try opening the file in an image previewer or editor. Most viewers and editors allow you to make selections in a way that shows you the dimensions of the selection in pixels. For example on macOS you can open Preview, click Tools > Rectangular Selection, and drag a rectangle around the region you want to measure. A small popup will show you the width and height of the rectangular region you have selected.
If you’re completely at a loss, make a guess and see how accurately the first image is grabbed. That should allow you to work out the size of the margins, and looking at the second image should allow you to work out the padding.
Шахматная гениальность на Python: создание полноценной игры с использованием всех фигур
Шахматы — это одна из самых популярных и увлекательных игр в мире, которая зарекомендовала себя как умственно развивающая игра. В этой статье мы рассмотрим процесс разработки полноценной шахматной игры на Python с использованием всех фигур.
Игровое поле
Шахматная доска состоит из 8 рядов и 8 столбцов, образуя 64 клетки. Расположение фигур на доске начальное и одинаковое для обоих игроков. Первый ряд состоит из фигур, которые представлены в следующем порядке: ладья, конь, слон, королева (или ферзь), король, слон, конь, ладья. Второй ряд состоит из 8 пешек.
Фигуры и их ходы
Шахматы имеют 6 видов фигур: пешка, ладья, конь, слон, ферзь и король. Каждая фигура имеет свои правила хода. Вот основные:
- Пешка. Пешка может двигаться только вперед на одну клетку, но может начально двигаться на 2 клетки. Когда пешка достигает последнего ряда, она превращается в любую другую фигуру на выбор игрока.
- Ладья. Ладья может двигаться только по вертикали или горизонтали на любое количество клеток.
- Конь. Конь может двигаться в форме буквы L на две клетки горизонтально и одну клетку вертикально или на две клетки вертикально и одну клетку горизонтально.
- Слон. Слон может двигаться только по диагонали на любое количество клеток.
- Ферзь. Ферзь может двигаться как ладья и слон на любое количество клеток.
- Король. Король может двигаться только на одну клетку в любом направлении.
Разработка игры на Python
Для создания игры шахмат используется библиотека Pygame, которая помогает создать графический интерфейс пользователя. Вот шаги, необходимые для разработки игры:
- Импортировать библиотеку Pygame.
- Создание главного игрового экрана.
- Загрузка изображения шахматной доски на экран.
- Загрузка изображений фигур шахмат на экран.
- Создание объектов-фигур.
- Размещение фигур на доске.
- Написание кода для правил хода каждой фигуры.
- Создание игровой логики, позволяющей игрокам по очереди делать ходы.
- Определение условий победы и конца игры.
Заключение
Шахматная гениальность на Python — это захватывающий процесс, который может помочь усовершенствовать навыки программирования. Вы можете попробовать разработать игру самостоятельно, используя знания, полученные из этой статьи.
Chess Library in Python
The chess module is a pure Python chess library with move generation, move validation and support for common formats. We can play chess with it. It will help us to move the king queen, pawn, bishops and knights. We need to know the basics of chess to play chess with it. This module does every task in python that is possible in the real game.
Installation:
We just have to import the chess library and with it, we can play chess. When we will import the chess library we have to call the function named board so that we can see the status of the chess board.
Building My Own Chess Engine
I have been learning chess (again) and how to program a chess engine (for the first time) over the last month. After skimming some introductory texts, I was convinced that building a simple chess engine — one that would put up a fair fight against a casual player — would take no more than a few days.
But I made it there in the end and created a toy chess engine (healeycodes/andoma) that I am proud of. It can play a game of chess and solve simple chess puzzles like mate-in-two or mate-in-three. It has a slim UCI interface which means it can be hooked up to lichess.org via lichess-bot — a bridge between the lichess API and chess bots.
The first speed bump in its development was grasping the computational complexity of chess — how fast, and wide, the search tree grows. When a chess game starts, white can open in twenty different ways and black can respond in twenty different ways also. After the first full turn, there are 400 variations possible. After the third full turn, there are over 119 million.
Claude Shannon calculated that there are around 10^120 possible games of chess in his seminal paper Programming a Computer for Playing Chess in 1950. In Rage Against the Machines, Nate Silver quotes Diego Rasskin-Gutman, who said:
There are more possible chess games than the number of atoms in the universe.
Given unlimited resources, it actually doesn't take many lines of code to calculate every legal variation of chess. Here, the Python package python-chess is used for board representation and legal move generation.
This program throws a RecursionError and prints 59691 — the number of different positions the search tree contained when it crashed. All we need to fix this, is another universe to run the program in.
Given that there are computational limits to abide by, as well as the time control rules of chess, improvements over a naive brute force search must be made.
Evaluation
In order to search for good positions, it is necessary to understand what makes a good position good. The most simplistic way of describing a position's strength is to compare the total value material of each side.
Tomasz Michniewski, author of the Simplified Evaluation Function, defined some values that are "designed specifically to compensate for the lack of any other chess knowledge". This is perfect for me — a beginner chess player.
This snippet sums the material on the initial board using Michniewski's piece values.
Michniewski also provides piece-square tables, which alter the value of a piece depending on which square it sits on. For example, it's better for pawns to progress up the board and it's better for knights to be near the center of the board.
The bonus of a square may be positive, neutral, or negative. The piece-square tables are presented from White's POV and must be mirrored for Black.
For the king, Michniewski provides two tables — one for the middle game and one for the end game. He defines the end game as being either if:
Both sides have no queens or
Every side which has a queen has additionally no other pieces or one minorpiece maximum.
The evaluation of a chess board is one of the things that's kept me interested in chess engines. Evaluation rules are easy to add and take away. I refactored the code from Go to Python to be able to prototype different rules faster.
After piece-square tables, one might look at pawn structure, mobility, center control, connectivity, trapped pieces, king safety, space, tempo, and other patterns (this list is taken from the Chess Programming Wiki's Evaluation page).
Searching With Minimax
Minimax is a search algorithm that finds the next optimal move by minimizing the potential loss in a worst case scenario. Chess is a game of perfect information — by looking at the board it's possible to know exactly what an opponent is capable of. However, this search for moves is limited by the evaluation function and the depth that computing resources are able to reach.
The search space is a tree of legal moves which grows exponentially at every level (the average branching factor is around 35). By the time the tree is explored, the path to many future boards is known as well as which path restricts the opponent's possible gains the most.
The leaf nodes of the tree return the evaluation of their current state. Non-leaf nodes inherit their value from a descendant node. Eventually, the recursive function reduces down to a value for the given board.
This function can be used to pick the next best move by calling it on every legal move available in the current turn. A great visual resource for this algorithm is Sebastian Lague's Algorithms Explained – minimax and alpha-beta pruning.
Alpha-beta pruning
My chess engine uses alpha-beta pruning as an improvement over the naive minimax algorithm — which does not fare well against the exponential nature of chess. Branches of the search tree can be eliminated when it is clear that another branch shows more promise. This significantly reduces the number of moves required to be generated.

By reducing the depth of branches that will not bear fruit we can search deeper down the better parts of the tree.
The speed of alpha-beta pruning can be increased by applying move ordering. This is where the more promising branches of the search tree are searched first — which means less time is spent in the worst branches as they will be cut off early.
Move ordering cannot be 100% accurate but it's a powerful optimization.
In my engine, a cheap (but not perfect) move_value function is used to sort the initial legal move nodes from best to worst. The logic of this function is capture in its docstring:
Communication and the UCI Protocol
The Universal Chess Interface (UCI) is a open protocol to hook up chess engines to user interfaces. The communication is done through standard input and standard output and messages end with \n . The move format is long algebraic notation — like e2e4 , or e1g1 for white short castling, and an example of a promotion to queen is a7a8q .
There are many configuration commands in the specification and it initially seemed overwhelming. After debugging, I found that not many were required to get a chess engine to the Hello World stage.
In order to hook my chess engine up to lichess via lichess-bot, I implemented the following. These commands are send to the engine from lichess-bot:
- uci — the engine reports its name, authors, and uciok
- isready — the engine reports that it's ready: readyok
- position startpos moves e2e4 — the engine sets it's internal state to match the list of moves
- go — the engine should now calculate and respond with the next best move, like bestmove g8f6
A Promise
I have found a great joy interacting with the chess community over the last month. Lichess is a fantastic resource and endlessly fun to play on. The UI is slick and light — and the post-match analysis is revealing and simple to use. It's open source and relies on donations and sponsorships.
I took breaks from writing this article to play chess against Dad on a real board. We're missing a white rook and use a pencil sharpener as a replacement piece. He has been telling me stories about playing chess decades ago — before IBM's Deep Blue) emerged and beat Garry Kasparov, the reigning world champion, on its second attempt in 1997.
If you are within my social circle, you will have experienced me evangelizing chess and chess engines over the last month — now that I have published this, I promise to chill out a little bit.
Other Resources
To build healeycodes/andoma, I used the following resources (and recommend all of them).