Как сделать стрелки в Illustrator
Стрелки используются для обозначения знаков безопасности, выделения объектов, направлений и многого другого. Изучение того, как делать стрелки в Illustrator, очень важно, потому что часто стрелки используются для обозначения больших знаков.
Illustrator используется для векторной графики, а векторная графика отлично подходит для создания больших иллюстраций. Эти стрелки будут изменены, поэтому, будучи векторной графикой Illustrator, стрелки сохранят свое качество независимо от размера.
Вы можете создавать стрелки в Illustrator, используя различные инструменты и функции следующим образом:
- Создайте стрелки с помощью инструментов Shape.
- С помощью инструмента Кисть.
- Используя символы.
- С помощью инструмента Перо.
1] Создание стрелок с помощью инструментов shape
Возможно, вам потребуется нарисовать стрелки для указателей, указывающих направление к месту встречи или заведению. Возможно, вы не очень хорошо разбираетесь в Illustrator, однако использовать инструменты shape для создания стрелок довольно просто. Базовая стрелка состоит из стержня (прямой секции) и острия, вам просто нужны формы для представления этих частей.
Использование инструмента Прямоугольник для создания стрелок
Для создания стрелок можно использовать инструмент Прямоугольник, инструмент Прямоугольник расположен на левой панели инструментов.
Выберите инструмент Прямоугольник или нажмите M, затем нарисуйте длинный прямоугольник, чтобы создать стержень стрелки.
После создания оси пришло время добавить острие стрелки. Вы можете использовать тот же инструмент Прямоугольник для создания острия стрелки. Выбрав инструмент Прямоугольник, нарисуйте квадрат.
Используйте инструмент прямого выделения и щелкните верхний левый маркер и нижний правый маркер квадрата, затем нажмите Пробел.
Это удалит части квадрата, придав ему вид треугольника. Вы также можете превратить квадрат в наконечник стрелки, выбрав инструмент перо. Затем вы должны навести курсор на любой из угловых маркеров до тех пор, пока рядом с курсором инструмента «Перо» не появится черточка, затем вы должны щелкнуть маркер. Это приведет к удалению этого маркера и превращению квадрата в треугольник. Затем вы должны переместить его в направлении оси стрелки, где вы будете вращать его.
Чтобы повернуть головку стрелки, вы можете использовать инструмент Поворот на левой панели инструментов. Чтобы получить доступ к инструменту Поворота, щелкните по нему или нажмите R. Вы также можете повернуть наконечник стрелки, наведя курсор близко к любому из маркеров. Когда курсор превратится в изогнутую стрелку, удерживайте левую кнопку мыши и вращайте объект. Затем вы должны перемещать его до тех пор, пока он не коснется стержня стрелки.
Хотя части стрелок касаются друг друга, это две отдельные части. Чтобы сделать их одним объектом, выделите обе части, затем перейдите на панель навигатора и нажмите Объединить. Вы также можете соединить их, выбрав обе части, затем перейдя на левую панель инструментов и щелкнув инструмент Shape Builder или нажав Shift + M. При активном инструменте Shape builder щелкните фигуры и перетащите их из одной части в другую.
Это готовая стрелка. Вы можете добавить дополнительные элементы к вашей стрелке.
Вы можете изменить цвет, добавить другой наконечник стрелки на другой конец и многое другое.
2] Создайте стрелки с помощью инструмента кисть
Другой способ, которым вы можете сделать стрелки в Illustrator, — это использовать инструмент Кисть.
Выберите инструмент кисть на левой панели инструментов, затем щелкните и перетащите, чтобы создать линию для стержня стрелки. Затем вы рисуете кончик стрелки.
Чтобы нарисовать прямую линию, удерживайте Shift, пока рисуете линию.
Когда вы закончите со стрелкой, выберите обе части стрелки, затем перейдите в верхнюю строку меню и щелкните Объект, затем обведите контурную обводку. С обеих частей стрелка по-прежнему выбран, вы можете воспользоваться формой строитель инструмента из левой панели инструментов, или объединиться вариант с панели Pathfinder, чтобы соединить оба слоя, указанном стрелкой.
3] Сделайте стрелки, используя символы
В Illustrator символы похожи на маленькие готовые значки. Доступно множество символов, и вы можете использовать их в своих иллюстрациях или другом художественном оформлении. Если вам нужна стрелка, вы найдете их в разделе Символы.
Чтобы получить доступ к символам, перейдите на панель символов в правой части рабочей области Illustrator.
Чтобы получить доступ к символам со стрелками, нажмите кнопку меню в правом верхнем углу палитры символов, затем в меню наведите курсор на Открыть библиотеку символов. Затем вы должны просмотреть список доступных символов и выбрать стрелки.
Откроется палитра «Стрелки» с доступными символами стрелок.
Нажмите на нужный символ, затем перетащите его в свою рабочую область.
Цвет или обводку для этой стрелки редактировать нельзя, ее можно только изменить. Чтобы отредактировать цвет и обводку, щелкните правой кнопкой мыши на стрелке, затем нажмите Разорвать ссылку на symboll.
Это редактируемая стрелка-символ.
4] Создавайте стрелки с помощью инструмента «Перо»
Использовать инструмент «Перо» для создания стрелок в Illustrator довольно просто. Освоение инструмента «Перо» может занять некоторое время, однако использовать его для создания стрелок легко, потому что стрелки простые.
Чтобы использовать инструмент Перо для создания стрелок, выберите инструмент Перо на левой панели инструментов. Щелкните по рабочей области, чтобы создать начальную точку. если вам нужна прямая линия, удерживая нажатой клавишу Shift, затем щелкните по другой точке.
Это создаст прямую линию, которую можно использовать в качестве стержня для стрелки. Убедитесь, что цвет заливки выключен, а обводка включена.
Если вы хотите создать изогнутую линию с помощью инструмента «Перо», вам следует щелкнуть, чтобы создать первую точку. Когда вы перейдете к созданию второй точки, щелкните и перетащите, чтобы включить маркеры. При перетаскивании вниз линия изогнется вниз, а при перетаскивании вверх линия изогнется вверх.
Это линия, изогнутая вверх, чтобы вы могли создать стрелку, изогнутую вверх. Ручка все еще там, так что вы можете щелкнуть по ней и настроить, если хотите.Чтобы избавиться от маркера, щелкните на инструменте выделения, затем щелкните в любом месте холста.
Добавьте наконечник стрелки, используя определение кисти
Чтобы получить начертание стрелки, вам нужно перейти в верхнюю строку меню и выбрать опцию Определения кисти. Обычно в ней есть слово Basic. Когда вы нажимаете на слово basic или стрелку выпадающего списка, меню открывается вверх.
Затем вы должны были бы найти меню (три горизонтальные линии), щелкнуть меню, и появится другое меню.
В этом новом меню нажмите Открыть библиотеку кистей, затем Стрелки, затем выберите из Arrow_special, Arrows_standard или Pattern arrow. Какую бы из них вы ни выбрали, появится палитра с различными доступными стрелками.
Специальные параметры Arrow_special
Параметры рисунка стрелки
Это один из примеров Arrow _special. Вы можете поэкспериментировать с другими. Вы заметите, что они получаются изогнутыми, как линия инструмента «Перо».
Это один из примеров Arrow _standard. Вы можете поэкспериментировать с другими. Вы заметите, что они получаются изогнутыми, как линия инструмента «Перо».
Это один из примеров шаблона стрелки. Вы можете поэкспериментировать с другими. Вы заметите, что он получается изогнутым, как линия инструмента «Перо».
Добавьте наконечник стрелки, используя опцию обводки
Вы можете добавить наконечник и даже хвост стрелки, используя опцию stroke (обводка).
Для этого щелкните по линии инструмента «Перо» или по контуру, который вы использовали. Затем вы нажимаете слово «Обводка » на правой панели «Оформление слоев».
Появится панель обводки, здесь вы можете выбрать, что проходит по каждому концу линии или контура инструмента Перо. Найдите категорию «Наконечник стрелы», и вы увидите два поля слева и справа. Левое поле предназначено для начала, а правое — для завершения. Начало — это то место, где вы нанесли первую точку с помощью инструмента «Перо», а окончание — то место, где вы нанесли последнюю точку. Вы можете использовать кнопку обратного хода, если вы нанесли наконечник стрелки не на ту часть.
Это пример стрелки с использованием опции stroke стрелка start и finish. Вы можете использовать любую из доступных стрелок start и finish.
Создавать стрелки в Illustrator довольно просто, а размер стрелок можно изменять, сохраняя их высокое качество.
Как сделать толстую стрелку в Illustrator?
Существует несколько способов сделать толстую стрелку в Illustrator. Для создания стрелки можно использовать такие формы, как инструмент Прямоугольник или инструмент Закругленный прямоугольник. Это упрощает создание толстых стрелок, особенно для больших надписей. Другой способ создания толстых стрелок в Illustrator — увеличить размер обводки, если вы используете для создания стрелки линии или инструмент Перо.
Как мне добавить наконечник стрелки к контуру в Illustrator?
Чтобы добавить наконечник стрелки к контуру в Illustrator, выберите контур, затем перейдите в левую панель и щелкните слово stroke. Появится панель stroke, найдите категорию Arrowheads. В категории Наконечники стрелок вы можете выбрать, что будет происходить в начале и в конце контура. Есть и другие вещи, которые вы также можете сделать с контуром в параметрах обводки.
How to Draw an Arrow in Adobe Illustrator

Arrows are useful for informative designs such as menus. They guide readers to find information faster and you don’t have to squeeze in the images right next to your text. Sometimes when there are limited spaces for photos, using an arrow to point at the corresponding dish was the easiest solution.
When I designed menus for the food & beverages industry over the years, I created all types of arrows for different types of menus. So if you want to draw a curvy arrow, hand-drawn style, or simply a standard arrow? You’re in the right place!
In this tutorial, I’ll show you four different ways to draw an arrow in Adobe Illustrator. You can use the line tool, shape tools, or drawing tools.
Get the tools ready and let’s get started.
Table of Contents
4 Ways to Draw an Arrow in Adobe Illustrator
You can use different tools to draw different types of arrows in Adobe Illustrator. For example, if you want to make a standard straight arrow, simply draw a line and add an arrowhead from the Stroke panel. If you want a cute hand-drawn style, use the paintbrush or pencil tool.
Note: all screenshots from this tutorial are taken from Adobe Illustrator CC Mac version. Windows or other versions can look different.
Method 1: Stroke style
This is the quickest method to make an arrow in Illustrator. Technically, you don’t have to draw it, all you need to do is to choose an arrowhead style from the Stroke options.
Step 1: Select the Line Segment Tool (\) to draw a line.

Step 2: Select the line and you’ll see the Stroke panel on the right-hand side of the document window. If not, open the Appearance panel from the overhead menu Window > Appearance, and you will see Stroke. Click on Stroke.
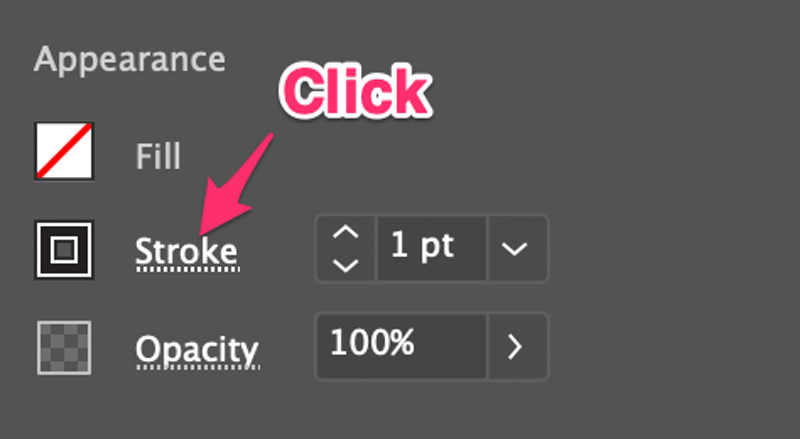
You’ll see more options such as weight, corner style, arrowheads, etc.
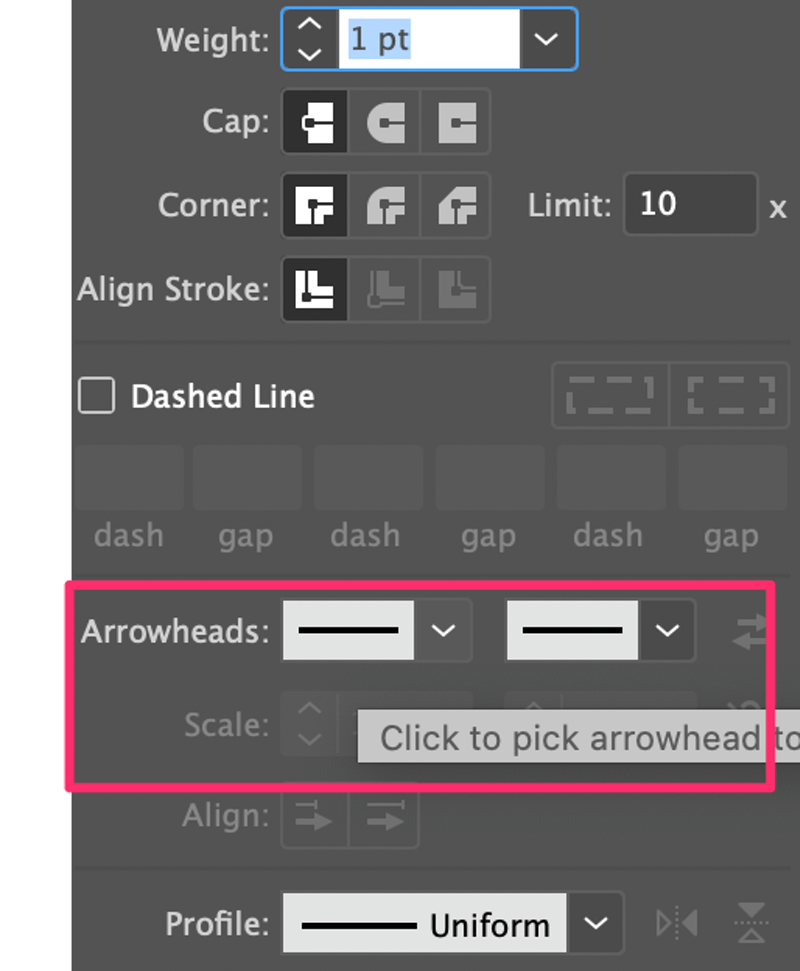
Step 3: Click on the arrowheads option to choose the arrowheads that you want. If you choose the left box, the arrowhead will be added to the left end of the line, and vice versa.
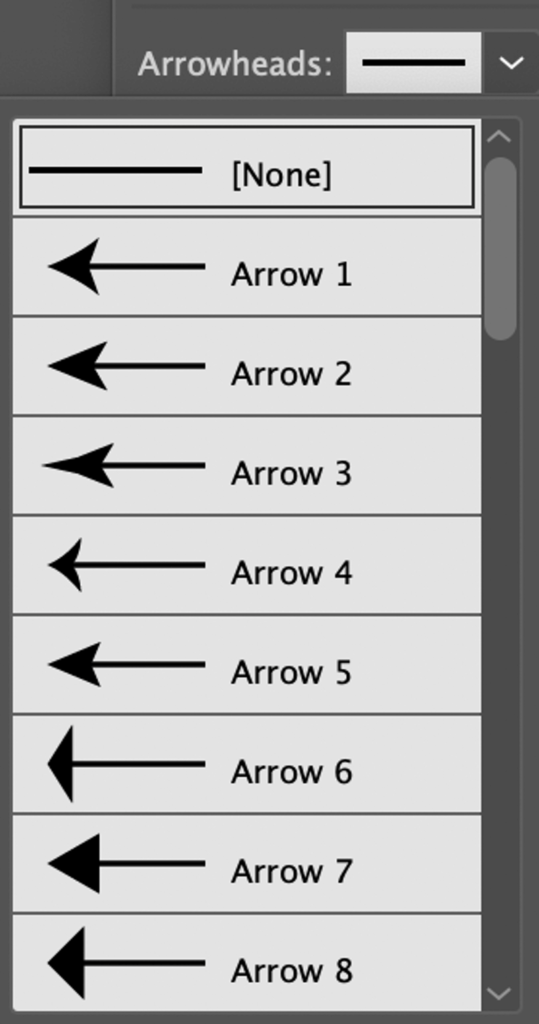
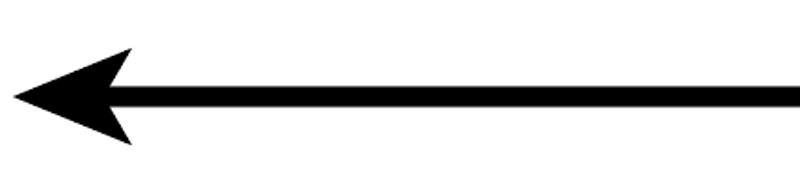
For example, I added Arrow 2 to the left end.

If the arrow is too thin, you can increase the stroke weight to make it thicker.


You can also add an arrowhead on the right side if you need it. The two arrowheads can be different.


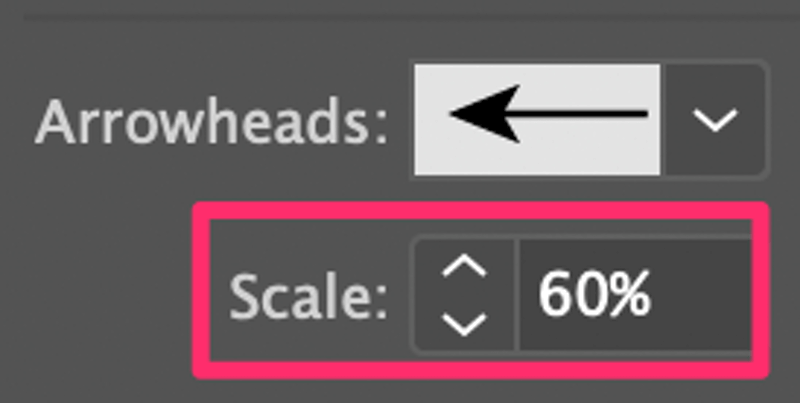
Under the Arrowheads option, you can adjust the scale to change the size of the arrowhead. For example, I changed the Scale to 60% so that it looks more proportional to the line.
Method 2: Shape tools
You’ll be uniting a rectangle and a triangle to make an arrow.
Step 1: Use the Rectangle Tool (keyboard shortcut M ) to draw a skinny and long rectangle.

Step 2: Use the Polygon Tool to make a triangle. Simply select the Polygon Tool from the toolbar, click on the canvas, and input 3 sides in the dialog box.


Note: You can use any method you like to make the triangle. I use the Polygon Tool because it’s easier.
Step 3: Rotate the triangle 45 degrees, place it on either side of the rectangle, and center align both shapes. Resize the shapes accordingly.
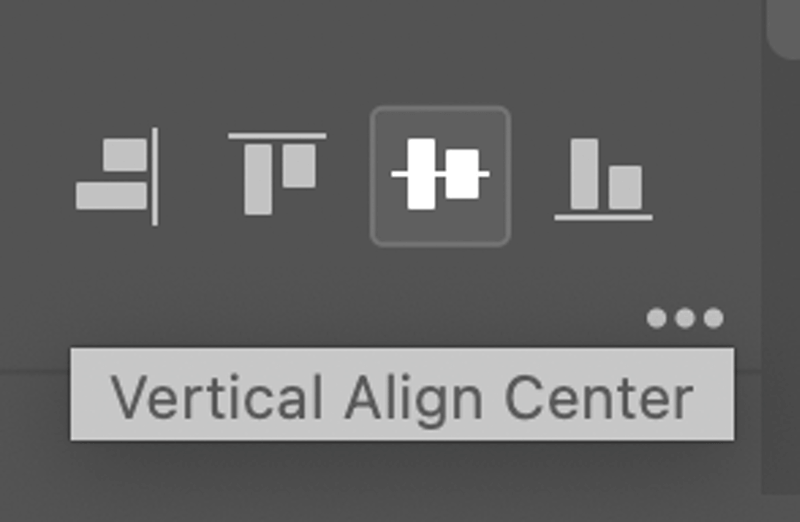

Looks like it’s done but we’re still missing one important step! If you press Command / Ctrl + Y to see the outlines, you’ll see that these two are separate shapes, so we’ll need to make them into one.
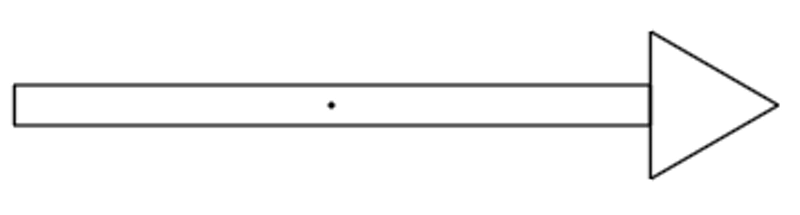
Step 4 (Important): Select both shapes, go to the Pathfinder panel and click Unite.
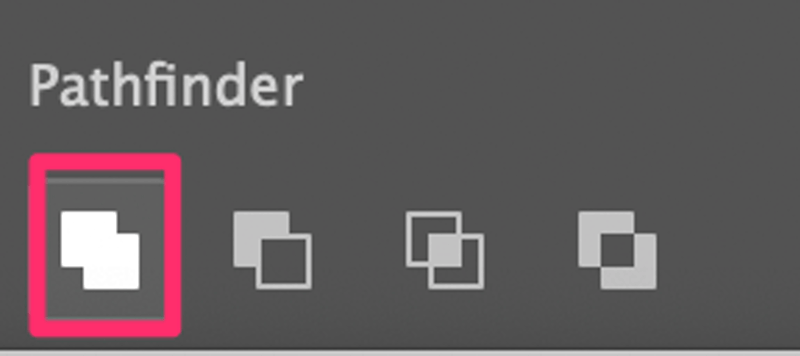
Now if you go to the Outline view again, you’ll see that the combined shape.
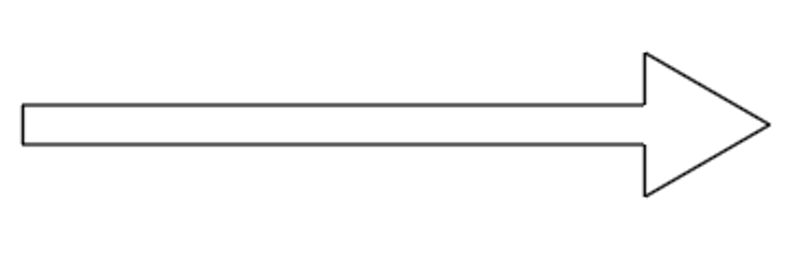
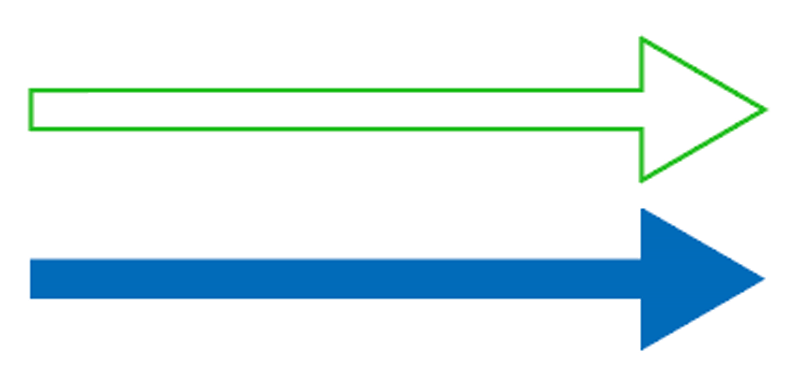
Exit the Outline view by clicking Command / Ctrl + Y again and you can add color to match your design.
Method 3: Pen Tool
You can use the pen tool to make a curvy arrow. The idea is to draw a curve line, and then you can either add arrowheads from the Stroke panel or draw your own with the pen tool.
Step 1: Select the pen tool, click on the artboard to create the first anchor point, click again, hold the mouse and drag to create the second anchor point, and you’ll see a curve.
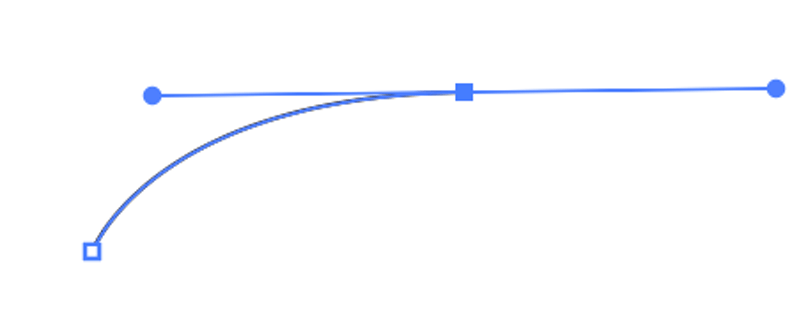
Step 2: Draw a triangle or an arrowhead shape using any method/style you like. I’ll keep using the pen tool.
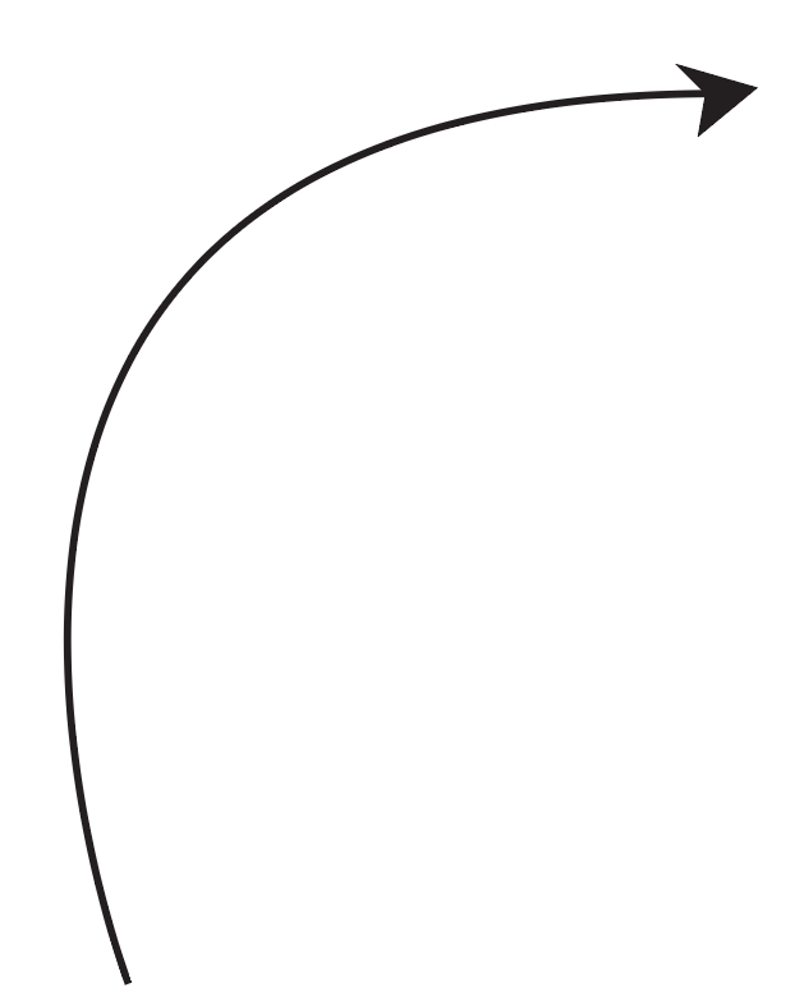
Tip: You can also add an arrowhead from the Stroke panel. If you do that, you can skip step 3.
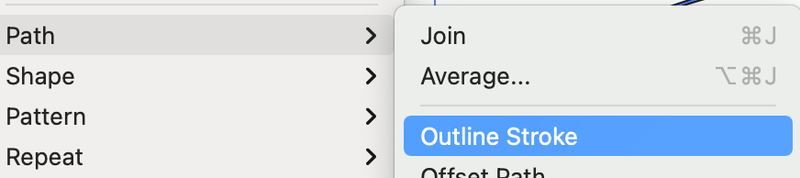
Step 3: Select both the curve line and the arrowhead, go to the overhead menu, and select Object > Path > Outline Stroke. This step turns the curve line (stroke) into a path (shape).
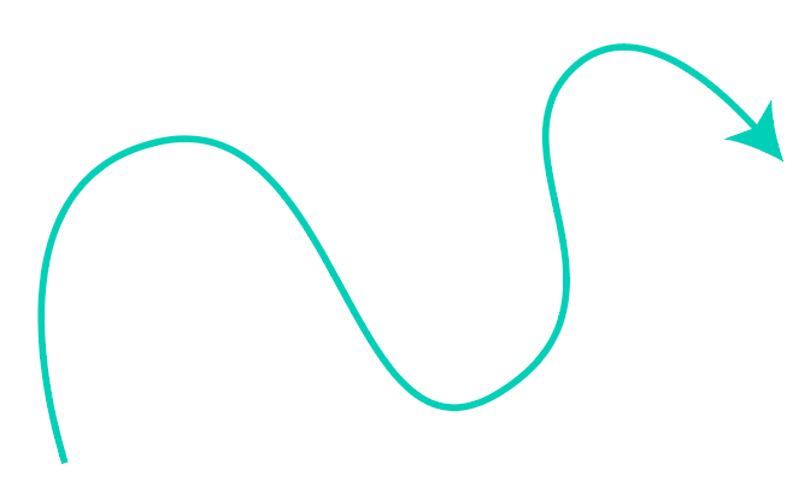
Step 4: Select both again, go to the Pathfinder panel and click Unify.
Tip: If you want to make a crazy wavy arrow, you can keep adding anchor points at Step 1.
Method 4: Paintbrush/Pencil
You can use either the Paintbrush Tool or Pencil Tool to draw freehand a freehand arrow.
Step 1: Select a drawing tool (Paintbrush or Pencil) and start drawing. For example, I used the Paintbrush Tool to draw this arrow.
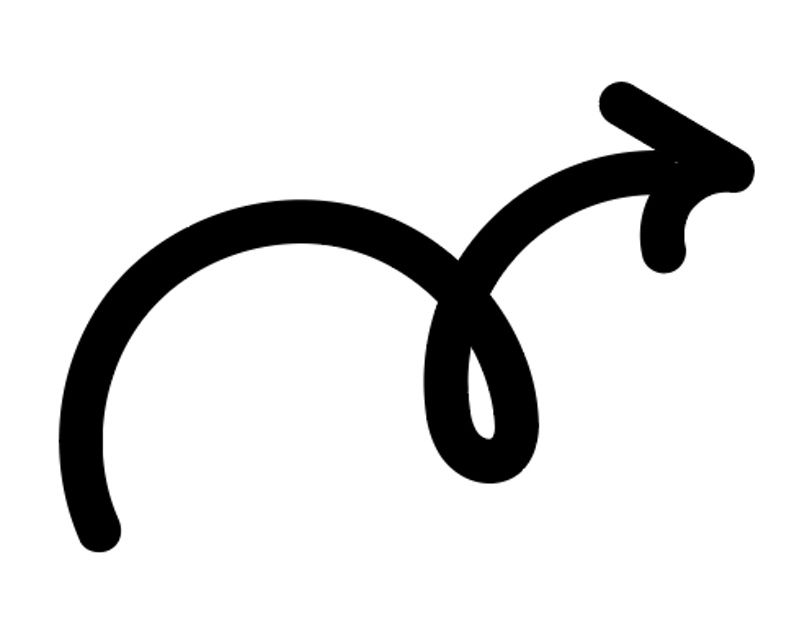
If you go to the outline view, you’ll see that the arrowhead is not connected to the line and they are both strokes instead of shapes.
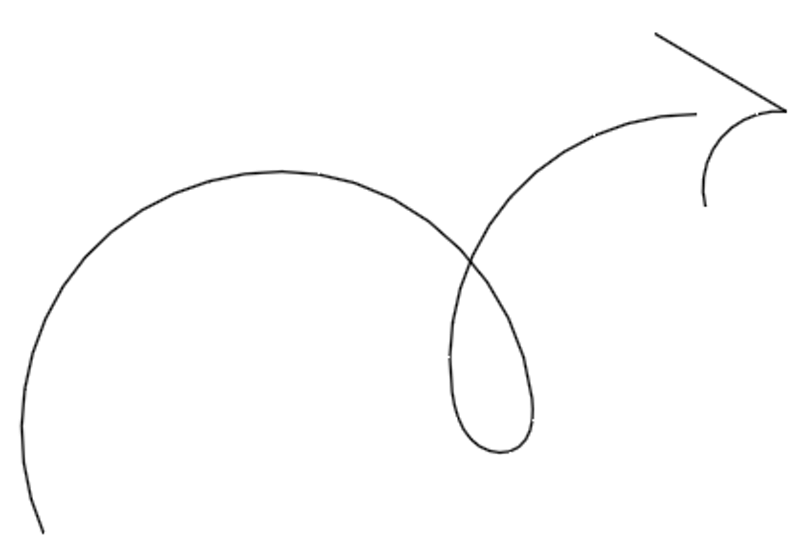
Step 2: Select both the curve line and the arrowhead, go to the overhead menu, and select Object > Path > Outline Stroke. Now the actual shape of the arrow shows.
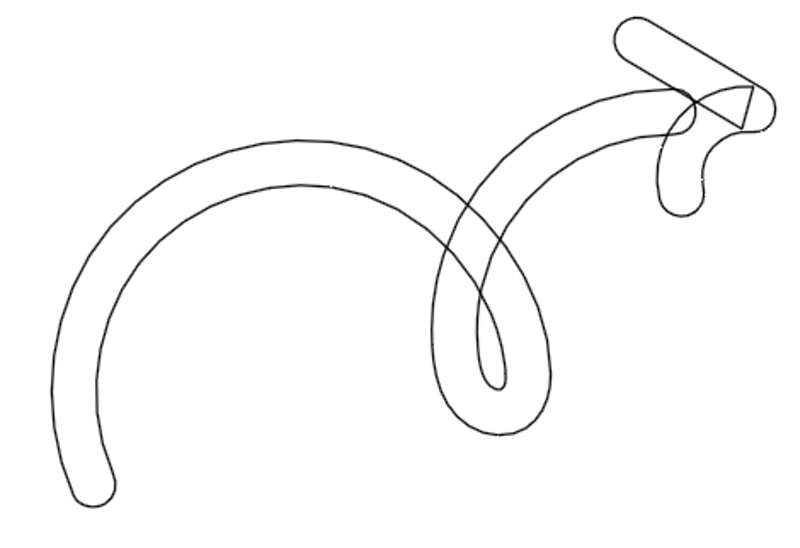
Quite a mess here, but don’t worry, we’ll combine the shapes and the outline will look like this.
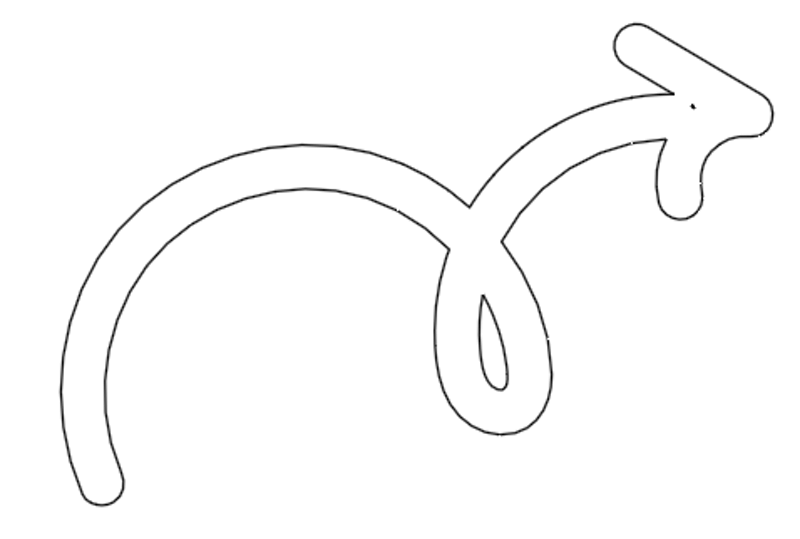
Step 3: Select both again, go to the Pathfinder panel and click Unify, same as step 4 from Method 2.
That’s It!
It’s super easy to draw an arrow in Adobe Illustrator. If you choose method 1, basically you only need to draw a line and change the stroke options.
For other methods, remember to convert to a stroke outline because it’ll be easier for you to edit it later. Also, don’t forget to combine the shapes so that you move, and scale the arrow proportionally. If you want, you can also combine the tools to make your favorite arrows.
How to Make an Arrow in Illustrator


 What You’ll Be Creating
In the following tutorial, you will learn how to make an arrow in Illustrator. We’ll explore three simple methods that you can use to create arrows in Illustrator.
As well as learning how to draw an arrow in Illustrator, you can try this set of vector arrows from Envato Elements. All the arrows are fully scalable and editable. Feel free to change the size and color with just a few clicks.


What You’ll Learn in This Tutorial
- How to make an arrow in Illustrator using the Stroke panel
- How to draw an arrow in Illustrator using brushes
- How to add an arrow in Illustrator using symbols
- How to create a double-ended arrow in Illustrator
- How to use Illustrator arrow brushes
Follow along with us over on our Envato Tuts+ YouTube channel:
1. How to Add Arrows in Illustrator
Step 1
The most common technique that you can use to create an arrow in Illustrator is via the Stroke panel (Window > Stroke).
Any opened path can be easily turned into an arrow. Just select it, make sure that there’s a stroke applied, go to the Stroke panel, and focus on the Arrowheads options.
Choose from the 39 alternatives to easily stylize the start and end points of your path and add an arrow to a line in Illustrator.


Step 2
Click the Swap button from the Stroke panel to quickly swap the start and end arrowhead in Illustrator.


Step 3
Use the Scale values from the Stroke panel to adjust the size of your start and end arrowhead in Illustrator.


Step 4
Use the Align buttons from the Stroke panel to place the arrow tip at the end of the path or to extend the arrow tip beyond the end of the path.


Step 5
Keep in mind that you can select arrow designs for both ends of a path to create a double-ended arrow in Illustrator.


Step 6
To recolor an arrow in Illustrator, all you have to do is change the stroke color.


Step 7
Besides flat colors, you can also use gradients or patterns to color an arrow in Illustrator.


2. How to Draw an Arrow in Illustrator
Step 1
The second method that you can use to add an arrow to a line in Illustrator is by using brushes. For this example, we’ll use some built-in Illustrator arrow brushes.
Go to the Brushes panel (Window > Brushes), open the fly-out menu, and go to Open Brush Library > Arrows > Arrows_Special. This will open a collection with some arrow brushes.
Make sure that your path is selected, and simply click the desired brush from the newly opened list. Alternatively, you can select the desired brush, grab the Brush tool (B) from your toolbar, and use it to create a curved arrow in Illustrator.


Step 2
To create a double-ended arrow in Illustrator using a brush, you can use Arrow 2.21 2 from the same collection of Illustrator arrow brushes.


Step 3
Keep focusing on your Arrows_Special collection of brushes and click the tiny arrow buttons from the bottom of the panel to move to the next collection of arrow brushes: Arrows_Standard.


Step 4
To change the color of an arrow brush, simply change the stroke color.
If you’re using a scatter brush, an art brush, or a pattern brush, make sure that Colorization Method is set to Tints.


Step 5
Move to the next collection of brushes and use one of the available pattern brushes whenever you wish to create a multi-colored arrow in Illustrator.
Obviously, you can create your own collection of arrow brushes or you could upload a set from Envato Elements. To upload a set, all you have to do is open the fly-out menu from the Brushes panel and go to Open Brush Library > Other Library and double-click your pack of brushes.


3. How to Add Arrows in Illustrator
The third method that you can use to create an arrow in Illustrator is via the Symbols panel (Window > Symbols).
Open the fly-out menu from the Symbols panel and go to Open Symbol Library > Arrows, which will open a collection with some arrow symbols.
Simply click and drag the desired symbol to add to your design. Scale it as you wish and double-click it whenever you need to edit it.


Congratulations!
Now you know how to draw an arrow in Illustrator. I hope you’ve enjoyed this tutorial and can apply these techniques in your future projects.
Check out Envato Elements, where you can find some great sources of inspiration to create your own set of Illustrator arrow brushes.


Popular Vector Arrows From Envato Elements
Envato Elements is an excellent resource for arrow designs. Here’s a short list of some of the most popular collections that you can find.
Arrow Head: Pattern Brushes & Vector Arrows (AI, EPS, PNG)
Don’t have the time to create your own set of arrow brushes in Illustrator? Try this impressive collection of brushes, which includes 20 pattern brushes and over 160 hand-drawn vector arrows.


30 Arrow Icons (AI, EPS, PNG, SVG)
This pack of slim and colorful arrow icons will make your design catchy and elegant. The icons come in two different styles: colored and outline.


3D Arrows Pack (EPS, PDF, PNG, SVG)
Make your design stand out with this collection of 3D arrows. These highly customizable designs can be easily adjusted to fit your needs.


Illustrator Curved Arrows (AI, EPS)
If you’re in a hurry or you simply can’t be bothered to learn how to make an arrow in illustrator, this small pack of Illustrator curved arrows might be the perfect solution.


100 Vector Arrows (AI, EPS)
Looking for playful and cartoonish arrow designs? Well, look no further, because this collection gives you 100 designs to choose from.


Want to Learn More?
We have loads of tutorials on Envato Tuts+, from beginner to intermediate level. Take a look!
Как нарисовать стрелку в AI?
Чтобы ими воспользоваться, необходимо обратиться к команде Open Brush Library и в списке выбрать Arrows> Arrows Standart. Создать при помощи кисти стрелку можно двумя способами: выделить линию и применить к ней выбранную кисть или нарисовать стрелку прямо инструментом Brush.
Как в фотошопе рисовать стрелки?
0:165:49Suggested clip 47 secondsКак нарисовать стрелку в Photoshop — YouTubeYouTubeStart of suggested clipEnd of suggested clip
Как пошагово нарисовать стрелки на глазах?
Стрелки на глазах тенямисначала подберите скошенную кисть из плотного натурального ворса;немного смочите ее фиксатором макияжа;наберите немного темных теней и начните рисование стрелки;выполняйте линию легкими штрихами от центра века к внутреннему глазному углу;аналогично проведите линию к внешнему уголку;
Как увеличить обводку в Иллюстраторе?
�� Инструмент толщины линий Width (⇧W) При наведении инструмента Width на обводку, на контуре появляется точка толщины и маркеры изменения толщины. С их помощью можно изменить толщину обводки, а также добавлять, дублировать, перемещать и удалять точки ширины.
Как в фотошопе нарисовать линию?
На панели инструментов щелкните и удерживайте значок группы инструментов Фигура ( ), чтобы вызвать различные варианты инструмента «Фигура». Выберите инструмент Линия. Вес линии фигуры можно регулировать с помощью настроек «Обводка» и «Толщина» на панели «Параметры».
Как поставить символ Стрелка вправо?
Стрелки сочетанием клавиш Alt и Num Сочетания цифровой клавиатуры и клавиши Alt работают в Ворде и любом текстовом редакторе. Для написания стрелки вправо (→) следует одной рукой нажать клавишу Alt и, удерживая её, другой рукой ввести на Num-клавиатуре цифры 2 6. Отпустите Alt — получится стрелка вправо.
Как рисовать стрелки 2022?
С помощью карандаша нужно прокрасить слизистую нижнего века, затем выйти на ресничный контур и растушевать легкой дымкой, вытягивая хвостик. Стрелку можно сделать абсолютно любой длины, главное, чтобы вам было комфортно. Завершите макияж, густо прокрасив ресницы.
Как нарисовать стрелку в AI? Ответы пользователей
Для этого выберите инструмент Произвольная фигура и в окне Параметры найдите выпадающий список со списком фигур, нажмите на кнопку Настройки и .
Зажмите левую кнопку мыши и тяните стрелку по направлению к конечной ее точке. Когда стрелка достигнет требуемой длины, отпустите кнопку мыши. При этом .
Например с помощью этого плагина Hotdoor CADtools 8.1.0 for Adobe Illustrator [ссылка заблокирована по решению администрации проекта] .
Как в иллюстраторе нарисовать стрелку, типа такого, чтобы одна сторона линии была стилизована под «указатель». В кореле есть стиль указателя .
Как нарисовать 3D-иконку в Иллюстраторе
Для создания стрелки следует использовать фильтр Add Arrowheads (Добавить стрелки) меню Filter | Stylize (Фильтр | Стилизация). Выбор формы и параметров стрелки .
Берем инструмент. strelka-v-fotoshope · В верхней части программы есть опции инструмента, где нам нужно указать расположение стрелки на самой .
Как нарисовать 3D-иконку в Иллюстраторе
Как нарисовать стрелку в Фотошопе · 1. Активируйте данный инструмент, находится в том же месте, что и «Линия». · 2. Найдите раздел с готовыми .